Have you ever discovered an Ableton shortcut and thought: “man, if only I knew this one earlier…”
I know I have. Multiple times 😅
I once followed a Microsoft Excel training program. We could only use keyboard shortcuts (no mouse allowed) to complete a task. It completely transformed my way of working.
Why? Using your mouse is a huge time-waster. A study even estimated 64 hours/year the time you waste not using keyboard shortcuts.
The more you know about shortcuts, the faster your workflow. And the faster your workflow, the more tracks you’ll finish (at EDMProd, we’re all about helping you finish tracks faster!) 🔥
So let’s dive into all the Ableton Live shortcuts you need 👇
Note: if you are using a Mac, substitute any mention of CTRL for CMD and ALT for OPT.
Browsing Ableton Live Shortcuts 👀
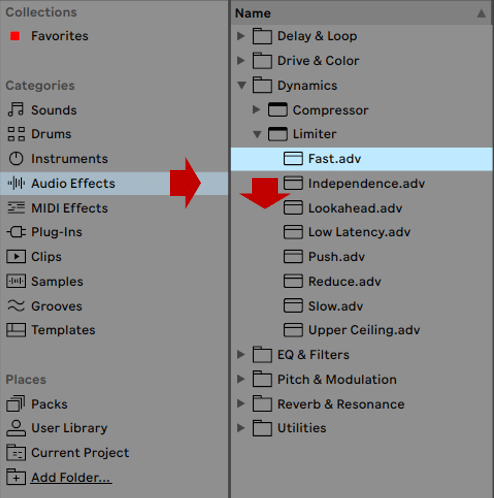
When browsing your plugins or samples, get in the habit of just using your arrows. That’s all you need!
Use UP and DOWN to navigate folders, and LEFT and RIGHT to open or close a folder.
If you are demoing samples, press RIGHT to hear it, and ENTER to load it in the Sampler. To load a plugin, simply press ENTER.
Looking for some free stuff? Check out our list of the 30 best free sample packs!
Looking for a specific sound? Use this Ableton shortcut: CTRL + F.
This will open up a search window. Type in the keyword you are searching, then navigate the results with the UP/DOWN arrows:
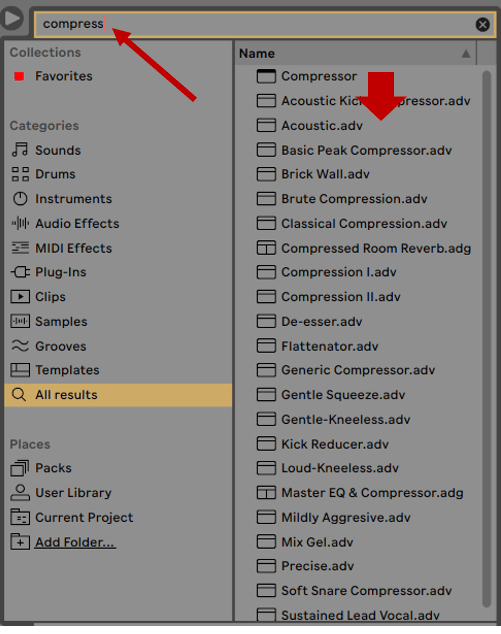
You can search specific folders with this Ableton Live shortcut by selecting the folder and then pressing the Ableton shortcut CTRL + F.
Just stumbled on a snare that you love? Save time by giving it its own color code!
Use the numbers 1 to 7 to assign a sample to a category:
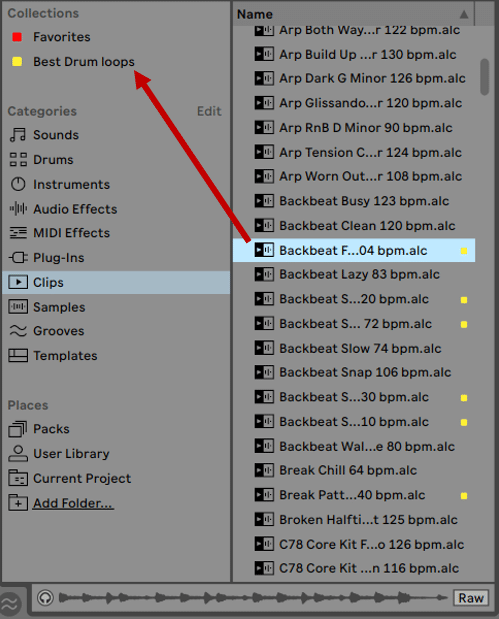
In this example I am pressing “3” to give samples the color yellow. These are then grouped in a folder I’ve named “Best Drum loops”. This a quick way to never forget where a sample is.
Talking about drum loops, check out our guide on the best drum breaks for EDM!
What I also like to do is have a folder named “Future Use”. This is for samples I like but that don’t fit the current project. I know I can just press “7” and save it for later:
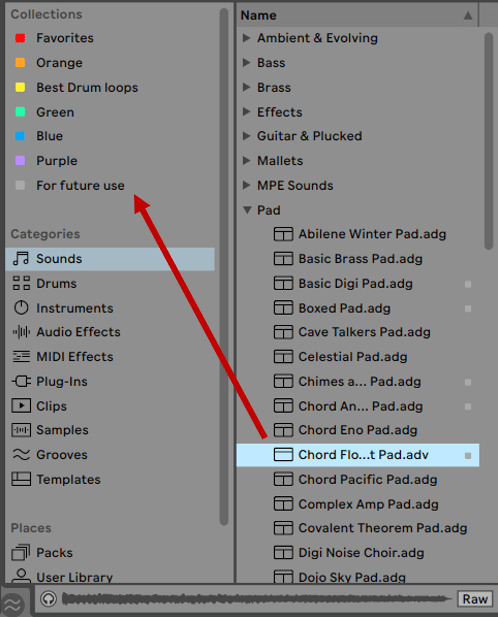
This Ableton shortcut also works great to categorize plugins (Mixing vs. Mastering vs. Vocal plugins for example).
By the way, to rename a folder, just press CTRL + R 😉
Navigating Ableton’s Views Shortcuts 💻
Opening and closing windows, navigating between the Session or Arrangement view… Doing this with your mouse can be the biggest time-waster. Luckily, there are Ableton shortcuts for that!
If you want to get immersed in your session, press the Ableton shortcut F11 to enable Full-Screen mode.
To easily switch between Session and Arrangement view, just press TAB:
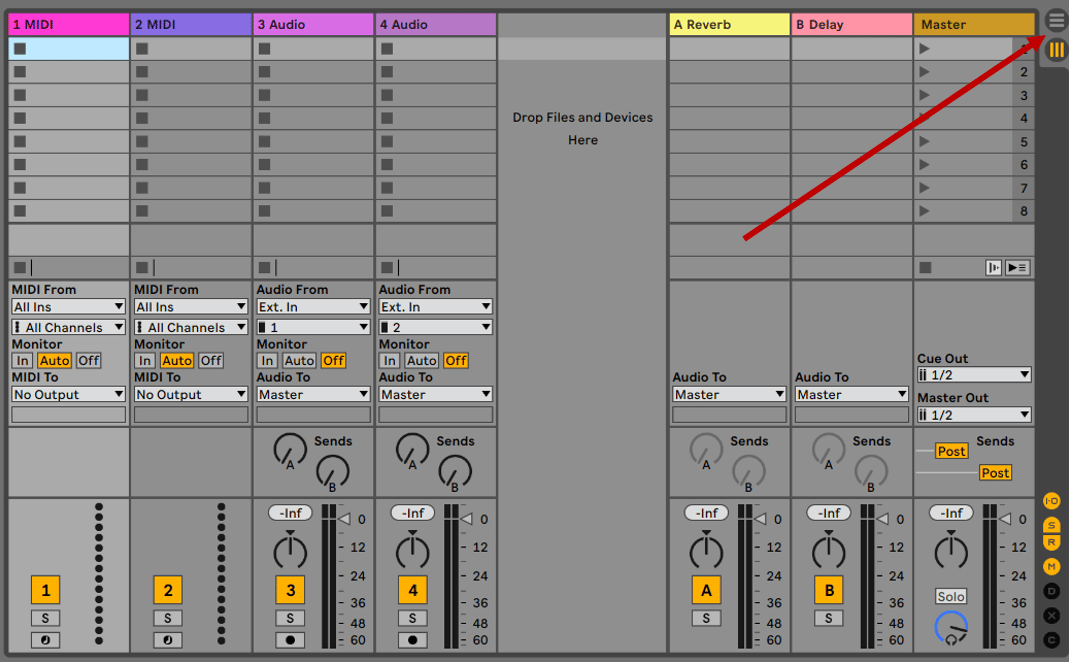
To easily switch between Device and Clip view, just use the Ableton shortcut F12. Or you can press SHIFT + TAB.
If you want to quickly swap out a synth or sample, you can enable Hot Swap by pressing Q. This lets you easily swap out any instrument with another.
Need some more space to arrange your song? Press the Ableton shortcut CTRL + ALT + B to hide the browser:
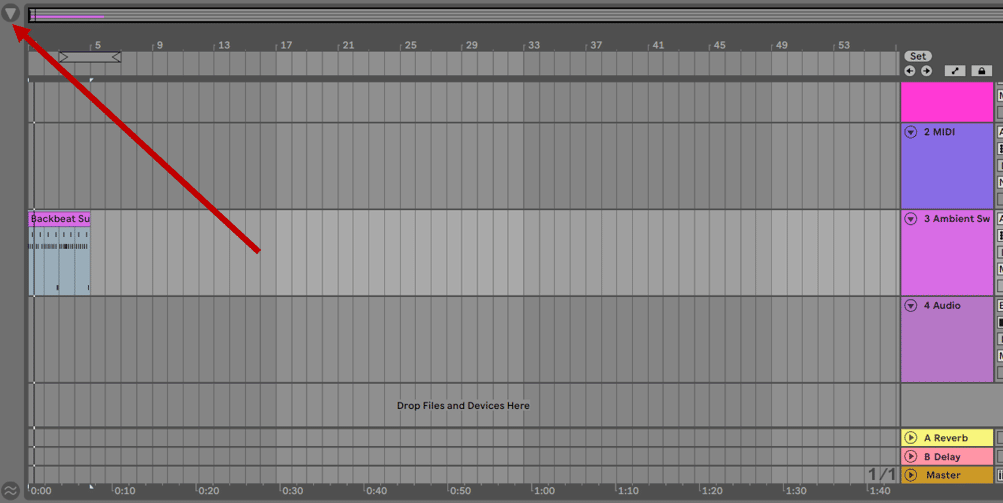
Here are a few more Ableton Live shortcuts to show or hide sections:
- CTRL + ALT + M: show or hide the Mixer
- CTRL + ALT + O: show or hide the Overview
- CTRL + ALT + S: show or hide the Sends
- CTRL + ALT + I: show or hide the In / Outs
If you have trouble remembering them, use the first letter to memorize (B for browser, M for mixing etc.)
Adjusting Values on Knobs & Faders 🎛️
Let’s face it. We spend most of our time as producers tweaking knobs or sliding faders. So it only makes sense to speed up that process!
To adjust a parameter, you can use the UP and DOWN arrows. Although I’ll admit this is one where just using your mouse is probably faster 😅
If you want to quickly set a parameter to its default setting, press DELETE. And if you want, you can directly type a value with your NUMBERS pad.
Finally, press the Ableton shortcut SHIFT while adjusting a parameter for more precision. It’s not technically a shortcut, but it’s still pretty useful!
Arrangement View Ableton Shortcuts 🎼
When you’re not tweaking knobs, the arrangement view is where you’ll spend the most time. Should I insert these shakers after 16 or 32 bars? What if I tease this pad in the intro and then remove it? We’ve all been there.
Luckily we have a ton of Ableton shortcuts to simplify our lives!
- CTRL + C: copy a clip or sample
- CTRL + V: paste it
- CTRL + D: duplicate your selection across the track
- Use SHIFT + LEFT or RIGHT to select any number of bars
- To zoom in on a particular selection, select a region and press Z. Press X to zoom out.
- Then, move that selection with the LEFT and RIGHT arrows
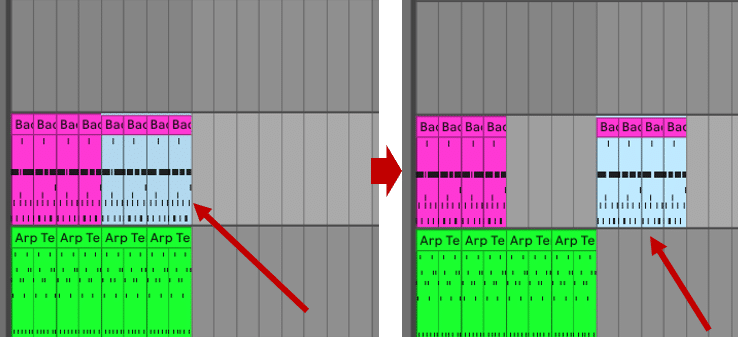
If you want to optimize your arrangement view, press the Ableton shortcut H so it fills the full height. And press W for it to fill the full width.
One Step Further
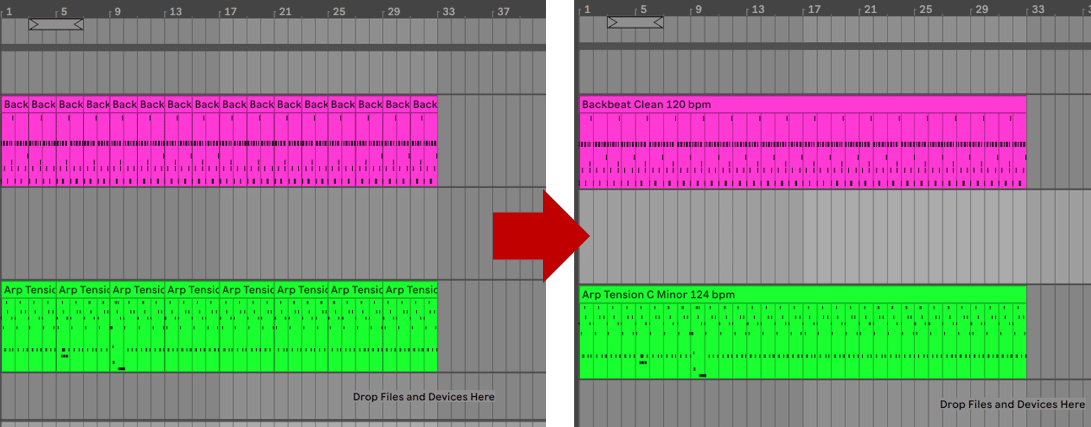
Got a bunch of clips duplicated across your track? Use CTRL + J (“join” I guess?) to consolidate them into one:
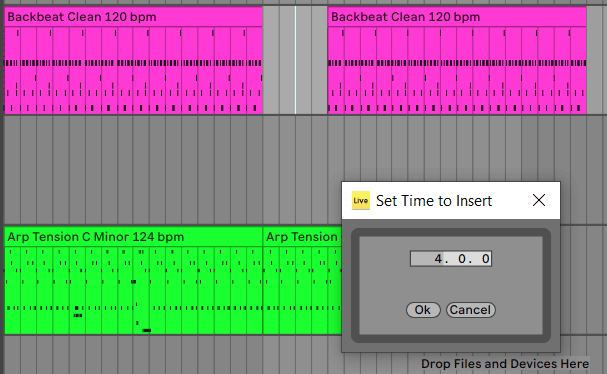
However, if you want to split a clip, press the Ableton shortcut CTRL + E. You can also insert a silence by pressing CTRL + I. A window then appears asking you how many bars of silence you want:
One of the fastest ways to make a sample cooler is to reverse it. In Ableton Live, you can do this in less than a second by pressing R. This also works if you select a small portion of a clip.
We already mentioned that you can duplicate a clip or sample by using the Ableton shortcut CTRL + D.
However, you can also duplicate entire sections of your track with CTRL + SHIFT + D . This is useful when you want to extend a section by another 16 bars for example.
Talking about bars, you might want to tighten or spread out the grid length. To do this, use the Ableton shortcut CTRL + 1 to tighten, and CTRL + 2 to spread out:

Finally, it’s essential to be able to quickly loop a section of your track. This could be because you are tweaking your synth or adjusting the FX chain.
To toggle the Loop selection, press the Ableton shortcut CTRL + L. You can then select what you want to loop using LEFT and RIGHT. Use SHIFT + LEFT or RIGHT to extend the section you want to loop.
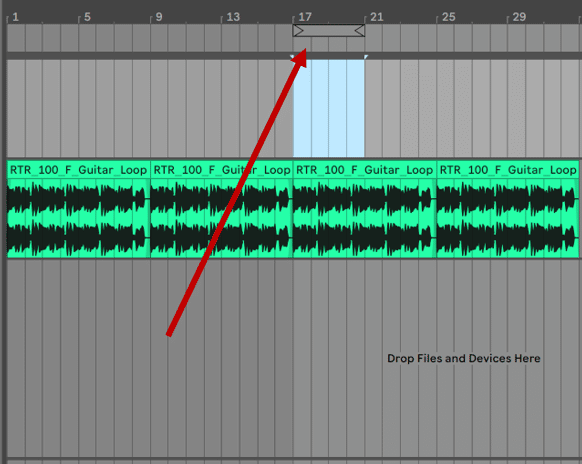
You can also use CTRL + UP or DOWN to double or halve the loop length.
MIDI Clips Editor Shortcuts 🎹
Editing MIDI notes after recording a performance can be a chore. I usually try to edit recorded MIDI as little as possible. But sometimes, it just doesn’t cut it.
To create a new MIDI clip, select a region and press the Ableton shortcut CTRL + SHIFT + M.
If you were way off beat (blame it on latency…), use the Ableton shortcut CTRL + U:

If you need more granular quantization settings, press CTRL + SHIFT + U:
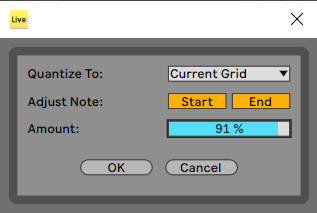
Here you can decide if both the start and end of notes should be quantized. You can also reduce the amount of quantization so that notes don’t snap perfectly to the grid. A neat little trick to maintain a human feel!
If you want to further adjust the position of a note, press the Ableton shortcut ALT + LEFT or RIGHT. This will bypass the grid.
When selecting one or several notes, press:
- LEFT or RIGHT to move them to the next grid line
- SHIFT + LEFT or RIGHT to lengthen/shorten the note(s)
- UP or DOWN to change notes on the piano roll
- SHIFT + UP or DOWN to move notes up or down an octave
- CTRL + DRAGGING UP or DOWN to change the velocity
And if you want to select all the notes of a MIDI clip, press the Ableton shortcut CTRL + A.
As you can see, Ableton Live’s piano roll is powerful. You can check out our video from Aden if you want to dive more into it:
Looking for the best MIDI packs out there? We have you covered!
Tracks Shortcuts 🔊
Inserting new tracks is one of the most frequent things you do in Ableton Live. So knowing a few shortcuts will make your life so much easier.
To insert a new MIDI track, press CTRL + SHIFT + T.
To insert a new Audio track, press the Ableton shortcut CTRL + T.
And for a new Return track, press CTRL + ALT + T.
Often you will want to group tracks together. For example, if you’re done with the drums, it’s handy to be able to “fold” all the drum tracks. To do this, press CTRL + G:
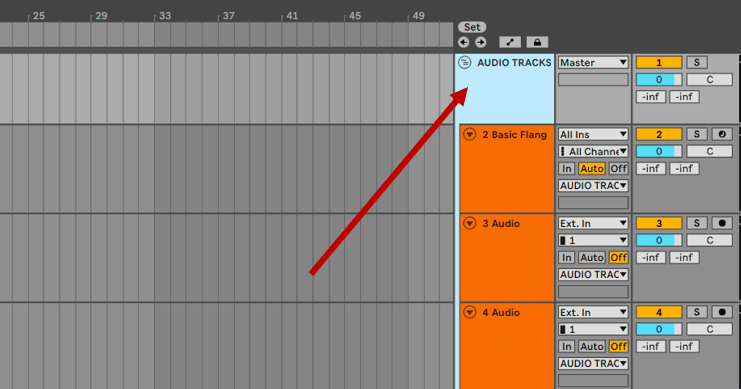
Note: this also works if you want to group effects together!
To rename any selected track, use the Ableton shortcut CTRL + R.
If you need to rename a bunch of tracks all at once, use the TAB key to switch between tracks (while renaming).
To move any track up or down, use CTRL + UP or DOWN. And to mute or unmute a track, simply press the number 0.
To collapse a track, use the Ableton shortcut U. And if you want to collapse all tracks, press the Ableton shortcut ALT + U.
If you want to solo a track, simply press S.
Finally, let’s talk about automation.
To enable or disable the automation mode, press the Ableton shortcut A:
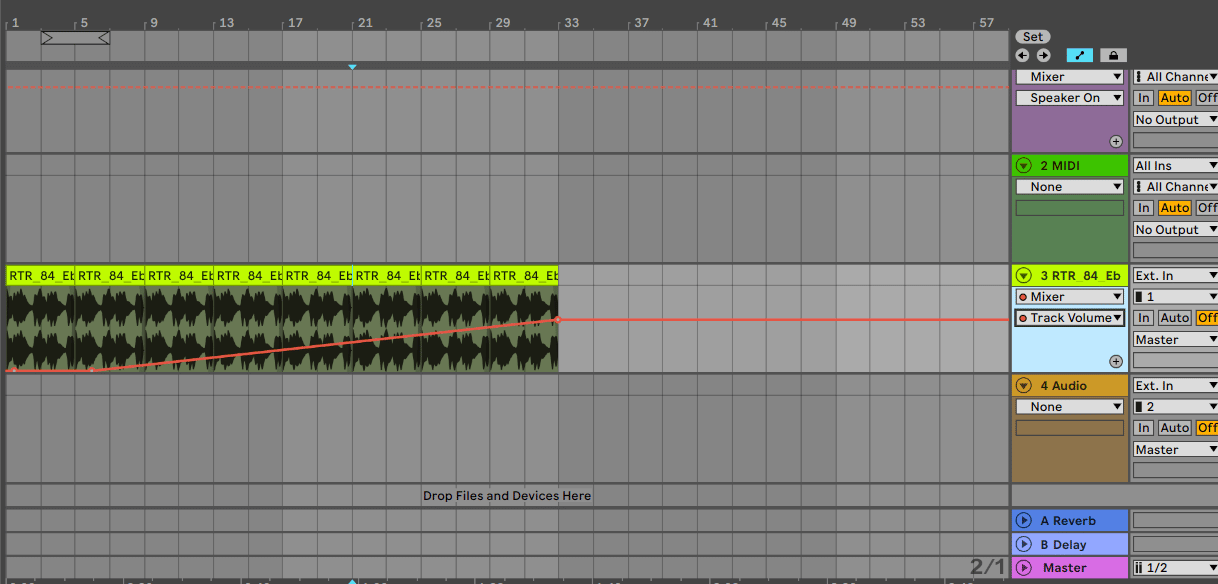
If you want to draw a curve, hold ALT before clicking on the automation. If you want to freely draw in an automation, use the Ableton shortcut B. To delete a portion of automation, select that region and press BACKSPACE. Or press CTRL + BACKSPACE to reset the entire automation.
Need a refresher on all things automation? Check out our comprehensive guide here!
General Ableton Live Shortcuts ✅
Finally, in no particular order, here are a few more Ableton shortcuts for you:
- CTRL + Z: undo your mess. The holy grail of all Ableton shortcuts.
- CTRL + Y: redo your mess. Maybe it wasn’t that bad after all.
- CTRL + S to save your project. Get in the habit of using this one every few minutes. If you’re someone you like me who likes to save a different version each time, use CTRL + SHIFT + S.
- To create your own custom Ableton shortcuts, press the Ableton shortcut CTRL + K. Then, select the parameter you want to create a shortcut for. Finally, press the keyboard shortcut.
- CTRL + ALT + P will open or hide the selected plugin
- Press F9 to start recording
- And if you forgot to press record, type the Ableton shortcut CTRL + SHIFT + C to recall what you just played
- To map a parameter to a MIDI controller, press CTRL + M. Select the parameter you want, then move the controller knob.
- Press M to enable or disable the MIDI computer keyboard. This lets you use your keyboard as a MIDI controller.
Last Words
That’s it for this guide! Hopefully, you learned a new Ableton shortcut that you didn’t know about!
When you start using a new shortcut, it might seem a bit forced. But once you get into the habit, your workflow will improve tremendously!
Did I miss out on any important shortcuts? Let me know by email at [email protected]!
Oh, and if you want more Ableton tips, here are 100 more!


