The Arturia Pigments synth is a monster in the world of sound design.
To be frank, it has features that I have never seen in any other synth.
However, it flies a bit under the radar compared to other options like Serum or Phase Plant. This might be due to the fact that Arturia is mostly known for its hardware synths and MIDI keyboards.
So, what makes Arturia Pigments so special? What can it do that no other synth can? And most importantly, is it worth your money?
We explore all that and much more in this guide 👇
So… What is the Arturia Pigments Synth? 🤔
Arturia is a company most known for its hardware synths and hardware emulations.
However, in 2018, they launched Pigments, their first software synth that was not an emulation of classic hardware:
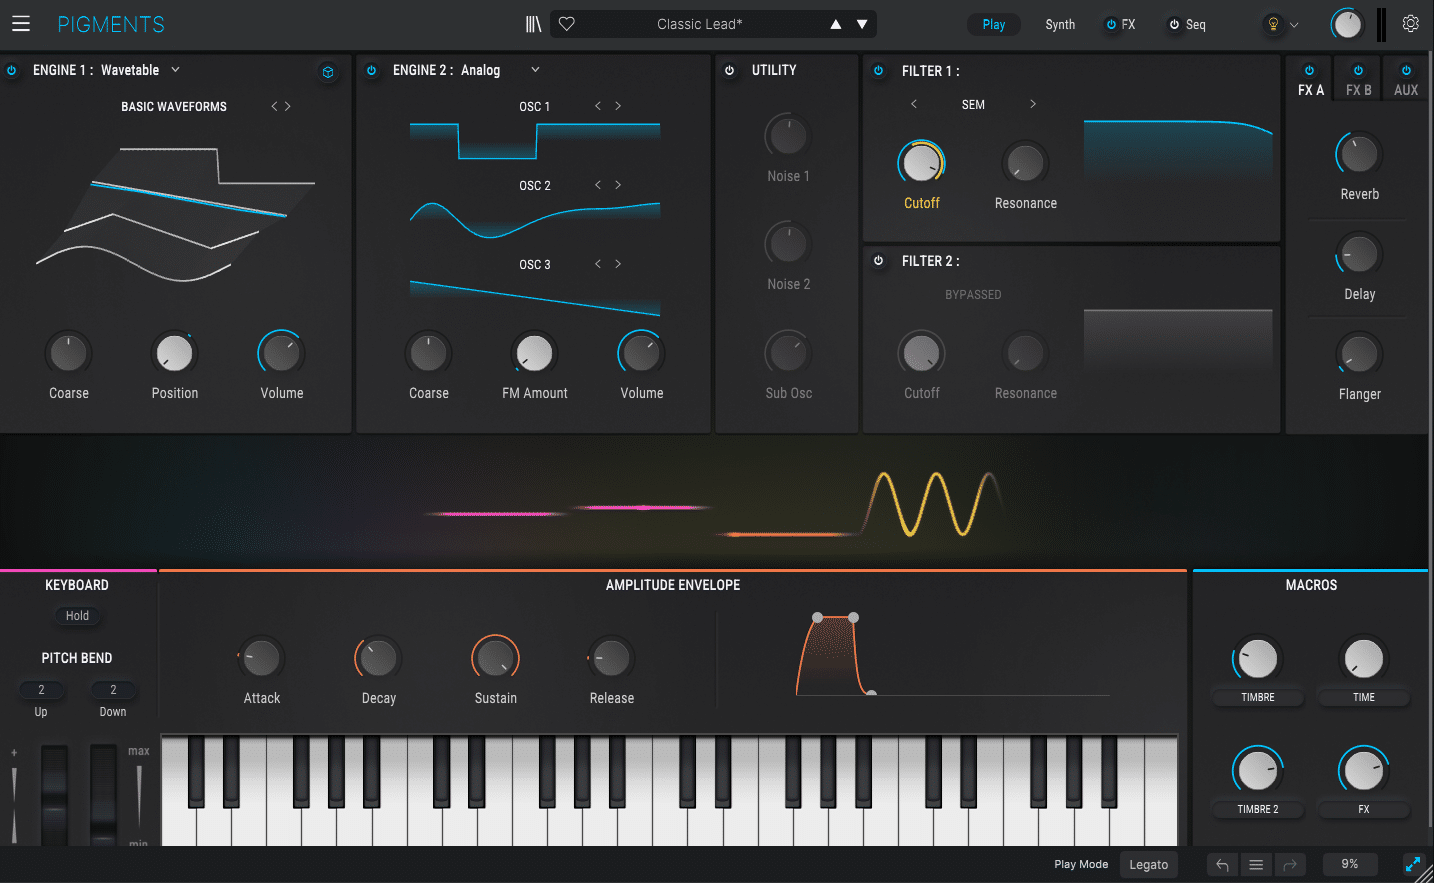
Practically, the Pigments synth combines both analog-inspired and next-generation sound design methods. You’ve got classic analog oscillators but also futuristic wavetables. Effects include both modern multiband compression, but also choruses and delays inspired by timeless gear like the Juno 6.
Pigments describes itself as an intuitive synth that suits both hobbyists and professionals.
So, how does Arturia Pigments hold up against competitors like Serum, Vital, or Massive X? Let’s explore 👇
The Arturia Pigments Synth Layout 🖥️
Before diving into how the Pigments synth works under the hood, let’s cover its interface:
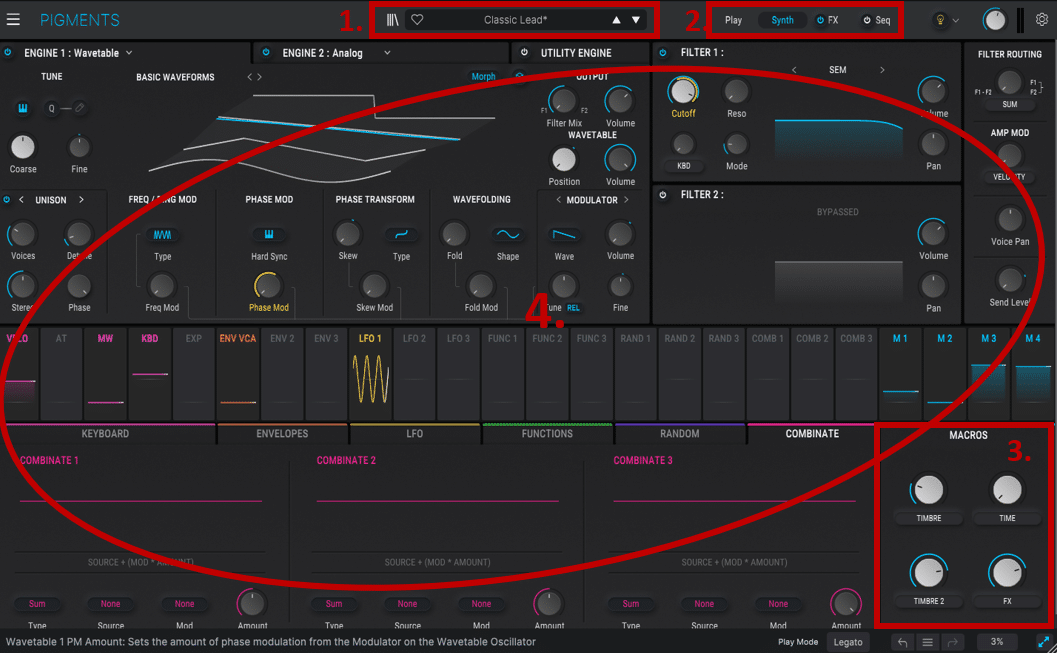
In order, we have:
- Preset Browser. This is where you can load up a preset, save it as a favorite, or quickly browse between different patches.
- The View selector. Here you decide what to display in the main viewing window. Your 4 choices are Play, Synth, FX and Seq (we’ll explore each one in detail very soon 😉).
- Macros. Four assignable knobs let you control multiple parameters at once.
- Main viewing window. This is where all the magic happens. The display changes based on what View you select.
The PLAY View 🎮
Let’s start with one of the most unique features of Arturia Pigments, the Play view:
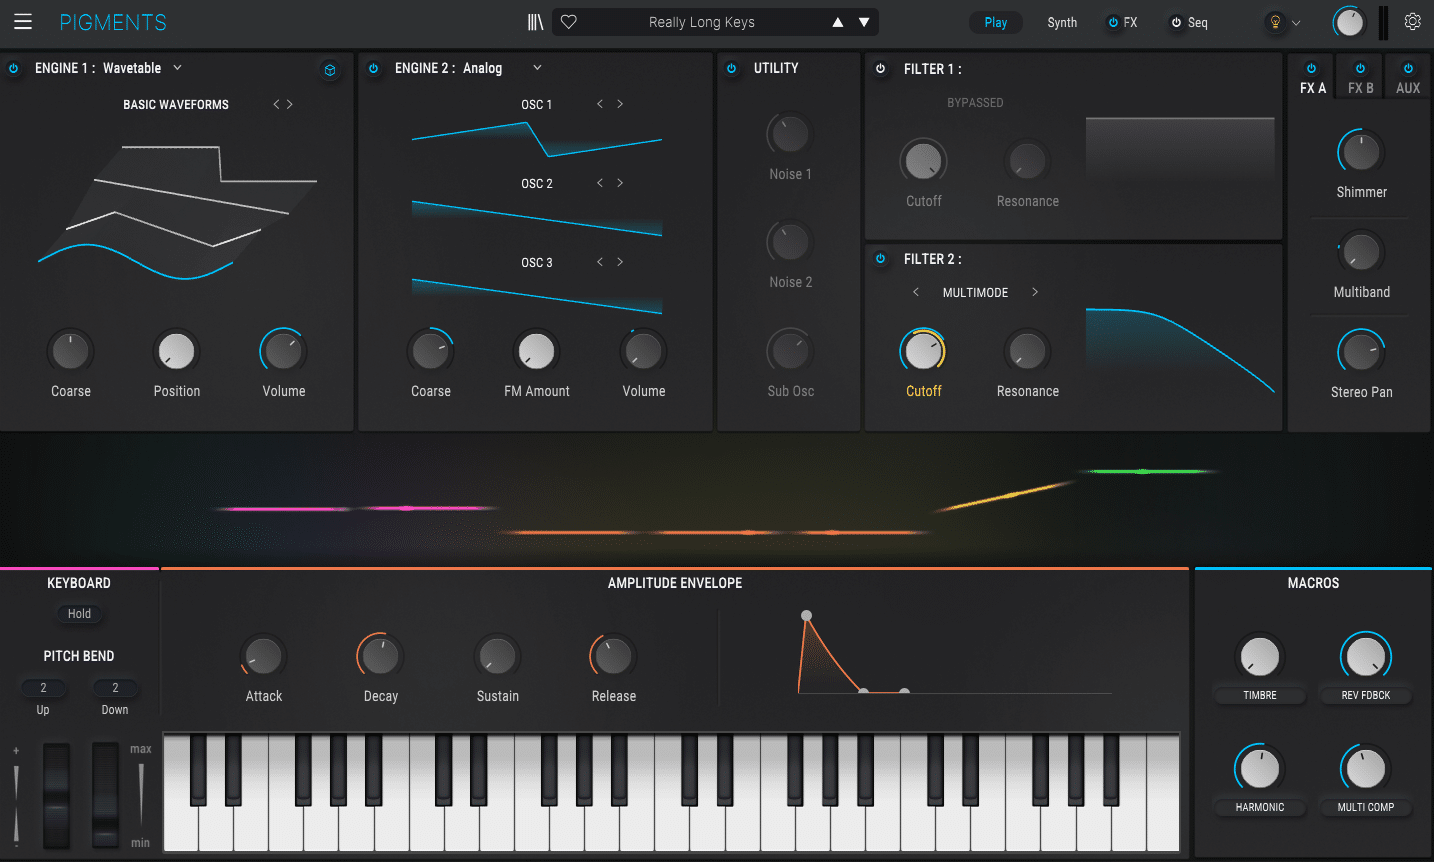
The PLAY view is one of the selling points of this synth for beginners. Most synths like Serum or Vital offer a single (and often complex) window to design your sounds. Pigments changes the game by offering a fully-featured view (the SYNTH view) and a simplified view: the PLAY view.
The PLAY view offers the basics you need to start playing immediately, without getting distracted.
You’ve got 5 main sections which have been simplified:

Simplified Engines
Firstly are the 2 main engines where you generate your sound. You can switch both engines to different synthesis types:
- Wavetable
- Analog
- Sample
- Harmonic
For each synthesis type, you can quickly switch between waveforms by clicking on the name or the arrows:
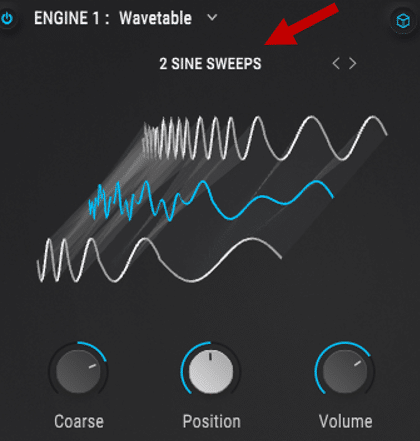
You’ve also got some basic controls at the bottom such as:
- Volume
- Wavetable position
- Fine-tuning
The controls will change depending on the synthesis type you’ve chosen.
Don’t worry, we’ll dig into all the sound design possibilities of these engines soon 😉
Next is the Utility engine, which lets you add different noise and atmosphere layers. You can also add a sub-oscillator. However, in the Play view, the only control you get over these layers is the volume. What’s more, if no noise layers are loaded in the Synth view, you won’t be able to turn this section on.
Simplified Filters and FX Amount
To the right of the Utility engine are the two filters:
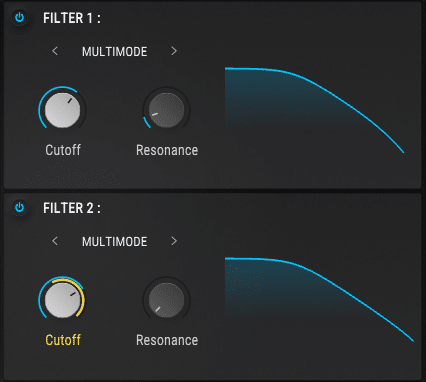
Here, you can easily turn filters on and off, change filter type, and adjust the cutoff frequency and resonance. Cool tip: you can adjust the cutoff and resonance by clicking and dragging directly on the graphic!
Finally, the FX section lets you adjust the Dry/Wet amount of various effects.
You also get basic ADSR envelope controls at the bottom of the view, as well as a virtual keyboard.
The Play view is designed to quickly try out different sounds. It is not meant for intricate sound design and therefore has quite a few limitations. For example, you cannot assign new LFO modulations. You cannot switch between effects and load new ones. You cannot change the filter routing or the FX routing.
If you want to access these controls and more, you’ll have to switch to the Synth view 👇
The SYNTH View 🎹
The Synth view is where all the intricate sound design happens. The general layout is the same as with the Play view, but with a lot more customization options:
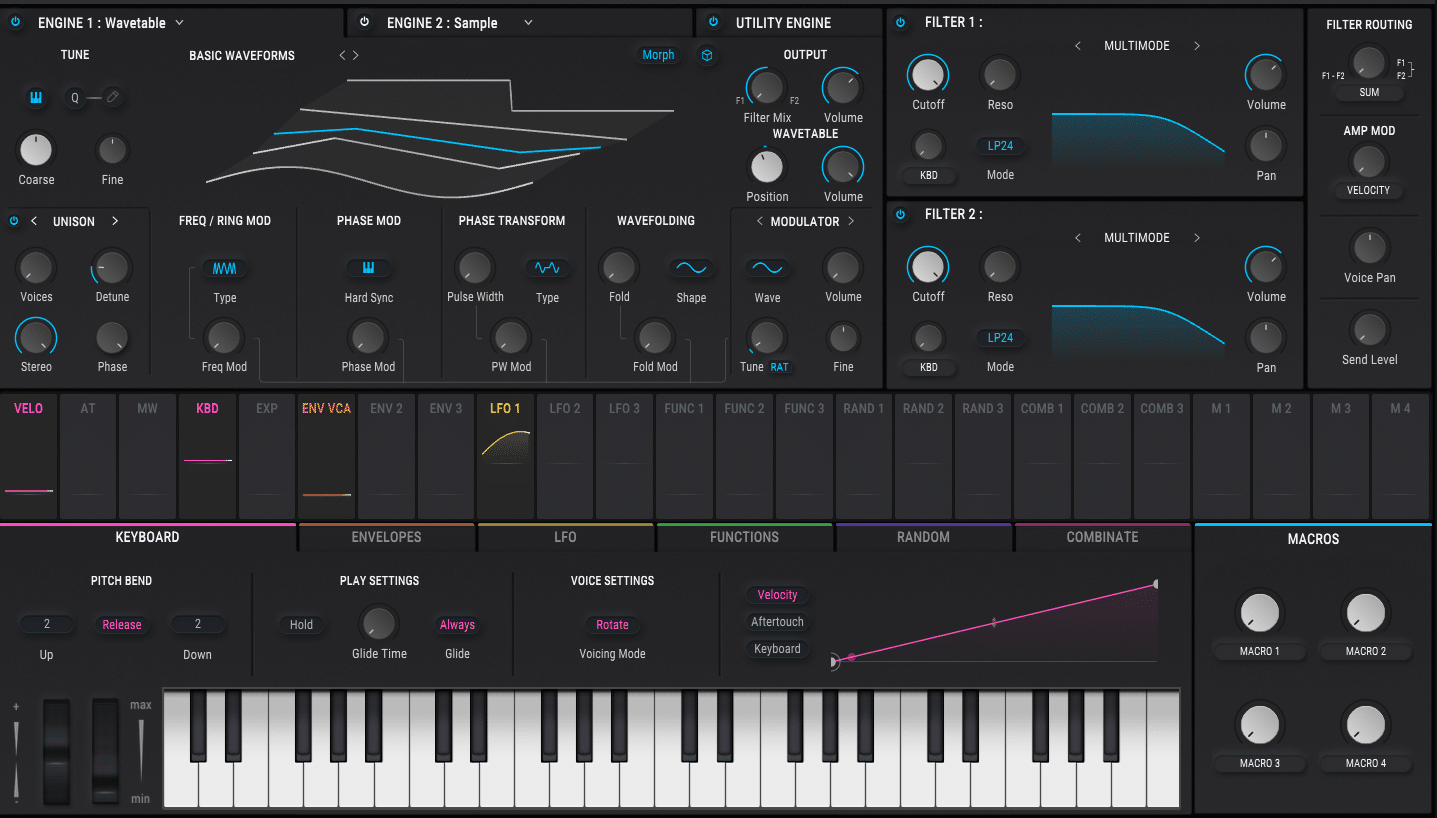
We won’t cover every single knob, or we would still be here tomorrow 😅. But we’ll go over what you need to know to start designing your own sounds.
The Sound Engines
Let’s first cover the sound engines. After all, this is where the basis of your sound is created.
In the Pigments synth, you’ve got 2 main engines + 1 utility engine.
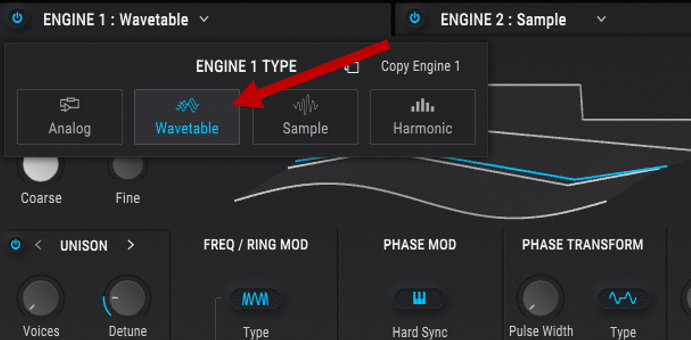
Each main engine can switch between different synthesis “modes”:
- Analog
- Wavetable
- Sample
- Harmonic
The utility engine works as a noise layer, where different types of atmospheres can be added.
Each synthesis method offers completely different parameters you can tweak, and vastly different sounds. So let’s go over them 👇
Analog Synthesis
When you select the analog engine type, you’ll be greeted with 3 oscillators:
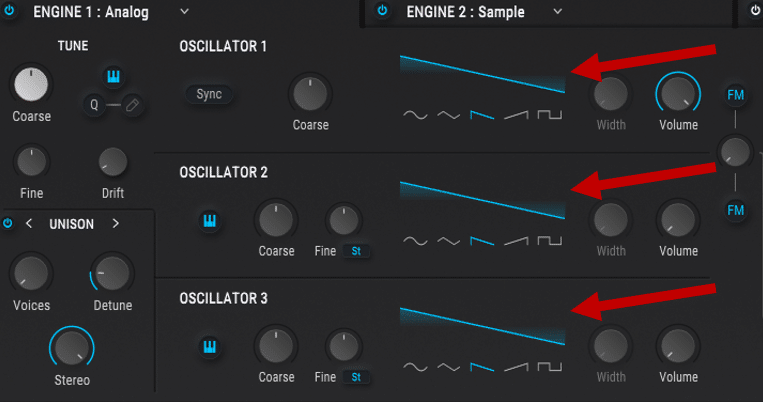
Each oscillator can switch between 5 different waveforms: Sine, Triangle, Saw, Ramp, or Square. You can adjust the volume of each individual oscillator on the right.
The analog engine works great for rich, warm sounds.
If you want to add some extra width, turn on the unison section. In standard unison mode, increase the number of Voices, and de-tune them slightly. You’ve also got 2 FM switches and a dial. These control how much FM modulation OSC 3 will apply to OSC 1 and OSC 2. If you’re new to FM synthesis, make sure to check out our guide over here 😉
Wavetable Synthesis
Wavetable synthesis is a topic we’ve covered in detail in this guide here. So we won’t go over all its intricacies in this guide.
In short, you can imagine a wavetable as a 3-dimensional waveform, where you can morph between different positions.
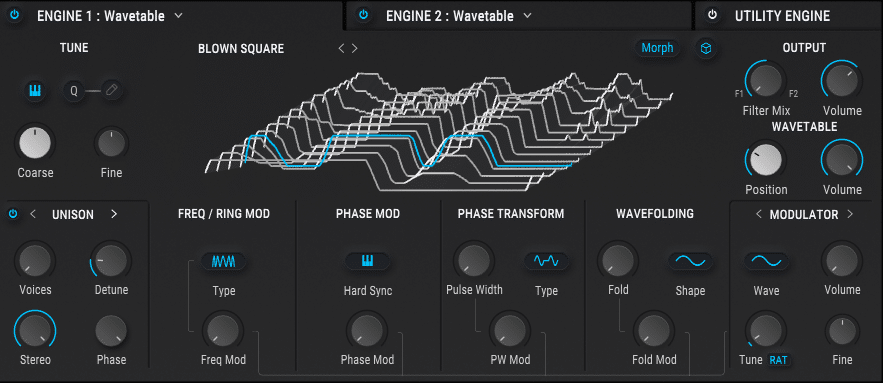
In the Pigments synth, you can choose from hundreds of available wavetables, or import your own. You can then “morph” or slide between frames by using the “Position” knob.
At the bottom of the engine window are a bunch of modulations and transformations you can bring to your sound (FM, Ring Modulation, Wavefolding…). The best here is to experiment with each one to see how they affect your sound 👍
Sample Synthesis
The sampler section of Pigments is another area where this synth really stands out. Whereas in most synths, you get one single sample oscillator, Arturia Pigments offers 6:
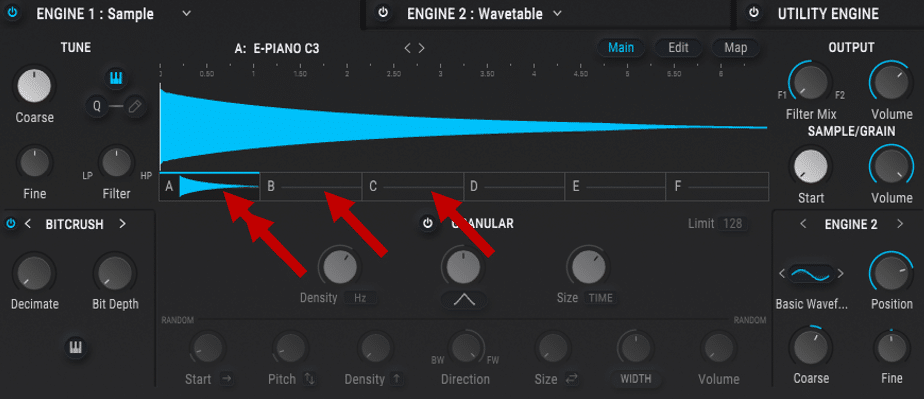
The Pigments synth offers a huge collection of samples, ranging from Piano, Guitar, percussion, and Foley.
Thanks to the 6 different slots, you can trigger different samples in really creative ways.
For example, load up two samples in slots A and B. Then, go to Map, and select “Random”. Now when you play, Pigments will randomly trigger between your two samples. Other sample mapping options include:
- Round Robin: Pigments will cycle through samples on each note
- Key Map: Each sample is assigned to a specific octave on your keyboard
What’s more, Arturia Pigments has even integrated granular synthesis! Just hit the “Granular” button to open up all the granular controls:
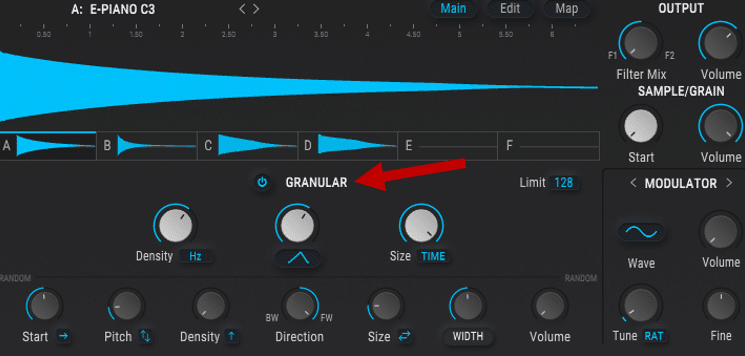
If you’ve never played with granular synthesis, it’s a really cool way to create pads from any samples.
Harmonic Synthesis
Finally, harmonic synthesis is the last engine type available in Pigments:
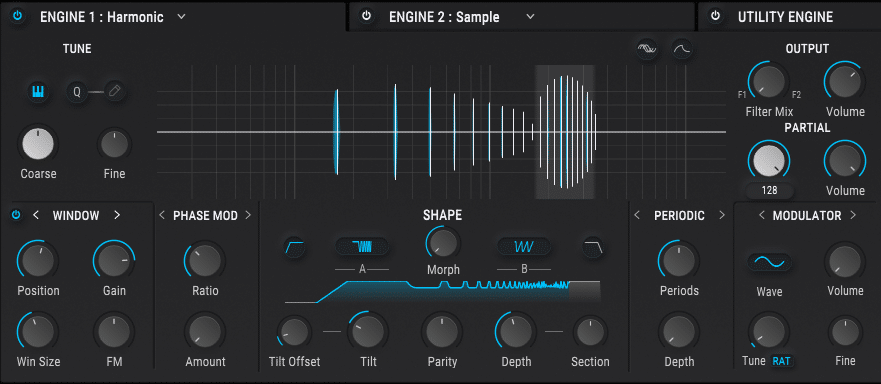
Harmonic synthesis is based on the concept of “additive synthesis”. The idea is that you start with a pure sine wave, and then add harmonics on top. You can then shape the relative volume of each harmonic to create the sound you want.
In that aspect, it is the opposite of subtractive synthesis, where you start with a signal rich in harmonics and attenuate it with a filter.
This synthesis method is by far the most complex and takes some learning to get the sounds you want.
The Utility Engine
Finally, the utility engine is the last type of sound generation you can use:
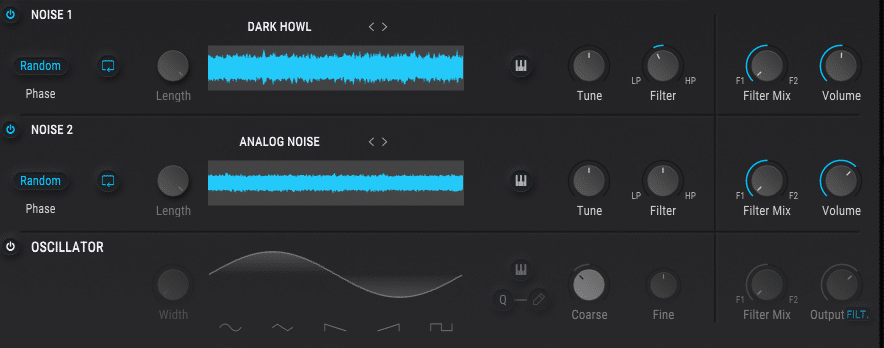
Here, you can add two separate noise layers as well as a sub-oscillator. Each layer can be first filtered independently before being routed to the Pigments filter section.
This engine is great for adding a bit of grit to a sound that is “too clean”. You can also add it as an “attack layer” by routing an envelope to the volume (for kicks and snares for example).
The Filter Section
Next, let’s move on to the filter section. The Pigments synth offers 2 filter windows:
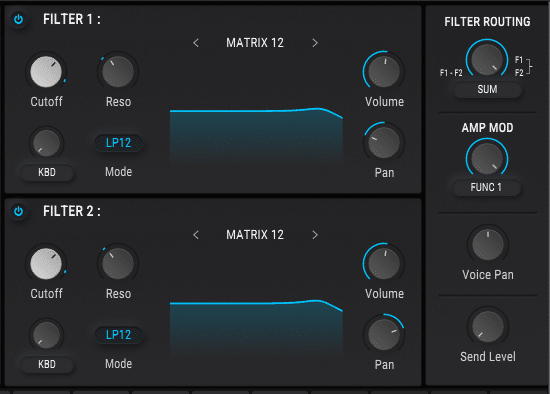
Each filter can be set to 11 different filter types, many modeled after classic analog gear. Each filter comes with a different set of controls. These are really worth exploring because they offer completely different sonic capabilities.
Filter routing is also crucial to how the filters shape your sound.
You’ve got 2 filter routing modes:
- SUM: both filter signals are summed and sent to the FX section
- SPLIT: the output of Filter 1 and Filter 2 can be sent independently to FX Bus A or FX Bus B.
In SUM mode, the filters can be set either in series (dial at 0%) or in parallel (dial at 100%):
- In series, the output of Filter 1 is sent to Filter 2
- In parallel, each filter is applied separately.
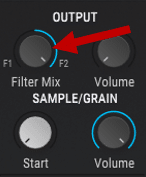
Each engine output has a Filter Mix knob, which lets you control where you send your signal:
Adding Effects and Sequences in the Pigments Synth 🎛️
Great, you now have a solid understanding of how sound is generated inside Arturia Pigments!
Let’s now go over the effects and sequences modules.
Effects in the Pigments Synth
The FX view features 2 “lanes” of effects, FX A and FX B:

Each lane can hold up to 3 effects. The order in which your effects impact your sound depends on the Insert settings on the left:
- A > B: the signal will flow into FX A, then into FX B
- B > A: the opposite 😅
- A // B: a dry signal is sent separately to both FX A and FX B before being summed.
But your signal flow also depends on the filter routing you choose! Let’s look at a quick example:

In this example, the engine 2 is set to Sample. The output is set to F2, which means I am bypassing Filter 1. The Filter Routing is set to Split, which means whatever comes out of Filter 2 is only sent to the FX B chain.
This allows to precisely shape each engine with its own filtering and effects processing.
Of course, you can also keep things simple, and route everything into Filter 1, then Filter 2, then FX A, then FX B.
Sequences in the Pigments Synth
The SEQ view lets you create all kinds of cool sequences and arpeggios:
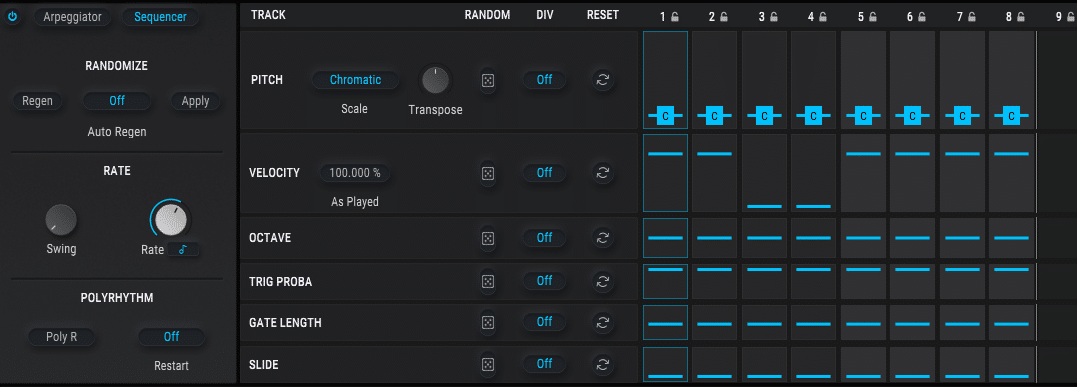
Arpeggios are a topic we covered in detail in this guide here. So I won’t go into too much detail in this guide. But in a nutshell, an arpeggiator will play notes from a chord in sequence. A sequencer on the other lets you pick the pitch of each note.
In my opinion, this is another unique feature lacking in many modern synths.
In this example, when I press the note C, the Pigments synth will actually a sequence of notes C – C – C – C – G – D# – C – A#:
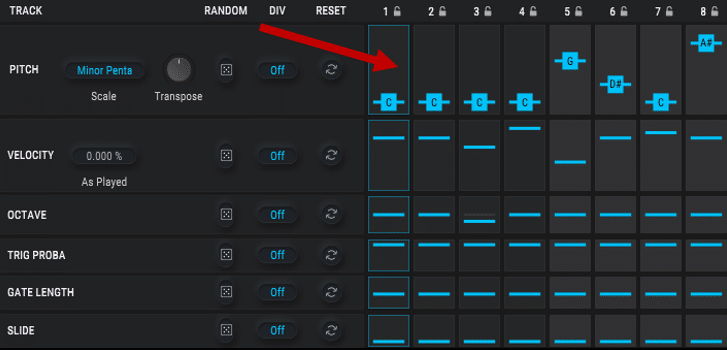
The sequencer has a bunch of great customization options for individual notes, including:
- Octave jumps
- Velocity control
- Slide amount
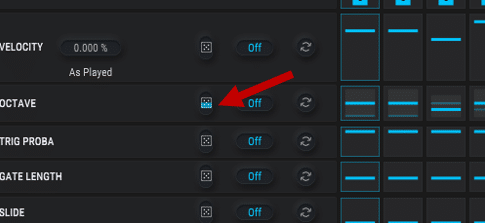
You can also introduce an amount of randomization into your sequence with the dice icon:
The sequencer has a crazy amount of other cool features which are really worth exploring.
That’s It for This Guide on the Arturia Pigments Synth 🙏
That’s a wrap for this guide on Pigments! Hopefully, I was able to help you make a decision whether this synth is for you or not. If you’re still unsure, just try out the 3 free days on Splice. You’ll get a good feel for how this synth operates and if it suits your genre and workflow 👍
Did I miss out on anything? Anything unclear? Feel free to get in touch with me at [email protected]
