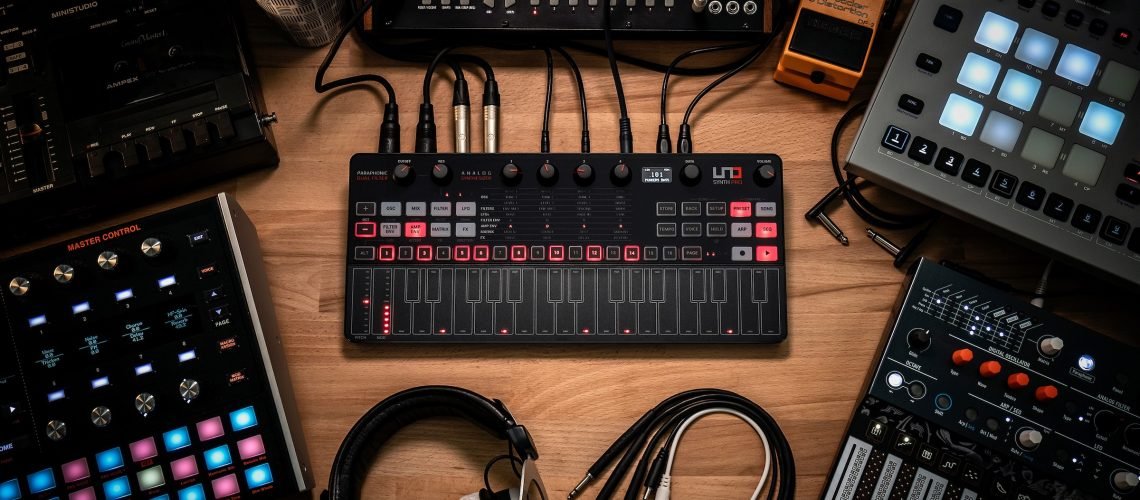
The UNO Synth Pro and Synth Pro Desktop each offer a wealth of possibilities with their analog oscillators and filters, external audio input, and digital control and software. Here’s your guide to hooking them up, maximizing their sounds, and getting ready to jam and play live.
In part one, we got introduced to the synth and its developers:
Once again, a quick overview of what you’ve got to play with:
- Analog oscillators (3 with continuous waveforms + 1 noise source) and tons of modulation options
- Mono, legato, and paraphonic settings to use with the three oscillators
- Double filters
- Sequencing and preset storage
- Digital effects (mono to stereo)
- Both MIDI and CV control, in both directions
- Companion software (UNO Synth Pro Editor)
- Audio input with routing to filters and effects
We’re going to use those features to put these devices to work in studio/production and jam/performance modes, including integrating with your gear and software. But let’s put all those tips together so you can find them at a glance.
This article was produced in collaboration with IK Multimedia. Thanks for their support.
Here’s what it can sound like together:
Hook it up
If you’re in a rush, you can skip ahead and start editing sounds, but it might be worth pausing and setting up your rig so you can quickly capture ideas and stay productive.
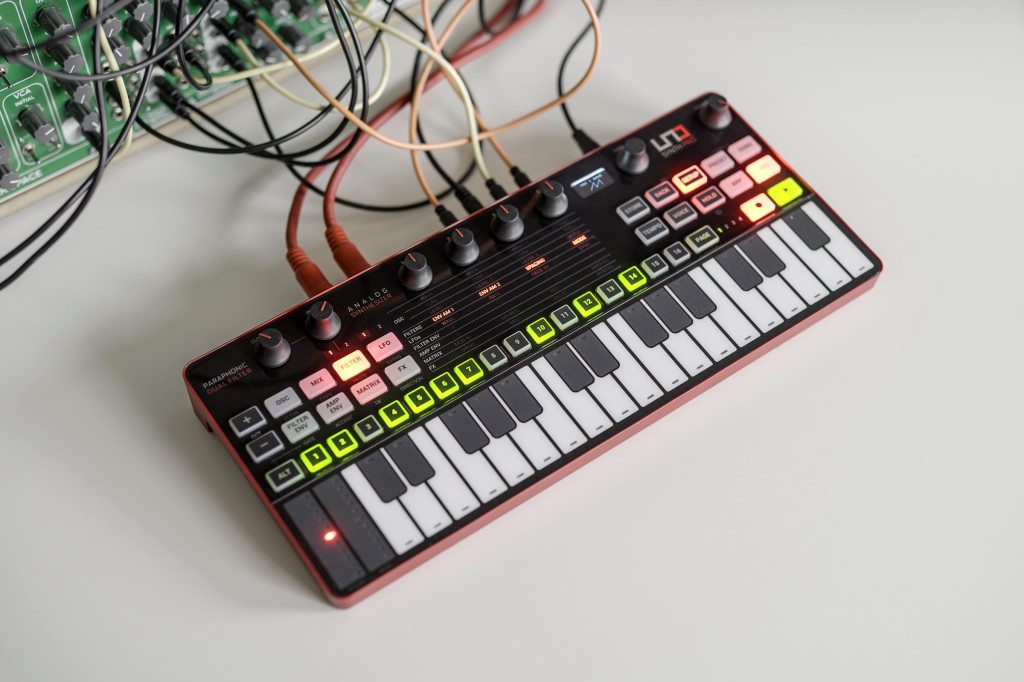
Power. Both units will power off of a reliable USB source alone. In addition, you can connect AUX POWER (Micro-USB ) on the Desktop for power only (no data), or POWER to use the power supply included on the full-sized UNO Pro. Since the Desktop version doesn’t come with its own power unit, if you find you’re having issues with noisy dodgy power units (like those you had for your phone), you might want to pick up IK Multimedia’s own option.
USB. The Micro-USB port labeled “USB” connects for data only – preset storage and management, and MIDI in and out over USB. For capturing audio, you’ll need an audio interface.
Audio in. This external audio input can be passed through – so for instance, if you don’t have enough connections on your mixer/interface. Or you can route through the UNO Synth Pro’s internal engine, meaning you can apply the UNO’s dual filters and FX to external devices, like a modular rig or drum machine.
Analog connections. Got a modular or analog gear? You’ve got two CV in and out, plus two gate in and out. If you want to work with analog sync, set to CV sync, and you get both clock and gate in or out:
CV IN 1 / OUT 1: clock receive / send
CV IN 2 / OUT 2: gate receive / send
For CV control of parameters – and routing CV from the synth to external gear:
CV input is bipolar (2.5V = 50% value)
CV output is unipolar (ranges 0 to +5V)
Unlike with MIDI, with CV this can require some thought. Some modules now are configurable to different behaviors. You can also check modules like the Befaco A*B+C or Frap Tools 321 Utility which each provide offset / scaling / multiplying and other useful utilities.

To set everything up, it’s a good idea to load the UNO Synth Pro Editor – though you can also navigate on the unit’s SETUP menu (see dedicated button) if you haven’t got the computer software handy.
There’s a metronome! This feature is easy to miss. The METRONOME feature gives you a practice tool, a way to time your performance, and a handy diagnostic to check sync. You’ll find it in Setup.
Integrating with your computer and DAW. The UNO Synth Editor runs both standalone and as a plug-in. Just set the appropriate MIDI in and out, and go – the plug-in will even take care of routing MIDI for you.
This means to capture audio from the UNO, just start a MIDI track with the UNO Synth Editor plug-in instantiated, then record audio to a separate track. It’s the best setup if you want to simultaneously store and recall patches from the plug-in. It also means you can go back to the original MIDI and preset recall.
Note: if you use your DAW’s own MIDI hardware routing tool – like Ableton Live’s External Instrument Device, or Bitwig’s HW Instrument and HW CV Instrument – you’ll probably want to use that device exclusively. Trying to use both can potentially cause conflicts or at least some confusion. (In Live in my work, I found the two could conflict; with Bitwig, it just was superfluous to try to use both.) These hardware tools have the advantage of managing latency compensation for you. I found if I was recording performances, I preferred the internal devices; for sound design, the editor is more useful.
Sound design workflow
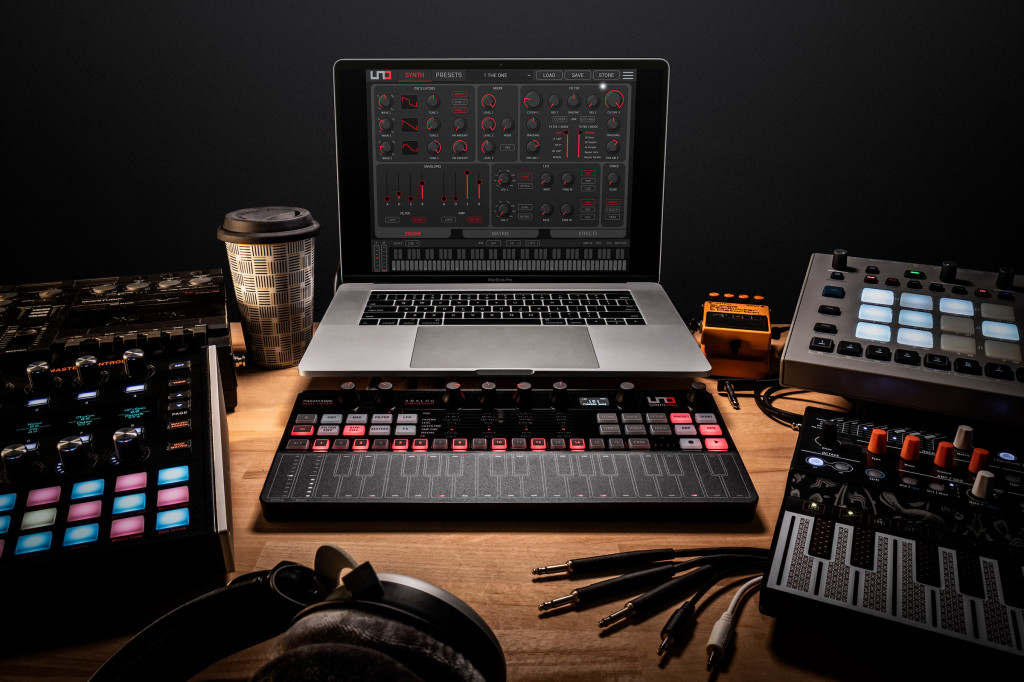
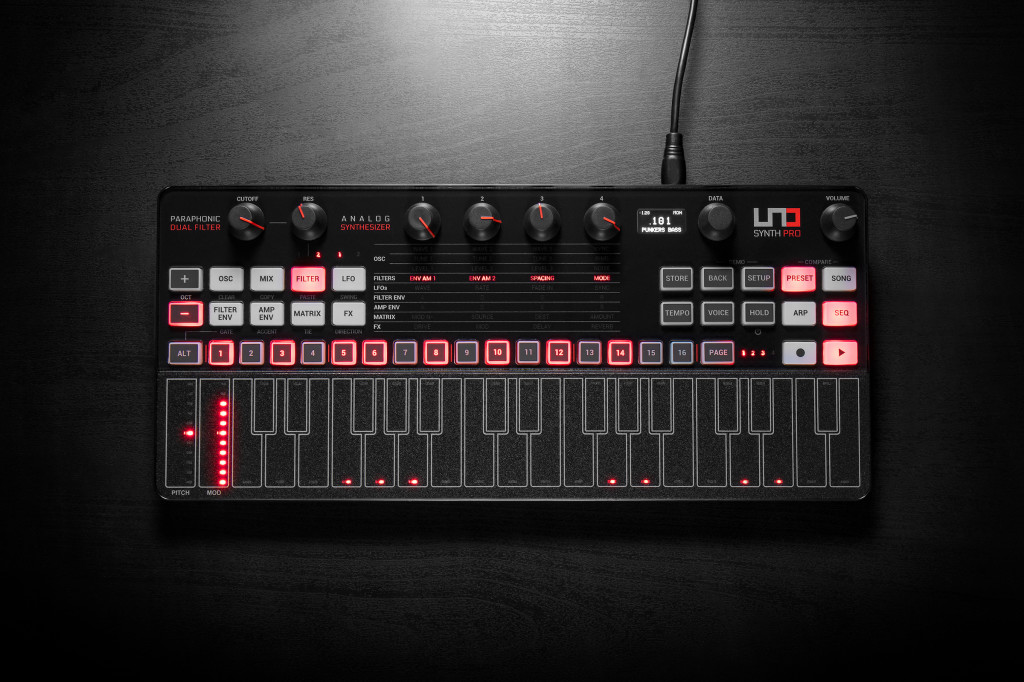
The front panel of the UNO will walk you nicely through a sound design workflow. OSC | MIX | FILTER lets you build up and filter the analog portion of the sound (3 osc + noise), then LFO | FILTER ENV | AP ENV | MATRIX applies envelopes and modulation plus routing, and finally the FX section gives you direct access to both the analog overdrive and switchable master effects.
It’s handy to keep the UNO Synth Pro Editor or its plug-in nearby for areas that would otherwise require some menu diving – it makes filter mode and LFO shape visible and gives you an overview. But that still leaves the front panel for tapping around aspects of the sound.
Let’s go one by one.
Quick reminders:
- Use DATA knob to navigate menus, push the knob to enter, and use BACK to exit
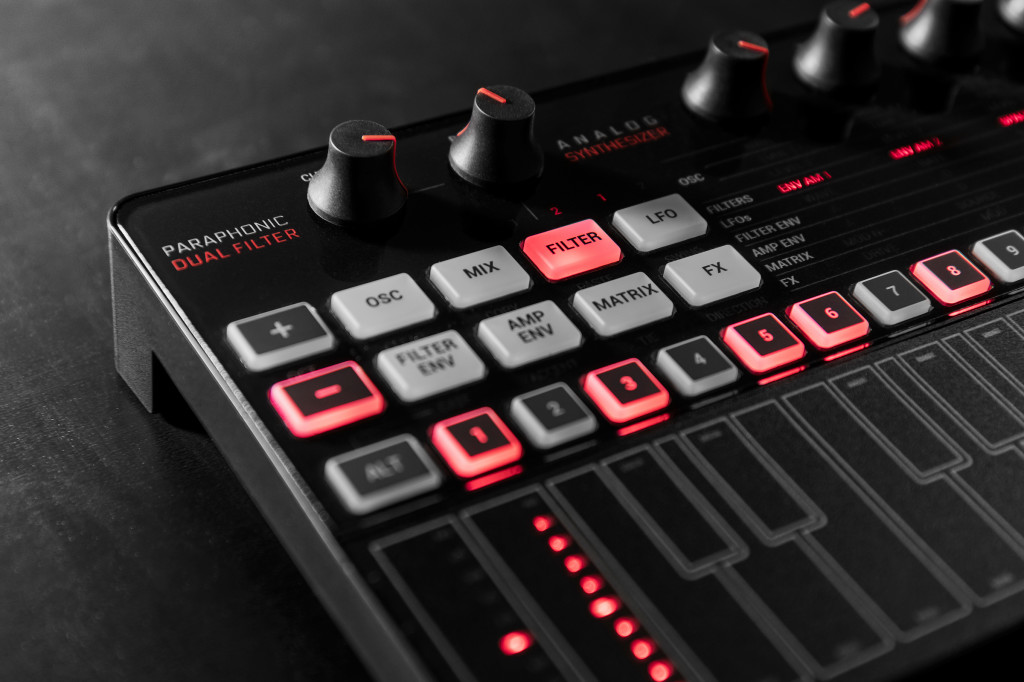
- ALT is essentially a shift key, and accesses the grayed labels in the buttons above it
- Once you start to adjust a knob, its parameter will appear on the screen. These aren’t touch-sensitive in that they won’t immediately select when you make contact – wiggle them ever so slightly (or give them a firm tap on the top).
- Try pressing the DATA encoder to bring up a related menu, or hold a sound editing button and pressing a step to bring up edit shortcuts.
MIX and WAVE
Use MIX to adjust levels of the three oscillators and one noise source. Shape the oscillators WAVE 1, WAVE 2, WAVE 3 for continuously variable analog waveshapes.
Note the sync modes – you can hard sync wave 2 or 3, 2+3, or ring mod oscillator 2 – so try sync, then tuning in different harmonic content. There are also dedicated FM amounts for wave 2 and 3.
NOISE balance can dial in aggressive sounds and also makes the UNO handy for percussion – you can get some really aggressive metallic and hat sounds, especially if you add FM to a wave oscillator(s).
Okay, that’s the technical terminology – now the musical description. These are some gnarly, gnarly analog oscillators. With noise, they can get really grungy. With ring mod and FM and analog overdrive and these filters (see below), you can evoke some complex, rarified classic synths – or do something fairly modern sounding, as well.
Some quick tips:

- Mess with the wave selectors. You can continuously shape from Tri – Saw – Pulse – PWM with duty cycles ranging from 50-98% and visual feedback on the display.
- Try adding RING mod, then tuning wave 2.
- Tune range is +/- 2 octaves, so octaves and extremes are possible (generally, and on wave 2, with ring mod)
- Crank up FM on wave 2 and wave 3 – you’ll hear some stepping at higher settings, but that’s useful in tuning. FM doesn’t need to be routed – just turn it up on one or both of waves 2 + 3.
These are some gnarly, gnarly analog oscillators. With noise, they can get grungy. With ring mod and FM and analog overdrive and these filters, you can evoke some complex, rarified classic synths.
You also have options for modes via the VOICE button. Mono is basic monophonic operation. In legato mode (the default), connect notes to change pitch without retriggering attacks (or envelopes and modulation). There’s also a glide option.
In paraphonic mode, you can play up to three notes at once – one pitch controlling each oscillator – before routing to the same dual filter and effects path.
Filter
FILTER navigates the dual filter system. Spacing is an offset of the two filters’ cutoff (not stereo offset, as on some synths). Envelope Amount and Spacing are each routed by default, too, so you can mess with them right away. You then set the two filter modes for different filter types and routings. You can also bypass one or the other filter.
In conjunction with the filter envelope and other modulation, this gets really powerful.
CUTOFF and RES at the top left are dependent on the selected filter. So especially for live performance patches, you’ll want to tune your two filters and adjust spacing so that one filter’s cutoff/res is satisfying to tweak as you play.
Also, some notes about filter control: cutoff and resonance controls are digital pots. Since this is an analog filter, you will hear some stepping at certain settings. There is some natural smoothing that occurs even in the step sequencer, though, so one option is to automate filter controls. You also have the option of using CV control, so this limitation goes away when you integrate with other analog gear. (I’ve tried it with a modular setup, but also the Moog Mavis works really well as a companion.)
Keep in mind, too, filter envelope is normalled to the filter.
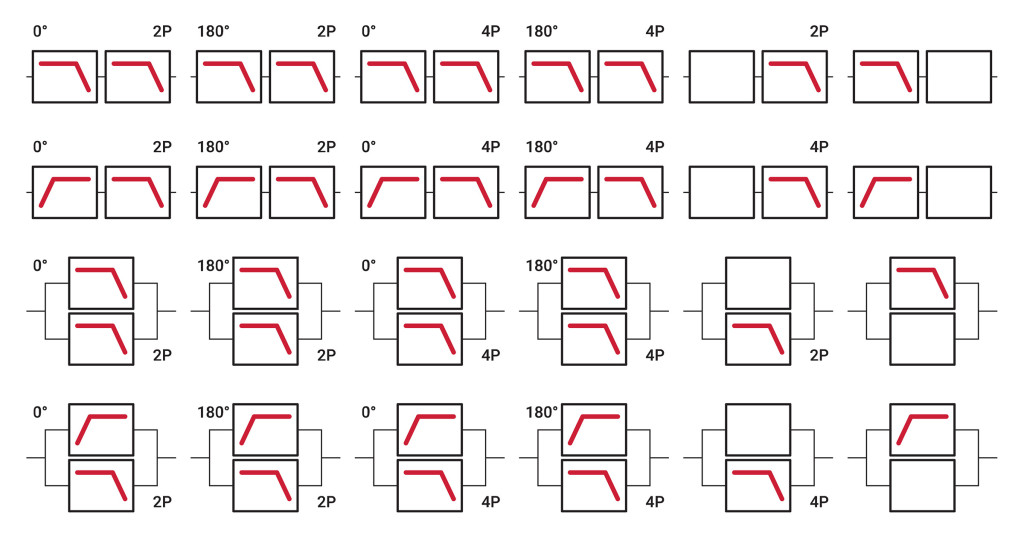
Funny enough not in the manual, IK has made a useful graphic showing all the filter modes (see above). Remember you have two filters, each with its own modes, plus serial and parallel routing, and spacing between the two cutoff values. That means a lot of different possibilities. But rather than worry too much about how the filter sounds, I really had the most fun when I went wild and experimented – there are loads of happy accidents around the extremes.

Modulation and matrix
The engine gives you quite a lot to play with as far as shaping sound:
- filter and amp envelopes, with loop and retrigger options (so they retrigger when you press another note)
- two LFOs, with various wave types (including S&H and noise), rate, and fade in, and again sync and retrigger options
- two CV and two gate inputs can also be sources
- MIDI pitch, gate, pitch bend, modulation, and aftertouch are all sources
- each stage of the ADSR pitch and filter envelopes can be sources
- all parameter settings can be sources
Those can then be routed to any destination you like with a 16-slot modulation matrix. That’s a lot to keep track of, so unless you’re working away from the computer, it’s easiest to modify the matrix on the software.
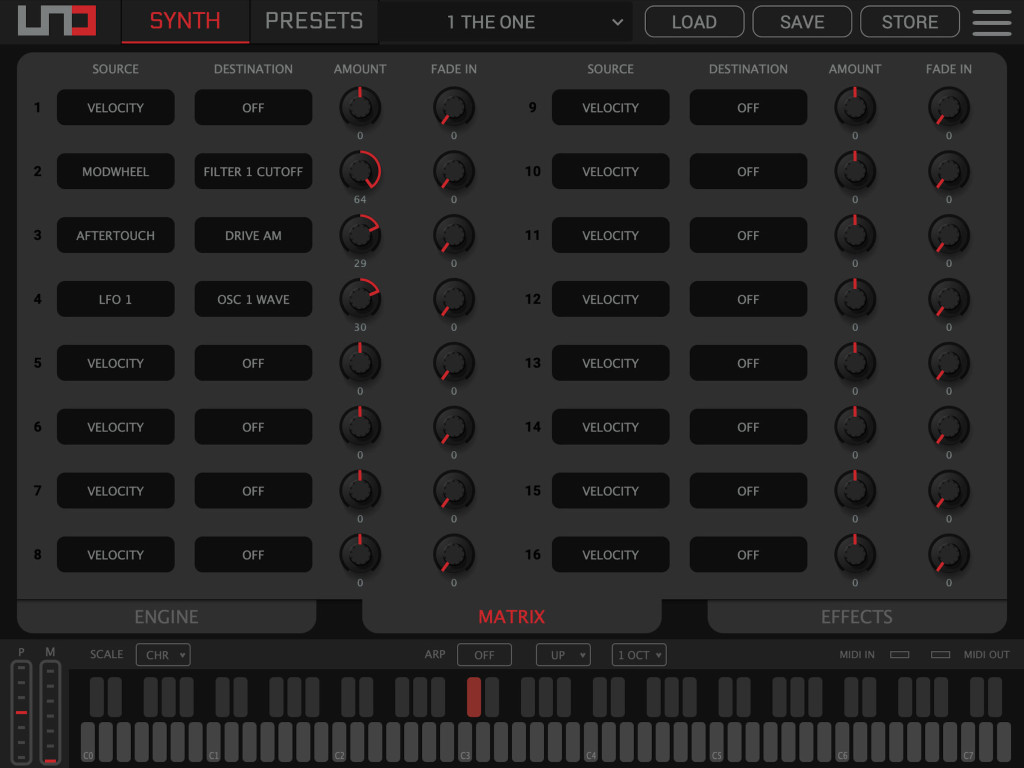
It’s really worth some “dangerous” experimentation here. Leave well-mannered sound design to people making sound packs or whatever. You can really make this thing scream in some beautiful and unexpected ways. That can then make a bassline that sounds like it came out of a modular … or a beautiful ambient track if you add some onboard or outboard reverb … and you can use audio input.
Working with sync. The LFO has its own clock division function – which means you can even think of the LFO as a clock divider for parameter control. Set SYNC to ON, and then RATE will adjust clock div (from whole note to 1/128 note with dotted and triplet intervals). With SYNC OFF, it’s free-clocked from 0.01 Hz to 100Hz. And keep in mind you can use an analog clock source (or destination), as with a modular or analog synth.
Effects
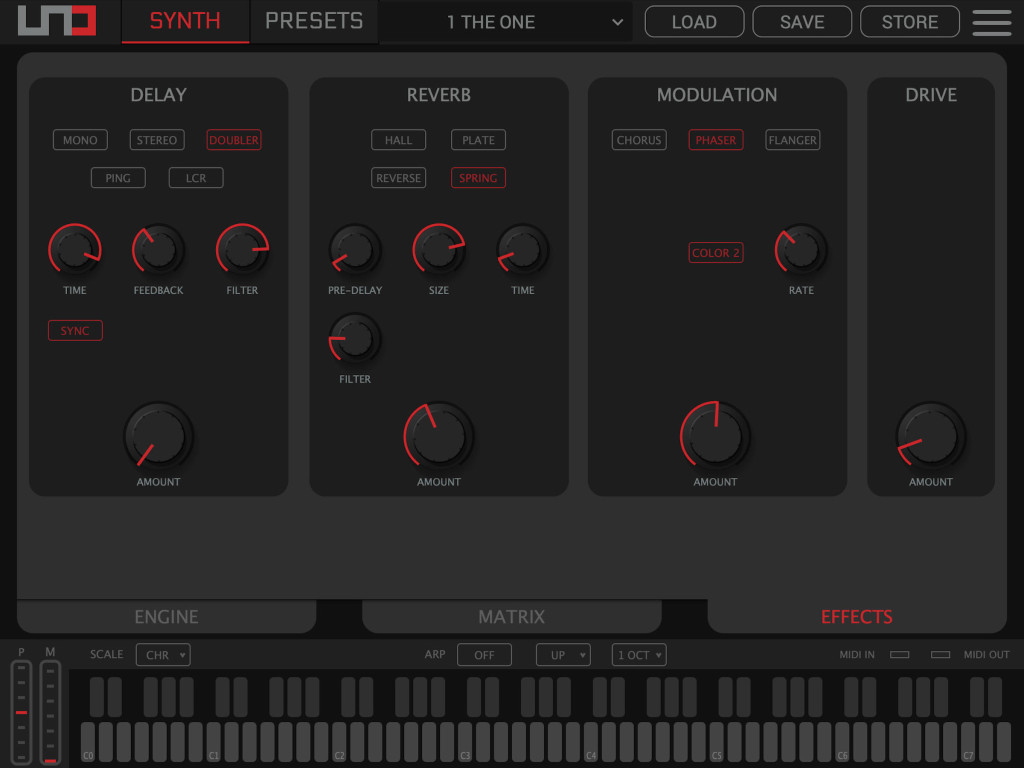
Effects start with a mono input but run to stereo output – meaning the FX section is also where you’ll add any desired imaging.
DRIVE: This is just a juicy overdrive circuit and – wow, it can make things even dirtier and edgier if you like.
The key here is that multiple effects are tucked in under each setting for all the rest:
DELAY: mono, stereo, doubler, ping pong, LCR (left center right). Here’s the big one – delay can be controlled down to 1ms (with sync off), which means you can even get some plucked and resonating sounds. And the LCR option gives you additional imaging choices.
REVERB: hall, plate, reverse, and spring. These also have nice short options as well as long (30 second plate is even possible).
MODULATIONS: chorus (synth I, synth II, and string), phaser (with color 1 and color 2), flanger. Chorus I, II, and string are obviously Roland modes (the I and II buttons from the JUNO-60, plus a string/ensemble mode. Flanger has adjustable feedback.

Don’t forget that analog overdrive.
Saving sounds
While you’re dialing in greatness, be sure to save.
Hardware preset storage. Hit STORE, turn DATA to select a slot, push DATA to confirm, then it’s arcade cabinet high score time – rotate DATA to select characters, press STORE again to save.
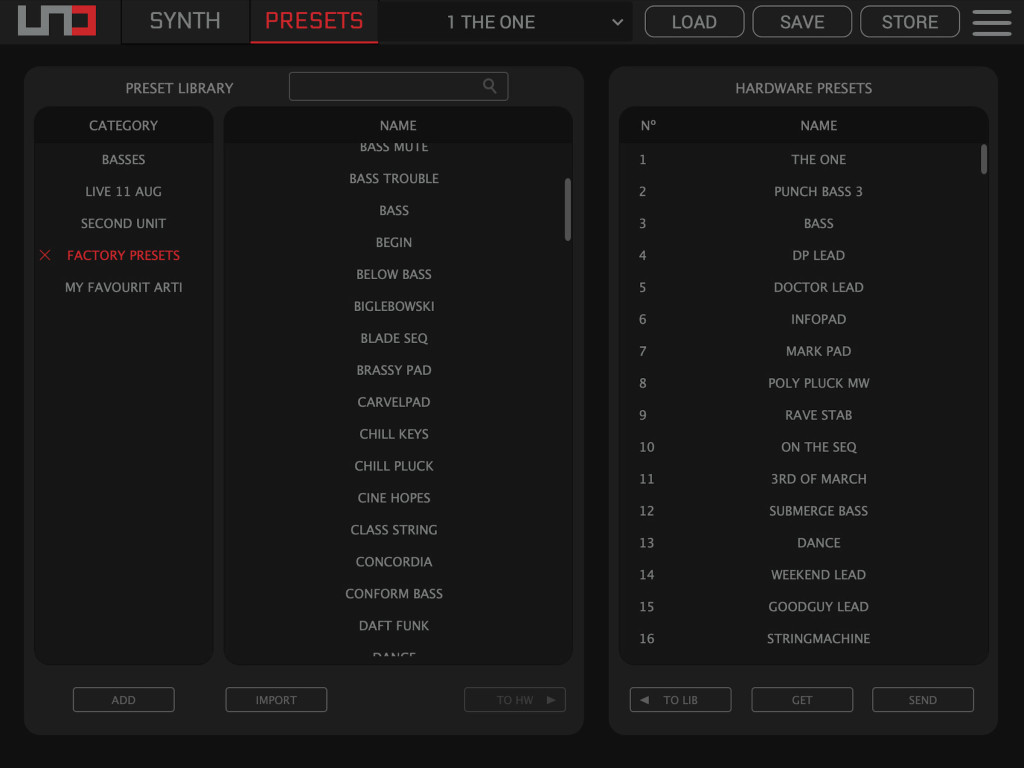
Software preset storage. Both options are on the toolbar. Hit STORE to save into the hardware, and SAVE to save locally to your computer.
Load from the computer to hardware. Hit LOAD to open a file. You can also pull up the PRESETS panel to manage banks.
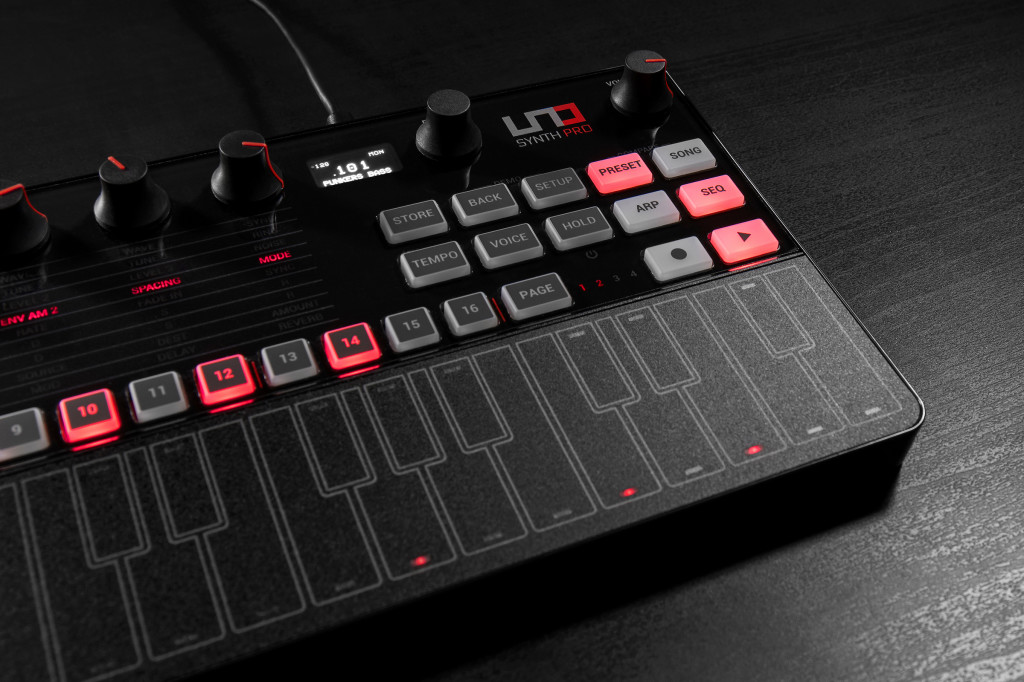
Live performance and jamming
You’ve got a few features that make both the UNO Synth Pro models ideal for live performance:
- Dedicated preset recall — 16 buttons right on the hardware
- Switch between presets without dropouts
- Store arpeggiator settings and step sequencer patterns with presets
- Take advantage of external audio input support, and MIDI and CV I/O
Because the knobs on the UNO Synth Pro are multi-function, and there are layers of controls to navigate with the selector, it’s less obvious how to tweak settings live but – there are some tricks there, too.
Design patches with easy tweakability. For me, this is about exploiting the filter controls, and setting the sound editing buttons to one row and then tweaking them. You can also dive into preset editing and set cutoff and resonance to linked for some patches. Beyond that –
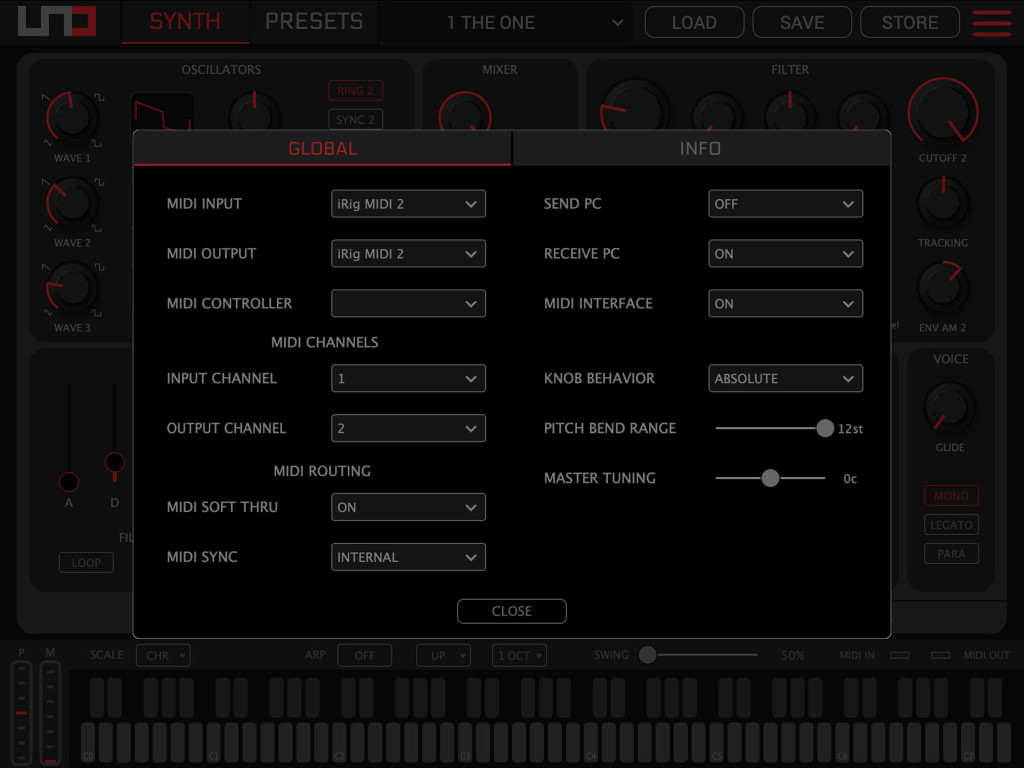
Exploit pass-through and relative modes for parameters. Knobs by default on UNO Synth Pro are set to Absolute Mode – turn a pot and the setting jumps. That’s ideal for sound editing, but can be abrupt when playing and tweaking live.
Pass-Through means the knob has to reach the preset value before it starts to do anything. (It’s what’s called take-up mode on some software and hardware.)
Relative mode adjusts these relative to the current value – though dialing all the way or all the way down gets you to the maximum and minimum.
Adjust pitch wheel range. This can be +/- as little as 1 semitone or as much as 12 semitones.
Use the steps in arp mode. You can swap on and off steps not only when playing sequences, but creating patterns on arpeggiators, too.
Record automation. You can record parameters into the sequencer. In addition to note pitch, each step stores every parameter you’re tweaking. Or –
Step record notes and parameters. Yeah, you can parameter-lock the UNO! Hold a step, and edit a pitch, or chord, or any parameter, in any combination. This also overrides recording.
Put that together, and you can store those sequence patterns with a preset for even more live possibilities. Plus there’s MIDI control of all parameters.
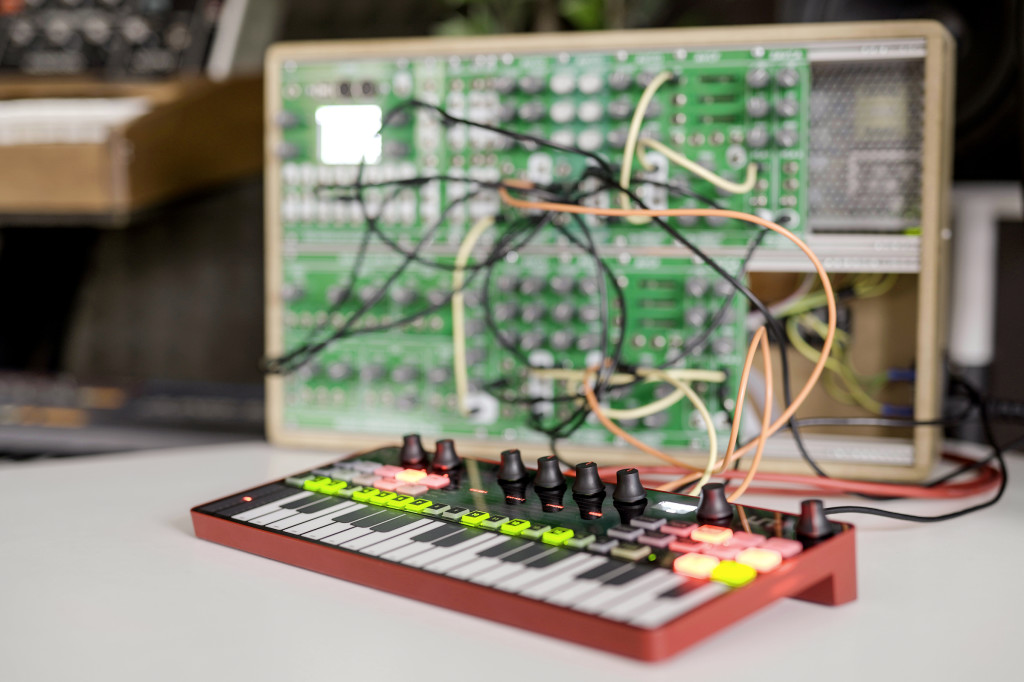
External gear. You can use the UNO as a MIDI or CV sequencer / controller for outboard gear – and visa versa.
External audio. Audio input is selectable in the MIXER section per-preset – meaning you can set up a set of presets to recall. Some might involve you playing the UNO, some might involve external audio input, and some might be a mix of both – ideal for a live set. In POST mode, audio is just passed through without being processed by the engine, so use PRE to incorporate the onboard filters and effects.
MIDI thru. There’s also soft thru as an option, so you can copy MIDI in to MIDI out. (This is soft thru, though, so might involve some small amount of latency – see something like our cubit duo for a near-zero latency hardware thru.)
MIDI interface. Want to control other gear and don’t have a MIDI interface handy? This copies incoming MIDI messages from USB to the MIDI OUT port. (Related to soft thru above, but uses USB as the input rather than MIDI in.)
Scales. If you’re concerned about your playing – especially on the Desktop unit – you have scale options that map to the white keys only. These are just modes, not different tunings – if you want tuning support outside 12-TET, you’ll need an external source that sends that tuning data. (That’s easy to do on the UNO, anyway, since it’s not polyphonic.)
Arp modes. You’ve also got a bunch of arpeggiator modes – and these can also be stored with presets. They all also have swing, and the arp can be recorded into the sequencer.
UP, DOWN, U/D, UD+ (upper and lower notes play twice), D/U, DU+, RND (random), PLY (as played), X2U and X2D (each note twice up or down, respectively).
One note jam to take us out:
There you have it! Do let us know if you run into issues or have more questions, and we’ll expand this guide.
More info:
https://www.ikmultimedia.com/products/unosynthpro/
Get your own UNO Synth Pro:
As we publish this, both UNO Synth Pro models are discounted. [Affiliate links help support CDM.]
You can purchase direct from IK Multimedia, too, or your favorite reseller.
IK Multimedia UNO Synth Pro – Desktop – Black Edition [Sweetwater]
IK Multimedia UNO Synth Pro Desktop [Sweetwater]
IK Multimedia UNO Synth Pro [Sweetwater]
IK Multimedia UNO Synth Pro Desktop [Thomann]
IK Multimedia UNO Synth Pro [Thomann]
