A noise gate allows you to reduce the level of background noise in your recordings. It does this by attenuating the level of quiet audio material, while leaving loud audio material unaffected — assuming you’ve used appropriate gate settings. For example, you can use a gate to reduce the level of lip smacks and breaths that are present within dialog, or string and finger noise that’s present within guitar recordings.
When Should You Use a Noise Gate?
You should only use a gate when you’re looking for a quick and dirty way to deal with background noise that’s present between audio content. For long audio recordings, such as podcast episodes, many people choose to attenuate breaths between dialog using a gate.
Manually cutting out low-level sounds in a DAW can be incredibly time consuming if you’re working on a 1-2 hour podcast. Slapping a gate onto your dialog and tweaking a few settings is a quick workaround.
Another instance of when you may want to use a gate is in a live context. If you’re performing in front of an audience, you don’t have the opportunity to manually edit your audio. However, you can use a hardware gate — or plugin gate if you’re running your audio through a DAW — to tame background noise.
I don’t recommend using a gate to clean up studio vocals when producing music. You’ll always be able to achieve cleaner results by cutting and fading the edges of audio clips. Most songs aren’t more than 3 minutes long; the amount of editing required to manually clean up a vocal recording is minimal and the results are worth it.
The breaths that exist within a vocal performance are often desirable and can add to the groove of a song. Sometimes, want to slightly tweak the level of breaths and adjust their length so they sound time-aligned and natural.
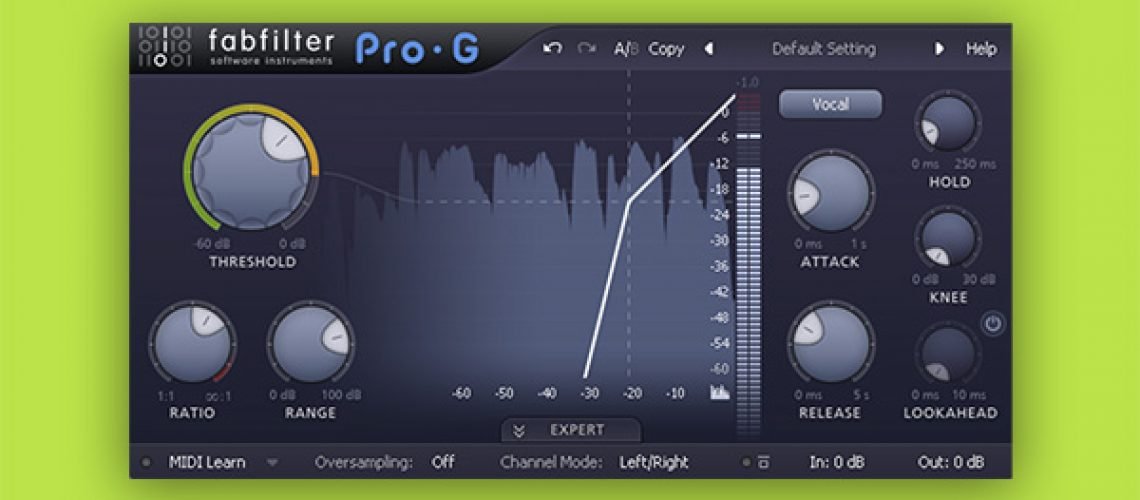
My gate of choice is FabFilter’s Pro-G. It provides six different gating algorithms, a few advanced controls that allow you to fine-tune the way in which processing is applied, and a sidechain feature that you can use to create interesting rhythmic pumping effects.

To clarify, a gate is not capable of removing noise that’s layered beneath audio content. For example, you can’t use a gate to remove the hum of an air conditioning fan that’s been baked into a dialog recording. You’ll need to reach for a specialized tool to deal with that, such as iZotope’s RX 9 Voice De-noise.

Apply the Gate Before Your Compressor
A compressor reduces the dynamic range of audio, making the difference between loud sounds and quiet sounds less significant; most compressors perform this process by reducing the level of loud sounds. Applying compression to your audio prior to using a gate makes it harder to selectively target quiet sounds like breaths.

To avoid this problem, apply a gate to your audio before applying a compressor. When you compress a signal and apply makeup gain, it will increase the level of the noise floor. Although, as long as you sufficiently reduce the level of quiet audio material using a gate, you don’t need to worry about undoing the noise reduction you’ve applied.
1. Use a Ratio of 4:1 or 10:1
A gate’s ratio value determines how heavily your audio signal will be attenuated when it breaches the gate’s threshold level. Most novice gate users try to completely remove background noise using an extreme ratio value like 100:1, which results in near-silence. The issue with doing this is that your audio will start to sound choppy because of the aggressive gain reduction being applied.
Using an extreme ratio value of 100:1 is actually a good idea when dialing in your settings; it will let you clearly hear the gain reduction applied. However, you should reduce your ratio value to 10:1 or 4:1 for a more natural sound once you’ve found an attack value, release value, and threshold value that work — we’ll look at these settings in a moment. Aim for noise reduction as opposed to noise removal.
Depending on the gate that you’re using, you may be provided with a floor control as opposed to a ratio control. In that case, you’ll simply input the amount of attenuation that you’d like the gate to apply as a decibel value.
2. Use a Fast Attack Time Between 1-5 ms
By default, a gate is closed and is constantly applying gain reduction. When signal breaches the threshold level, the gate opens. Your gate’s attack value dictates the amount of time it takes for the gate to open and allow sound to pass through.
You should use a relatively fast attack time in the neighborhood of 1-5 ms. If you use a longer attack time than that, the gate might not open in time to let your dialog through; it will apply an audible fade to the beginning of your audio content.
If you happen to be gating sustained audio content, such as synth pads, you can use a longer attack time since it will be less noticeable. Again, I recommend manually trimming the musical audio content of songs but a gate is a good solution in a live context while on stage.
3. Use a Moderate Release Time Between 100-300 ms
It seems like it would be a good idea to use a fast release time so that your gate closes immediately after someone finishes speaking. Although, this can result in unwanted chattering effects as a result of the gate behaving too responsively.
Aim for a natural fade at the end of your dialog. A release time between 100-300 ms should get the job done. Even if you can hear a little bit of background noise as this fade-out process occurs, it tends to be less jarring and noticeable to listeners than a short and aggressive fade.
4. Set the Threshold Level
To set the perfect threshold level, find the quietest section of dialog in your recording. Slowly reduce the threshold until you can clearly hear the dialog — but don’t reduce the threshold level farther than that. If you’re setting up a gate for live use, speak softly and perform the same process.
Being able to hear all of your dialog is more important than catching every breath. If there are a few breaths that slip through your gate, it’s not the end of the world. If you’ve recorded this audio, isolate the breaths along the timeline of your DAW and adjust their clip gain to drop them below your gate’s threshold level.
5. Adjust the Hold Value as Necessary
Boosting a gate’s hold time can prevent dialog from cutting in and out. If you find that your gate is producing chattering effects — in which the gate is repeatedly opening and closing as the signal floats around the threshold level — increase the gate’s hold value. The hold time specifies how long the gate is forced to remain open when signal breaches the threshold level. Don’t worry about the exact hold value that you should use, just turn it up until the chattering disappears.


