Looping is a fundamental concept of modern music production. Every top-charting track on Beatport has a loop of some sort in it.
Loops and looping simply refer to a piece of audio that is repeating.
However, creating and manipulating loops can seem daunting. And if you do it wrong, it can sound very amateurish. But fear not! That’s why I’ve put this guide together for you. Together, we are going to look at:
- What are loops and looping
- How to create your own loops in Ableton Live and FL Studio
- Advanced editing techniques to make loops your own
- Live loop and overdub recording
Ready? Let’s dive into it! 👇
So… What Is Looping? 🤔
Before explaining what looping is, we need to cover what loops are.
A loop simply refers to a section of sound that is repeating.
So far, pretty simple. By deduction, looping simply refers to playing a loop. However, over the years, looping has taken on multiple meanings. This has somewhat muddied the exact definition of what is looping:
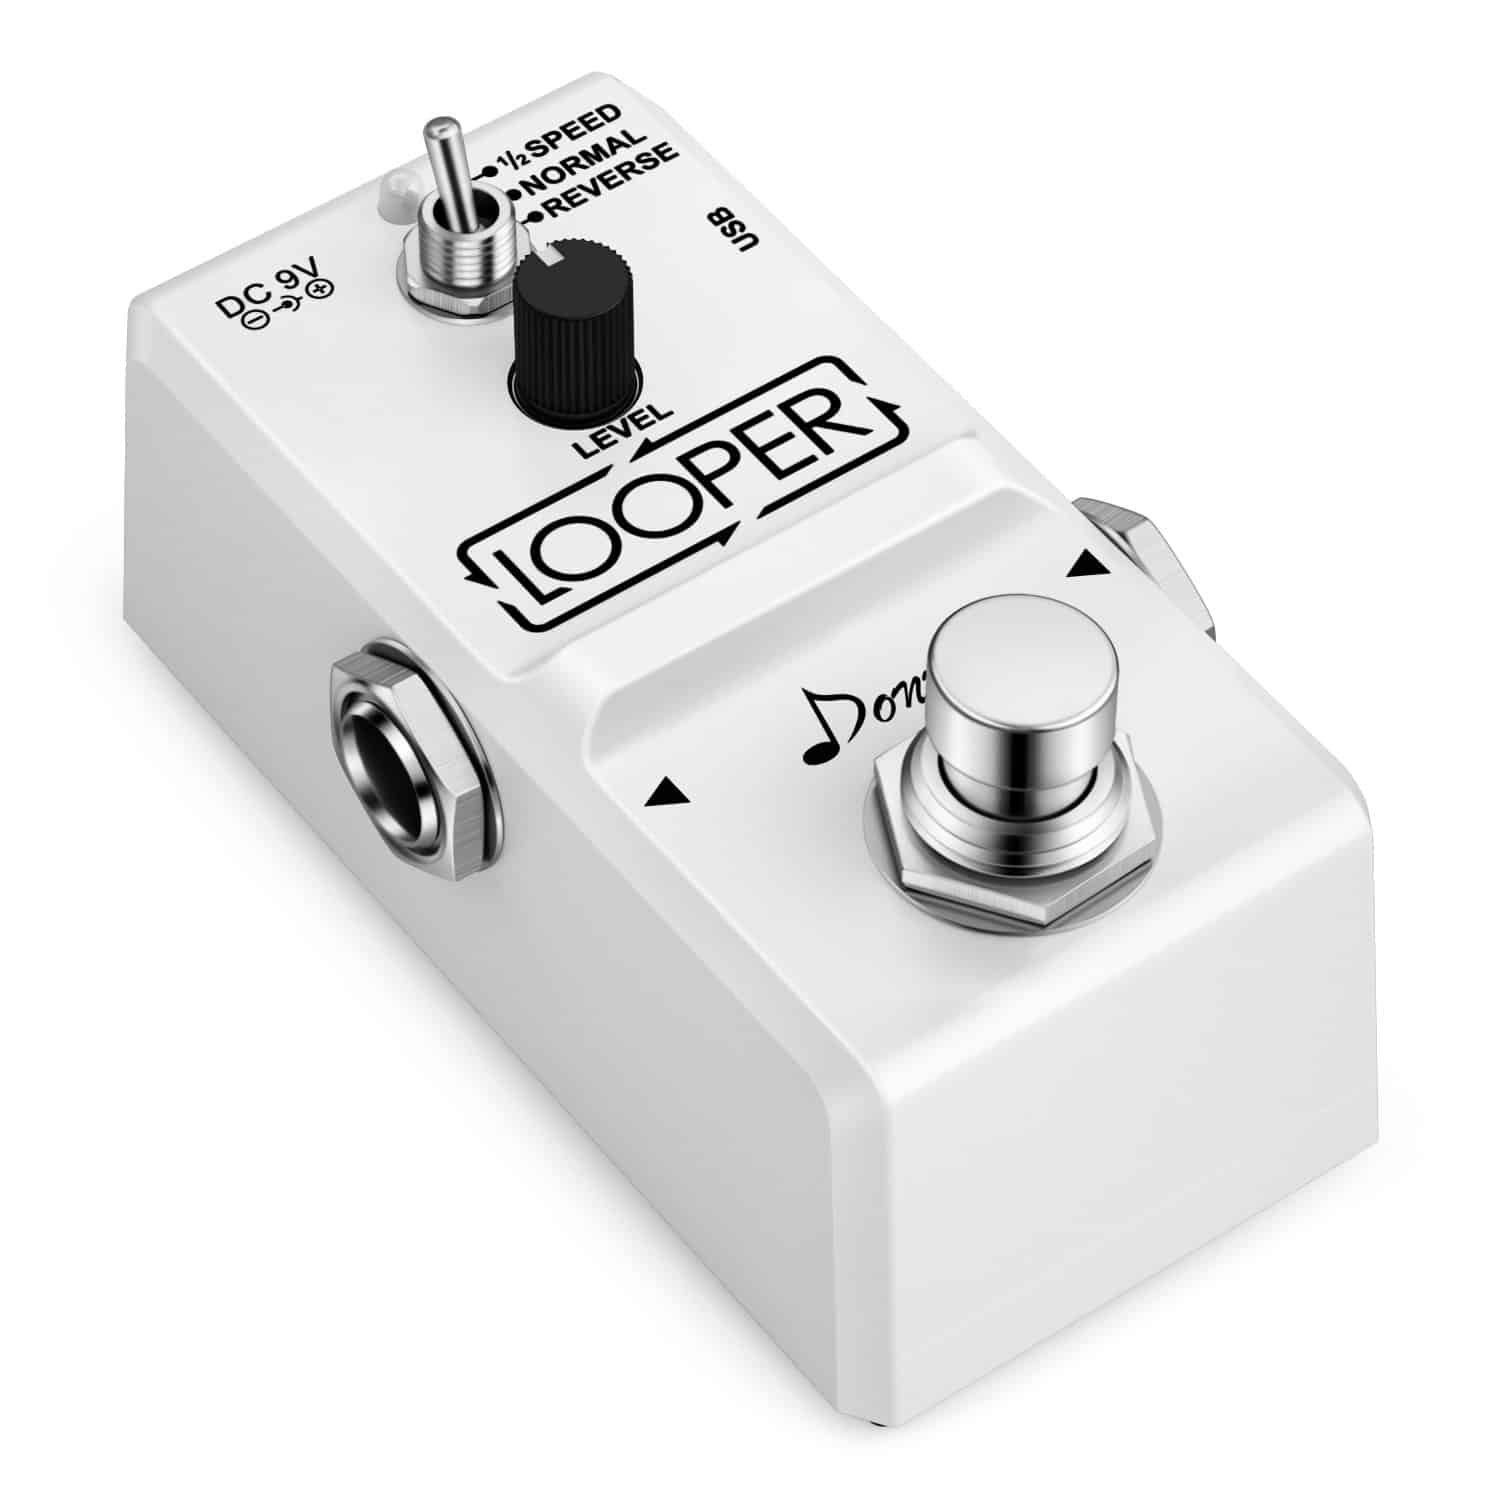
When people talk about looping in music, they usually refer to one of the following:
- creating a loop from an audio sample
- simply looping audio (to jam on top for example)
- loop recording and overdub recording
Let’s go over each of these in more detail 👇
What is Looping with Samples?
Looping audio samples usually refer to a sample that you play in repetition:
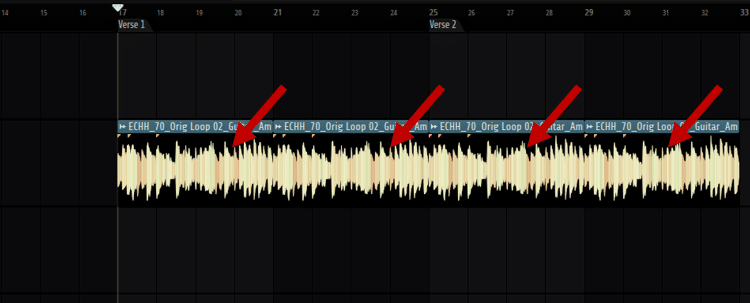
The most straightforward way to do this is simply by copy-pasting the sample. That’s what I did in the example above. In that case, we would say that I am “looping the sample”.
However, what happens if you just want to loop a certain section of the sample?
There are a million different ways to edit, cut, and loop samples. Here, I will share with you some of my favorite techniques.
Creating loops in FL Studio
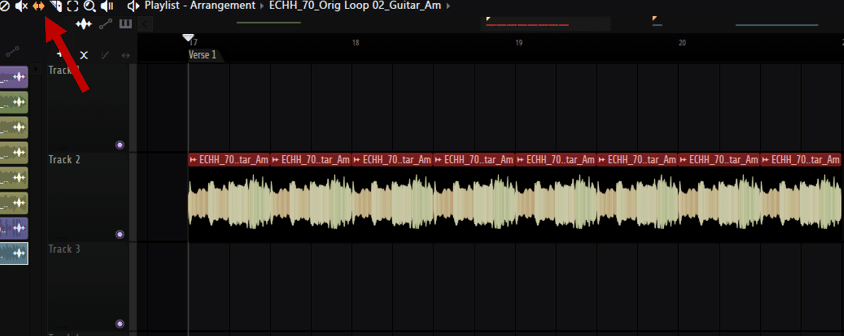
Let’s say I want a loop that is only two beats long. First, I will shorten the entire loop to just 2 beats:

Next, I will copy that section over 4 or 8 bars. Finally, I will use the “Slip” tool to scan through the full loop. This lets me audition different sections of the original loop:
Another trick I like to use is to open the loop in Fruity Slicex. By selecting the “Dump to piano roll” feature, I have all the different sections of the original loop available:
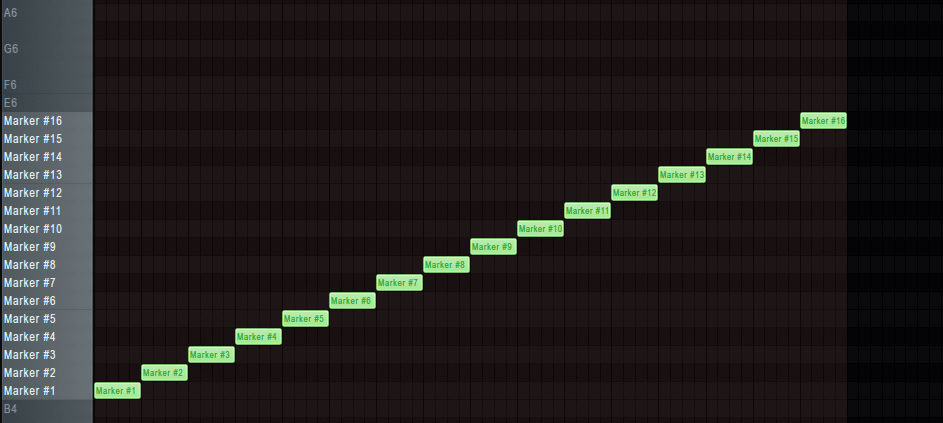
Creating loops in Ableton Live
In Ableton Live, enable the “Loop switch” at the top of the window, then load up a sample. Enable “Loop”, and select the region you want to loop:
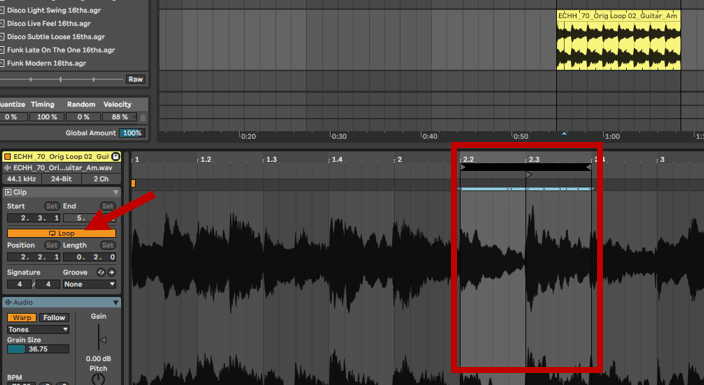
You can now easily audition different sections of your loop by dragging the selection left or right.
A common issue you might run into when looping is clicking. This happens when the loop starts over. Because you’ve cut in the middle of the sample, an audible “click” or “pop” is there:
To counter this, enable the Clip Gain Envelope. With this, you’ll be able to fade in and out your sample at the point where it loops:

Going One Step Further: Loop Editing
One thing you’ll always hear is: “Don’t just drop a loop in your project”.
With the millions of loops available on Splice and Loopcloud, it’s easy to become lazy.
Simply drag and drop a few loops, and you have a song! However, there are a few problems with this approach. Namely, you are not:
- … being very creative 😅
- … crafting your own sound identity
- … learning anything in the process.
This is why it’s crucial to process your loops. And I’m not talking about post-processing with reverb, delay, or saturation here.
No, I am talking about hands-on, proper audio manipulation. Let’s have a look 👇
Looping and Editing in FL Studio
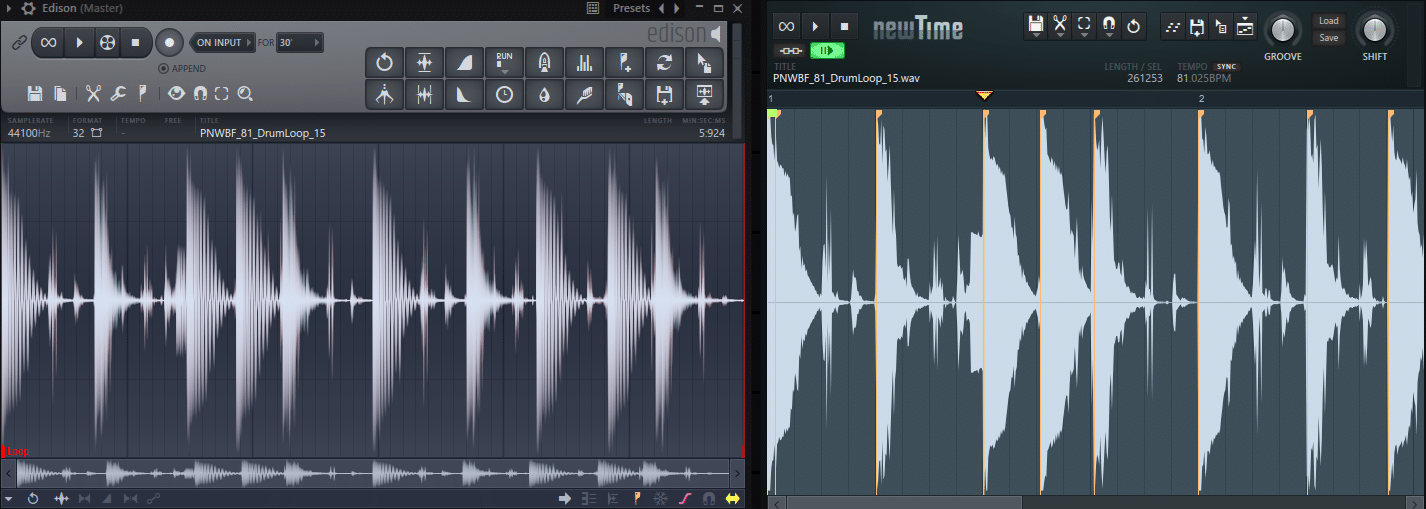
My 2 favorite tools to edit loops in FL Studio are Edison and NewTime:
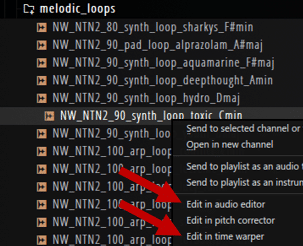
To open either Edison or Newtime, right-click a sample and select “Edit in audio editor” (Edison) or “Edit in time warper” (NewTime):
Edison is FL Studio’s stock audio editor. With it, you can normalize, reverse, de-noise and more. Let’s have a quick look with an example:
To make the loop a bit more interesting, I am going to reverse the last 4 beats of every bar:
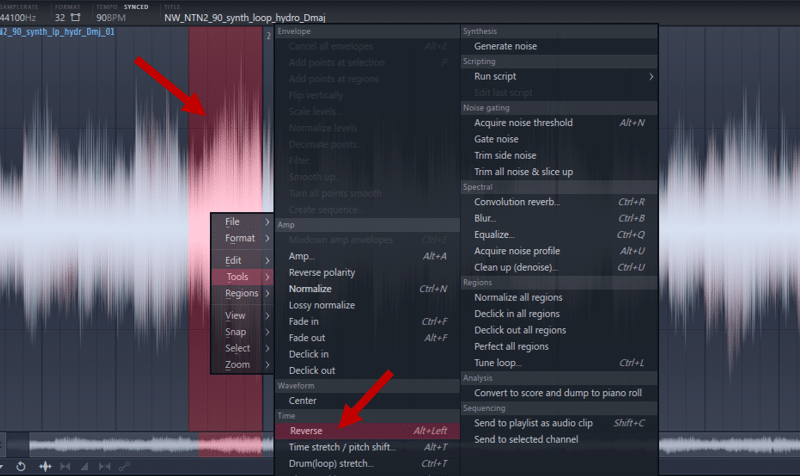
You can also play with the pitch of different sections to create entirely new melodies. You can also use the “Claw machine” to remove blocks of audio from your loop. This works best with drum loops, but can yield interesting results with melodies too:
In this example, I’ve also added a bit of “Blur” to smear the audio:
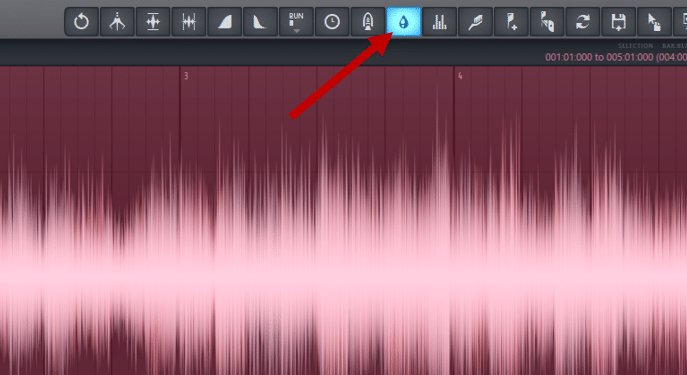
On the other hand, NewTime is FL Studio’s time manipulation editor. It’s great for drum loops that you want to warp and stretch out:
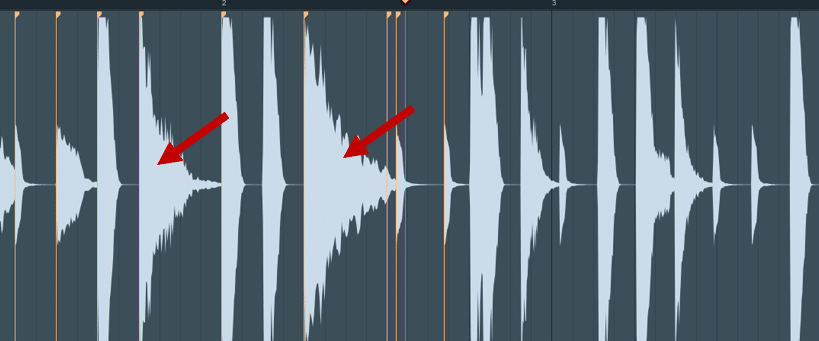
Looping and Editing in Ableton Live
Ableton Live also offers a ton of tools to edit your loops. A key feature is the “Warp markers”. These let you stretch our individual sections of your loop:
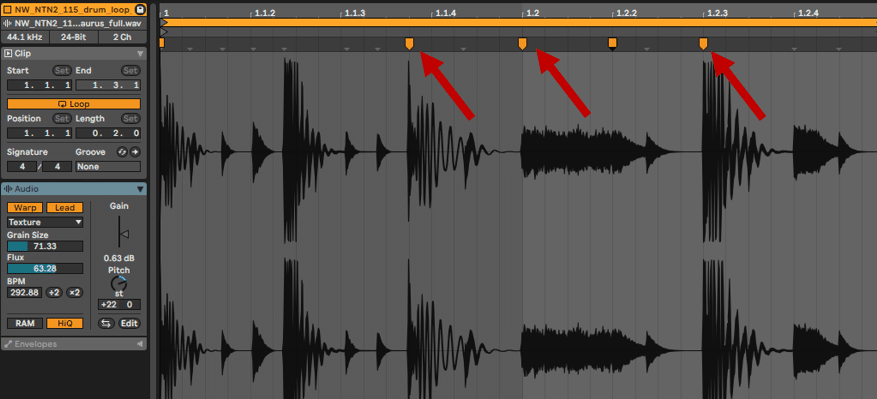
You can place as many Warp markers as you want. This way, you can completely transform melodic or rhythmic loops.
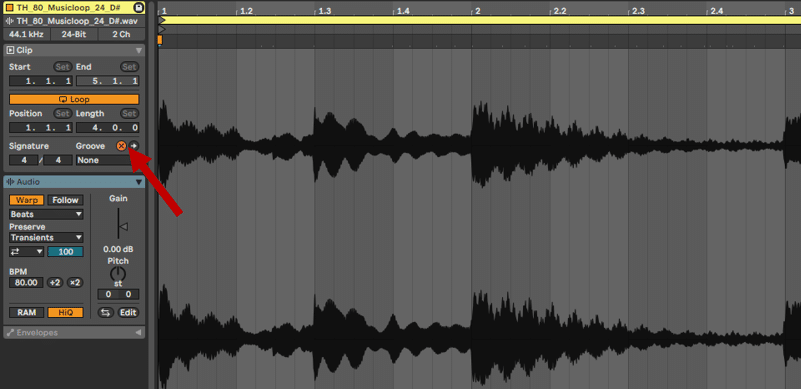
One amazing tool that makes Ableton Live unique is the Groove selection. This basically enables you to “infuse” a groove into any loop.
To do this, enable “Hot-swap mode” This will let you switch out Grooves on the fly. Next, select a groove from the browser, and adjust the settings to taste:
What Is Looping Audio Live?
So far, we’ve looked at looping in the context of “repeating an audio sample” in a track.
However, looping can also refer to a section of your song that you play on repeat.
There are several reasons you might want to do this:
- auditioning samples over a certain section
- jamming on your MIDI keyboard or instrument
- adjusting the post-processing of a sound
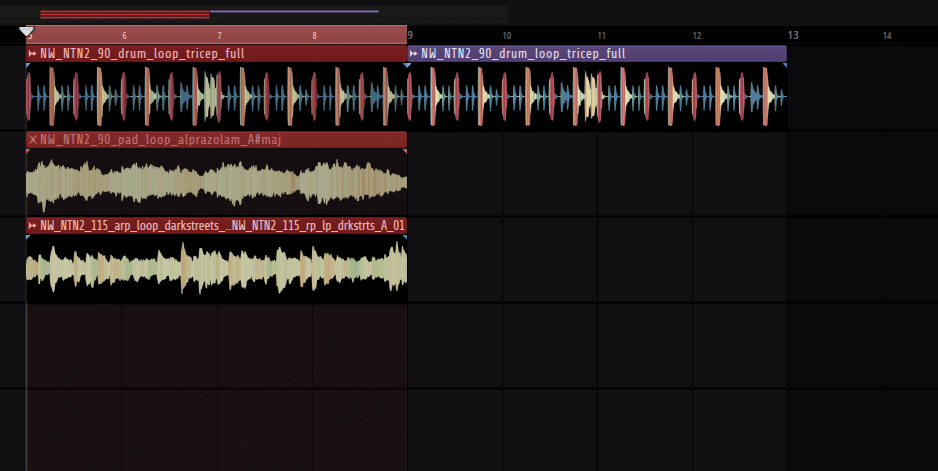
In FL Studio, simply hold CTRL and select the section that you want to loop:
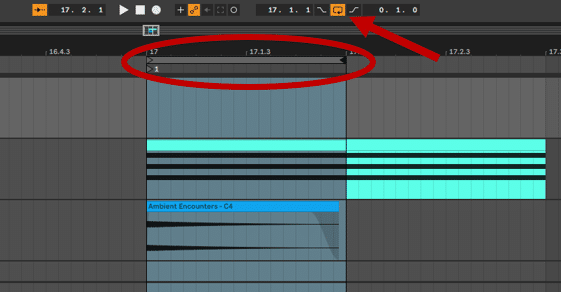
In Ableton Live, enable “Loop Switch”, then set your loop points:
Looping audio is one of the best ways to adjust audio in context.
Let’s say for example I want to adjust the ADSR envelope of a a pluck. Why not do it “in context” instead of just soloing the sound? Simply loop a section of the song, and let it play on repeat while adjusting:
Looping also works great if you’re trying to figure out a melody. Instead of playing in isolation, let the section of your track loop. Now, you can experiment in real time to find a melody that fits.
Loop Recording
Loop recording is the process of looping a section of your song, and recording something new each time. This might be useful if you want to record several layers of a vocal. Or maybe you just want to experiment with different melodies, and then select the one you like most.
To set up a loop recording in FL Studio, enable it at the top of the window:
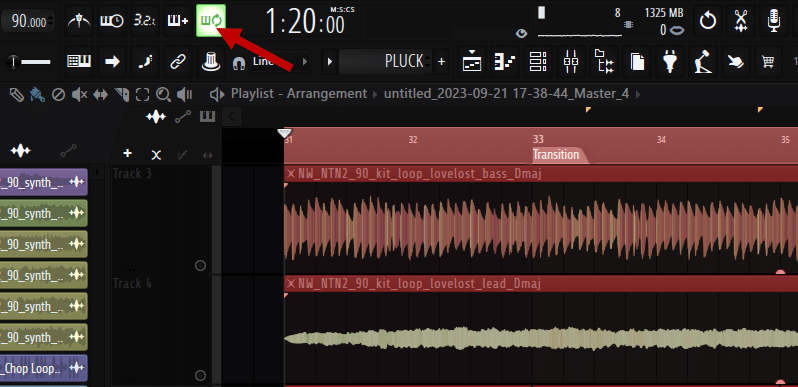
The great thing is that this works with both audio and MIDI recording. The only difference is that you need to enable “Audio” or “Notes” recording first. To do this, simply right-click the recording button:
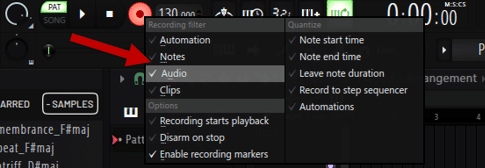
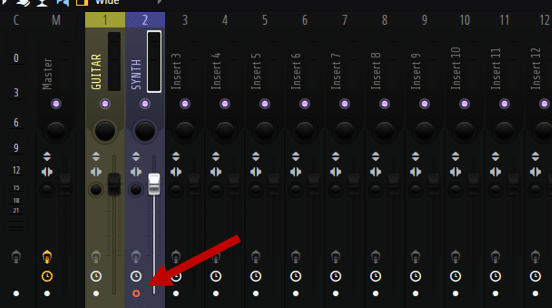
The last thing to do is to make sure you’ve armed the recording on the right mixer track:
When looping and recording, you usually have 2 options:
- automatically mute what you’ve just recorded
- hear what you’ve recorded
In the first case, you can record multiple takes without having to mute each track. This mode is set by default when you enable loop recording.
The second case is what we call “Blend recording” or “overdubbing”.
This version of loop recording lets you hear what you’ve just recorded. This is great if you want to instantly add layers or harmonies to a melody. To enable “blend recording”, just select it at the top of the window:

Here’s an example of a blend recording:
You can hear that with each new playback of the loop, I have recorded something new.
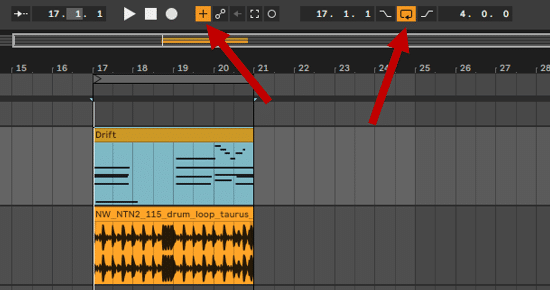
To enable Overdub recording in Ableton Live, enable both the “Loop Switch” and “MIDI Arrangement Overdub”:
That’s It for This Guide on What is Looping! 🙏
That’s the end of the loop for this guide 😉 Looping is one of my favorite tools to jam by myself and create great song starters.
I hope you learned something new here that you can apply to your music. Got any questions? Did I miss out on anything? Drop me a line over at [email protected]


