Beginner producers often overlook learning to compress bass. And when mixdown time comes, it can become a huge problem.
The bass is the foundation of any EDM track. Without a solid low-end, your track loses energy and momentum.
And bass compression is the key to getting a consistent, powerful bass sound! So in this guide, we’ll cover:
- Why bass compression is important
- Different techniques to compress your bass
- How to use parallel and multiband compression effectively
- 3 common mistakes to avoid when compressing bass ⚠
So let’s get started! 👇
A Quick Reminder on Compression
First off, let’s do a quick reminder on compression.
Compression is a tool like any other. There’s nothing mythical or magical about it. In fact, compression can be understood in a simple sentence:
It’s just volume automation.
That’s right. Behind all the buzzwords and complicated parameters, compression is just volume automation:
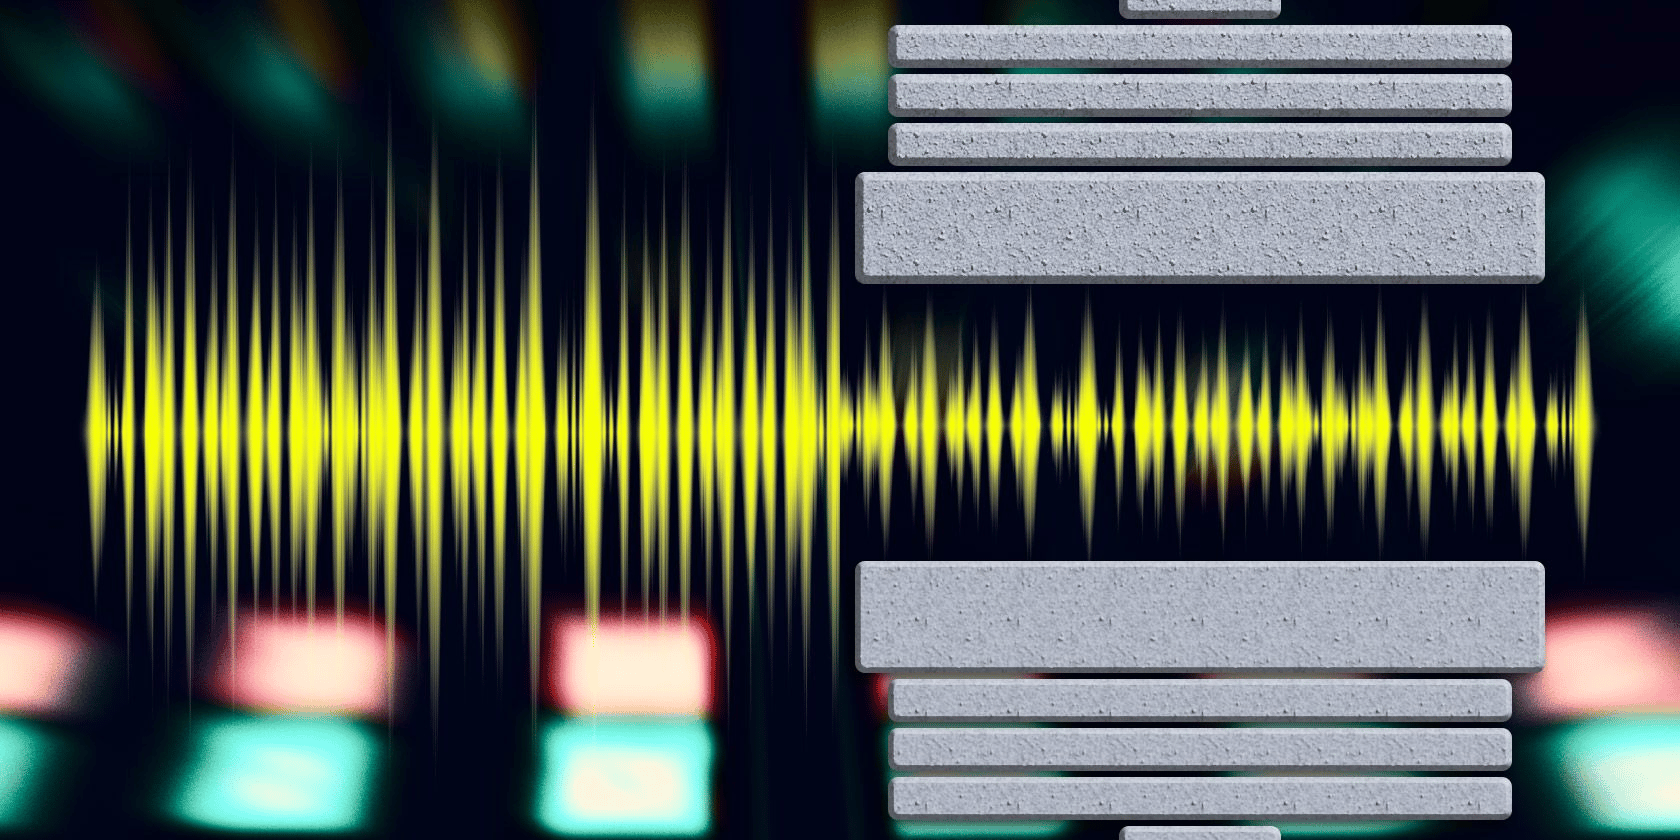
The only thing is that compression acts on volume really fast. Like, “a few milliseconds”-type of fast.
Essentially, compression turns down an incoming signal when it gets too loud. It then turns it back up when it’s quiet again. Pretty simple right?
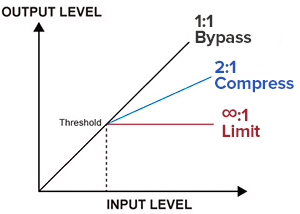
With compression, there are 5 key parameters:
- Threshold. This is the dB level at which the compressor is activated.
- Ratio. The ratio sets how much the signal is compressed.
- Attack. How fast the compressor jumps into action to compress.
- Release. How fast the compressor stops compressing the sound.
- Gain. Gain serves to boost the overall level post-compression.
Now that we know what compression is, let’s see how to compress bass specifically.
Looking to dive further into the world of compression? Check out our detailed guide here!
Why Do We Need to Compress Bass? 🤔
In music, some sounds have a lot of dynamics. This means there’s a big difference between the loudest and quietest parts:
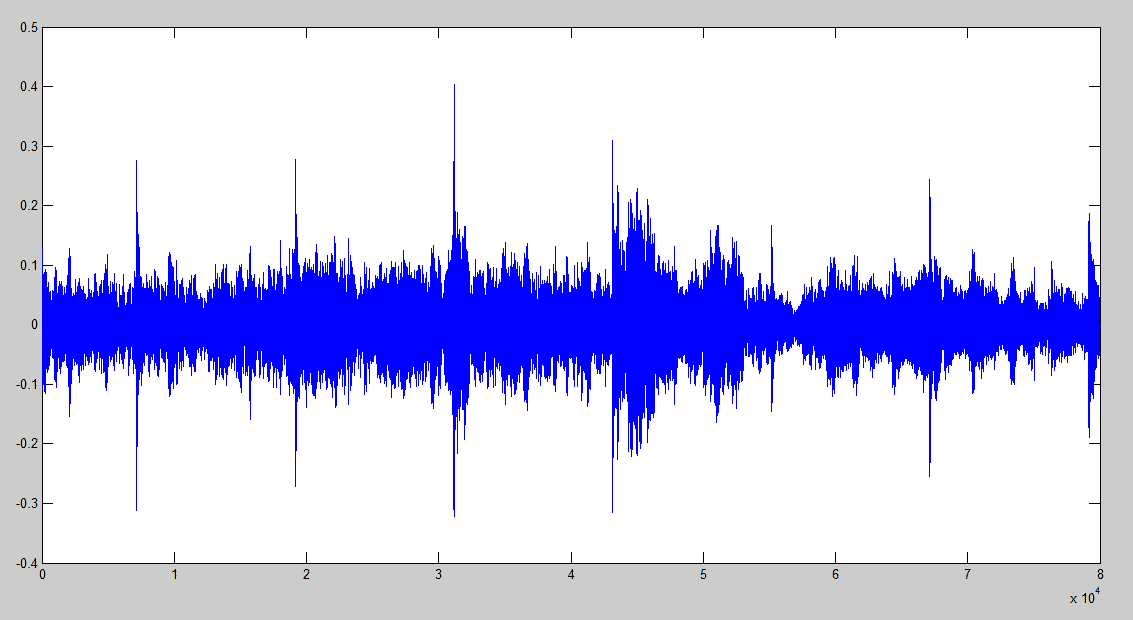
Compression can be used to smooth out the peaks of a signal. But it can also enhance the quietest parts thanks to makeup gain.
When you don’t compress bass, each bass note will fade out quickly.
This means you lose a lot of energy and “fullness” in the low end of the mix. With bass compression, each note will retain its volume, giving steady energy to your track.
How to Set Up Bass Compression
Let’s look at a practical example. You’ve got your bassline, but it’s lacking energy. And simply turning up the volume doesn’t quite cut it.
This is when you should look at bass compression.
First off, load a compressor plugin on your bass. Set the ratio to 3:1 or 4:1:

Set your Attack to around 100ms and your release between 20ms and 40ms.
Next, start decreasing your threshold until the compressor is triggered.
On a plugin like Fruity Compressor, this might be hard to hear. To compensate for the lack of visual aid, you can load something like Fruity dB Meter. You can also use Fruity Limiter in “Comp” mode for visual aid.
In Ableton Live, luckily you have the gain reduction written out for you:
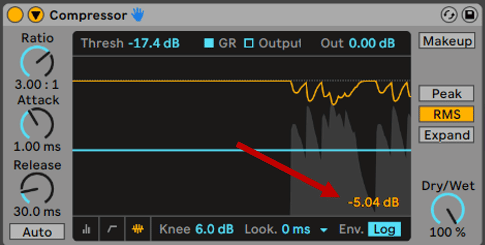
Aim for somewhere between 5 dB and 8 dB of gain reduction.
Next, you can start slowly decreasing the attack time. This will make your compressor act faster.
Decrease your attack until it starts messing with your transient.
That’s when you know you’ve overdone it. You can then back off by a few milliseconds.
Getting the release time right is a bit more tricky with bass compression. You will need to experiment here to see what sounds right.
With the release time, you’re looking for a setting that will “groove”.
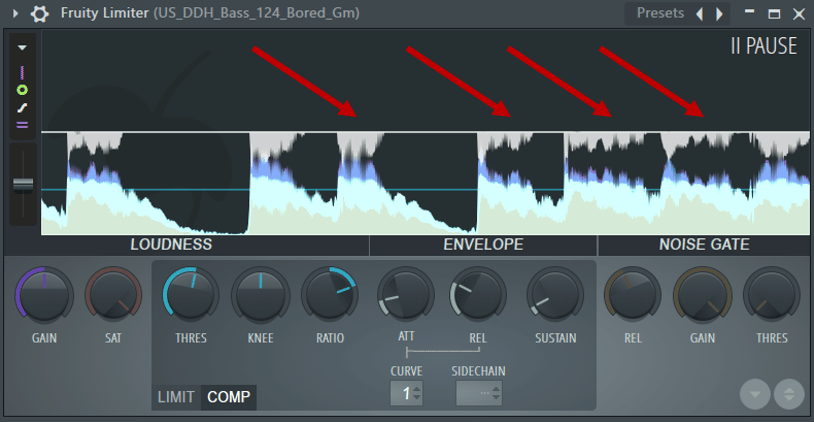
This means you want the compressor to open up roughly in time for the next note to play.
In the example above, the compressor has time to reset between notes. I have the release set at 20ms here. But this will depend on the tempo of your track.
As a rule of thumb, you want a faster release for fast bass parts. Conversely, you’ll need slower releases for slower bass parts.
Serial compression
One issue you might run into is that your bass needs a lot of compression.
But setting a low threshold and high ratio results in a squashed, unnatural-sounding bass. To remedy this, you can use serial compression:

Instead of letting one compressor do all the heavy lifting, you share the workload. Each compressor will apply 2-3db gain reduction, resulting in the overall compression you need.
When using 2 or 3 compressors in series, your ratios don’t need to be as high. Aim for somewhere between 2:1 and 3:1, then duplicate the compressor.
One Step Further: Parallel and Multiband Compression
Now that we’ve looked at some basic bass compression, let’s go a bit deeper. Parallel and multiband compression, although more advanced, are not only reserved for professionals. So let’s see how we can apply those concepts to compress bass.
Parallel Compression
Parallel compression is the art of mixing an unprocessed (“dry”) and a compressed (“wet”) signal together. This allows you to dial in just the right amount of compression.
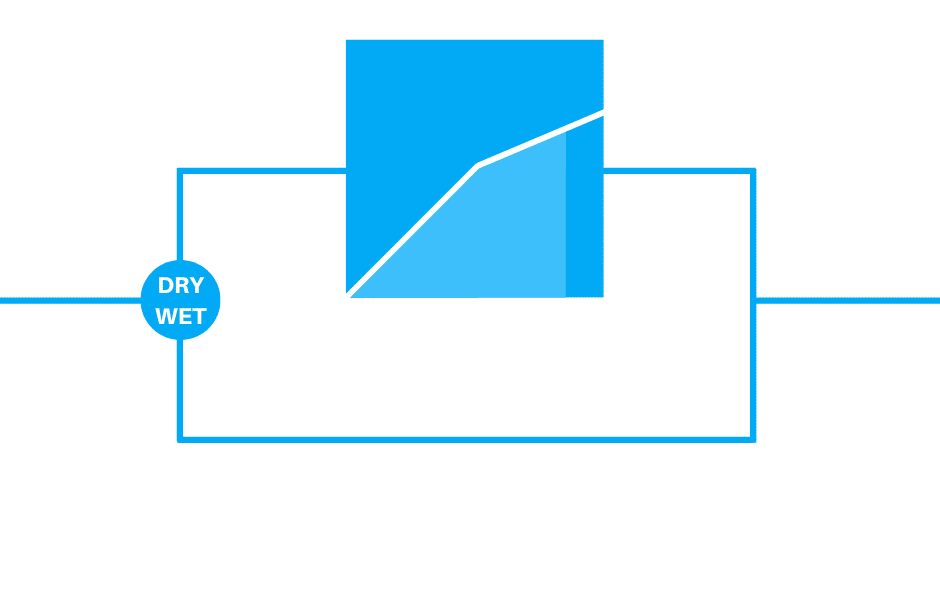
Saturation and distortion are often used to enhance the presence and punch of the bass. But too much saturation can quickly muddy up your low-end.
This is why it’s often better to process your bass in parallel. This will ensure you don’t lose too much focus in your low-end.
This is also true when you compress bass! Overdo it, and you run the risk of losing all energy in your track.
By setting a parallel signal, you can compress your bass a lot more than you would on the main channel. But pay attention to two things here:
- Phase cancellation. This can occur when using multiple instances of the same signal. To make sure your two signals aren’t canceling each other out, use a free plugin like SPAN. Or even better: mix in mono 😉
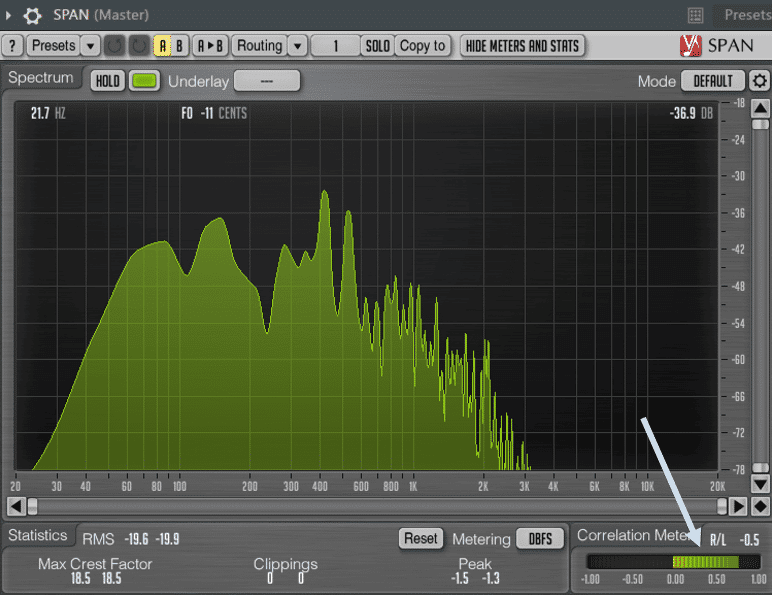
- You will also need to do some EQ work to make sure your low-end isn’t overlapping. The sub-bass area (roughly below 100 Hz) needs particular attention here.
If you don’t want to EQ specific regions, there’s a secret weapon: multiband compression 👇
Looking to learn more about parallel compression? We have you covered!
Multiband Compression
Among all the tools available to compress bass, I find that multiband compression is the most useful one:
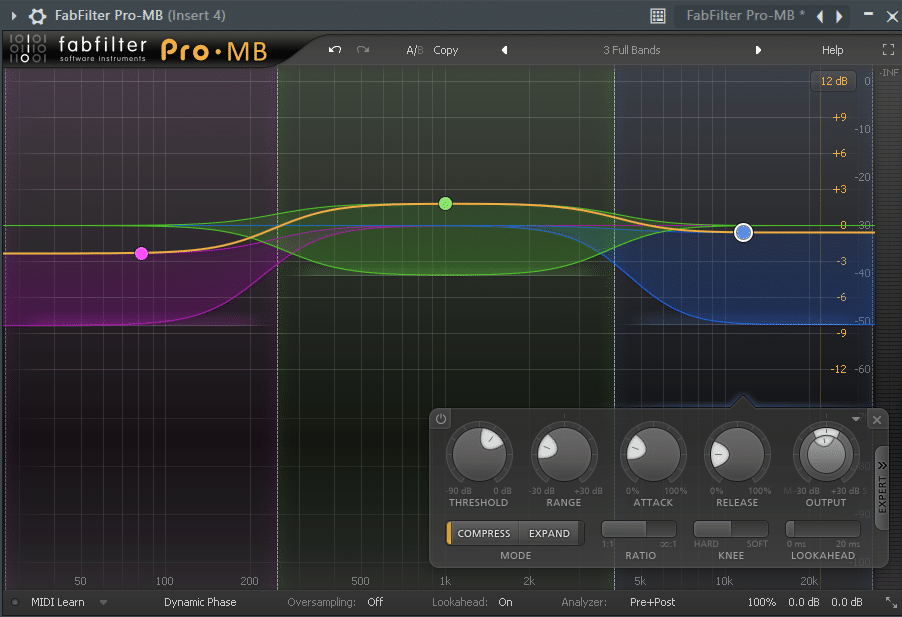
Instead of applying a one-size-fits-all compressor, you tailor it to each band. Now you can control the mids and highs differently from the lows.
This is why multiband compression works great on bass.
You can tighten up the low frequencies without affecting the mid-range frequencies. This reduces the “booming” sound of the sub while leaving the attack of the sound in the higher frequencies intact.
“Wait, so does this mean I should put an OTT on all my basses?“
Well, not exactly. Xfer’s OTT is probably one of the most famous multiband compressors out there. But it’s also a very aggressive plugin:
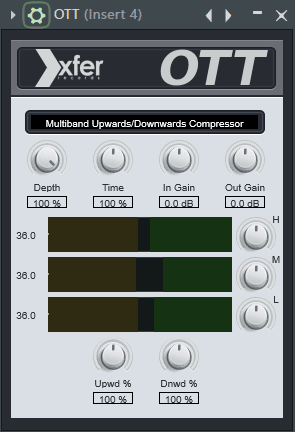
If you’re not familiar with it, OTT is a multiband upward and downward compressor.
Downward compression is your classic compression. If a sound gets above a certain threshold, it gets compressed.
Upward compression is the exact opposite. If a sound gets below a certain threshold, it gets boosted.
This can work wonders when you compress bass. For example, your sub might sound great but your mids need more presence. This is where you can reach for an OTT. OTT also works great when you have several bass layers that you want to glue together.
However, OTT is quite an aggressive plugin. By default, the ratios are high and the attack and release settings are fast. This means that your sound will quickly sound “slammed”. For genres where the bass is front and center such as Slap House or Dubstep, this is a blessing.
But if you’re looking for subtle enhancements, try using a standard multiband compressor such as FabFilter Pro-MB.
Looking to bring your bass compression even further? Check our out multiband compression guide!
4 Common Mistakes to Avoid 🛑
Finally, let’s wrap things up with some common mistakes when it comes to bass compression.
Choosing the Wrong Notes
What do you mean by “wrong notes“? Isn’t music supposed to be subjective? Well, yes and no.
When it comes to your sub-bass, some notes are better than others.
Specifically, notes between D# to G are the best candidates. Ever notice that many tunes are written in F minor?
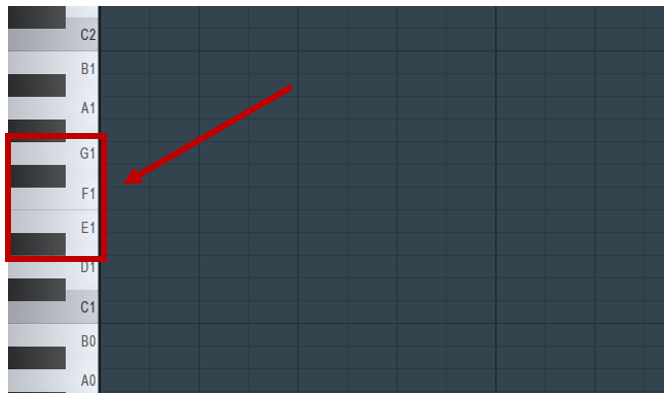
This is because the low F note hits at roughly 43 Hz. This is often a sweet spot on car and club speakers.
If you go too low under D#1, you will struggle to hear the bass on a standard system. Going too high above G1 and your bass won’t have enough “oomph”.
This doesn’t mean you have to restrict yourself exclusively to those notes.
Octave jumps for example are a common trick in bass melodies. But when your drop hits, try to stick to the D# to G region.
Bringing it back to bass compression, look at the notes you’re playing first. Switching out one or two notes might help enhance the bass’s presence. And you’ll avoid unnecessary processing!
Use the Context of Your Mix!
When played solo, your bass might sound amazing. But it’s difficult to judge a sound in isolation.
This is why you should always check your bass within the full mix.
This is where you will notice if it lacks energy or focus:
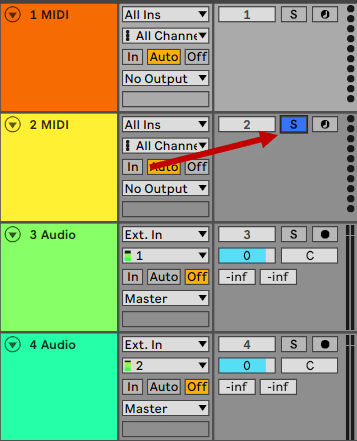
More specifically, always check your bass in relation to your kick. Your kick-bass duo is the most fundamental element of any Dance music genre. Beyond bass compression, use EQ and sidechain compression to make your kick and bass work together.
Also, don’t slap an OTT on your bass just for the sake of it. Some bass sounds might actually not even need compression! Always use your ears and intuition first.
Mono or Stereo Bass?
Here at EDMProd, you’ve gone to great lengths to cover the topic of stereo imaging. We’ve even done a full video covering the topic:
In 99.99% of cases, you want your sub to be mono. This is because a subwoofer is a single-channel speaker. This means that a stereo channel in the subfrequency will be collapsed to mono. This can lead to the infamous phase cancellation problem.
Your mid-bass can be slightly stereo. This will give a sense of space to your bass while leaving the sub down the center.
In FL Studio, one plugin I like to use for this is the Frequency Splitter:
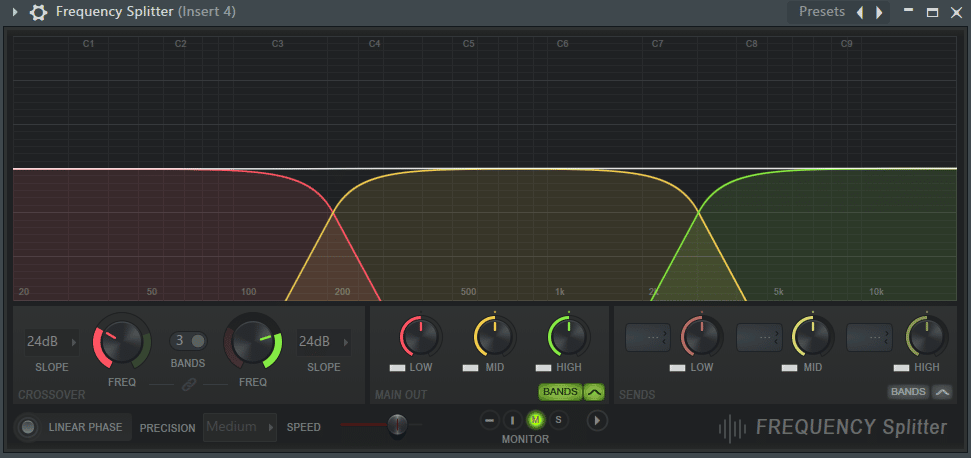
With Frequency Splitter, you can easily split a signal into 2 or 3 bands. You can then send each band to a different mixer track for further compression.
In Ableton Live, you can achieve a similar result with the Audio Effect Rack. Right-click on the empty space to create 3 chains: low, mid, and high.
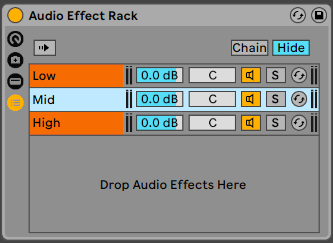
What we’ve done here is duplicate our bass into 3 chains. We can now place an EQ on each chain to isolate the frequency range we want. Finally, we can then compress each region to our liking.
That’s a Wrap!
That’s it for this guide! Hopefully, I could provide you with some tips and tricks regarding bass compression.
Is there any technique that I missed out on? Let me know over at [email protected]!
