If you’re struggling with muddy mixes, Soothe 2 might be your savior.
In a nutshell, Soothe 2 identifies problematic resonances and applies gain reduction automatically.
Need to give your vocals more clarity? Too much muddiness in your bass? This is what Soothe 2 was made for!
Although it might sound complex, the process is surprisingly straightforward. In this guide, we’ll cover:
- What dynamic resonance suppression is
- How Soothe 2 works under the hood
- The main parameters of Soothe 2
- My favorite application of Soothe 2 👀
So let’s get started! And if you’re already convinced, you can grab Sooth 2 here.
Note: dynamic resonance control is quite an advanced topic. So if you’re just getting started with production, this might not be the guide for you. 😅 However, I have tried to make it as digestible as possible. Before diving in, ensure you are familiar with the concepts of EQ’ing, stereo imaging, and ADSR.
What is Soothe 2? 🤔
So, what is Soothe 2?
Soothe 2 is a dynamic resonance suppressor.
Thanks for coming to my Ted Talk, any questions? 😅 All jokes aside, let’s break down what this means.
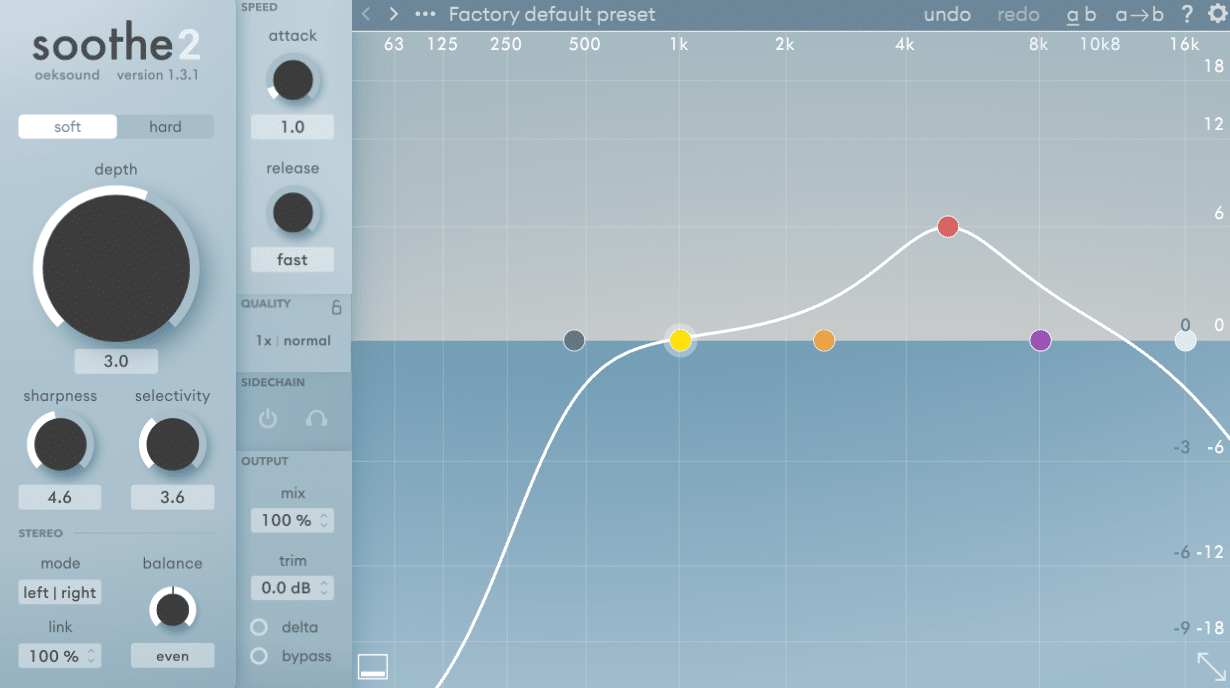
- Dynamic means that changes happen in real time based on the input. Think of it as the opposite of your standard EQ. When you make a low-cut, it stays there for the entire track. Soothe2 reacts in real time based on the frequencies it detects.
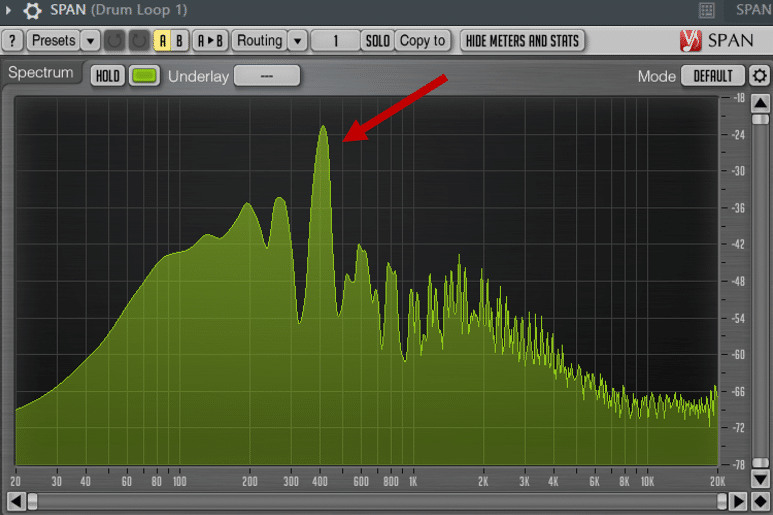
- Resonance is a buildup in amplitude at a given frequency. The resulting sound is often unpleasant. You will often find multiple resonance points in any sound:
- Suppressor means that the resonances are… suppressed! Of course, Soothe 2 lets your dial in how much suppression occurs.
So there you have it. Soothe2 detects in real-time any frequency buildups and reduces them when they become too loud.
This makes Soothe2 a bit of a magic wand. Wave it at any sound, and it will detect any unpleasant frequencies and tame them.
But there’s much more to Soothe 2 than that. So let’s explore 👇
A Quick Reminder on Resonances and EQ 👂🏻
Before we dive further into Soothe 2, let’s do a quick recap on EQ’ing and its importance.
At its core, EQ, short for equalization, lets you change the volume of specific frequencies of a sound.
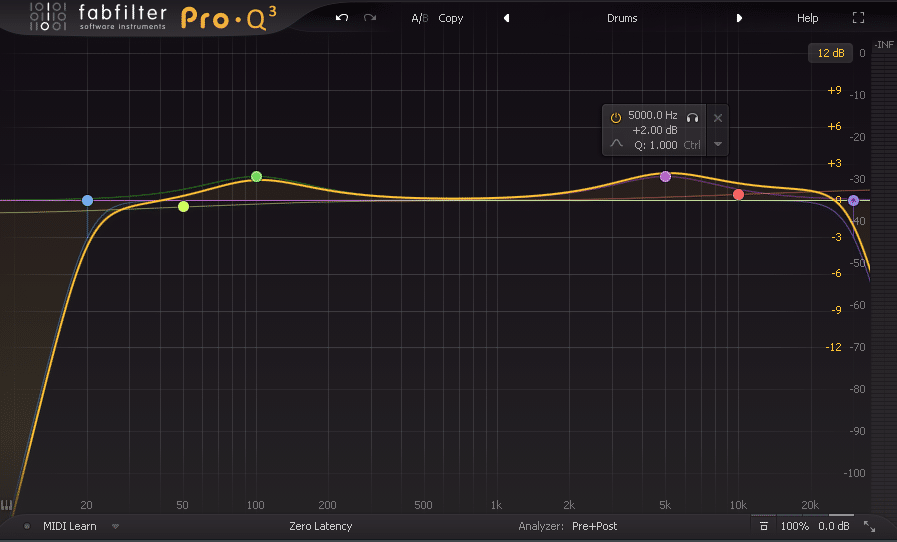
EQ’ing is a fundamental tool of music production – for mixing but also creative sound design.
Resonances happen when there is a buildup at a specific frequency.
This can be due to the nature of the instrument or sound design choices. In any case, this can result in an unpleasant humming, hissing, ringing, or harshness.
Although standard EQ’ing can help remove certain resonances, it does present an issue.
An EQ plugin changes the sound in a static way. This means that a boost or a cut will apply for the whole time the sound plays, without changing:
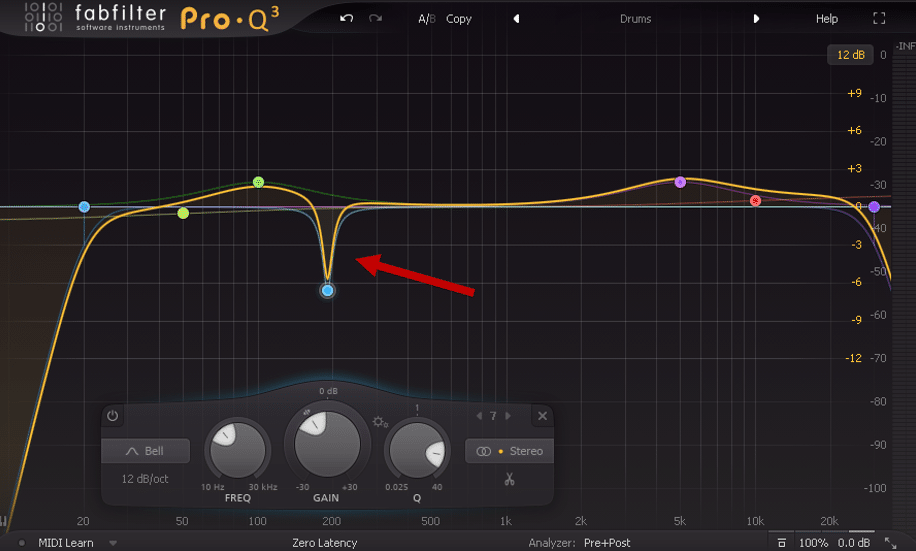
However, resonances are a dynamic process. They appear and disappear based on the notes you play.
So with a standard EQ, you might end up removing frequencies when there is no resonance issue!
This is where a plugin like Soothe 2 comes in. With dynamic processing, you can remove harsh frequencies only when they build up . This means you are not cutting out frequencies when they aren’t causing problems.
The Main Parameters of Soothe 2 🎛️
Now, let’s look at the main parameters behind Soothe 2:
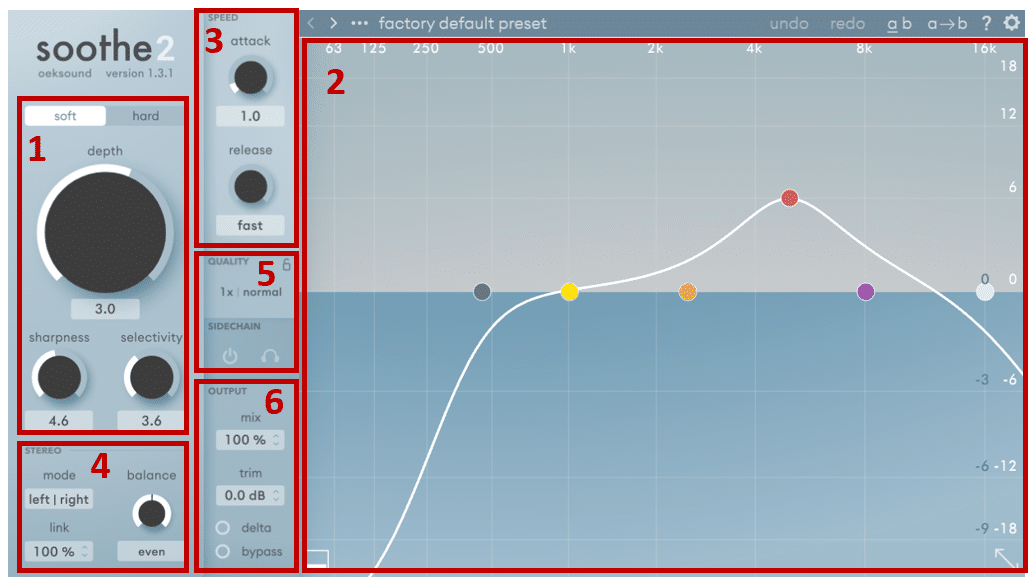
1. Depth, Sharpness and Selectivity
Firstly, let’s take a look at our main control: depth. It’s the biggest knob, so it’s probably important 😅
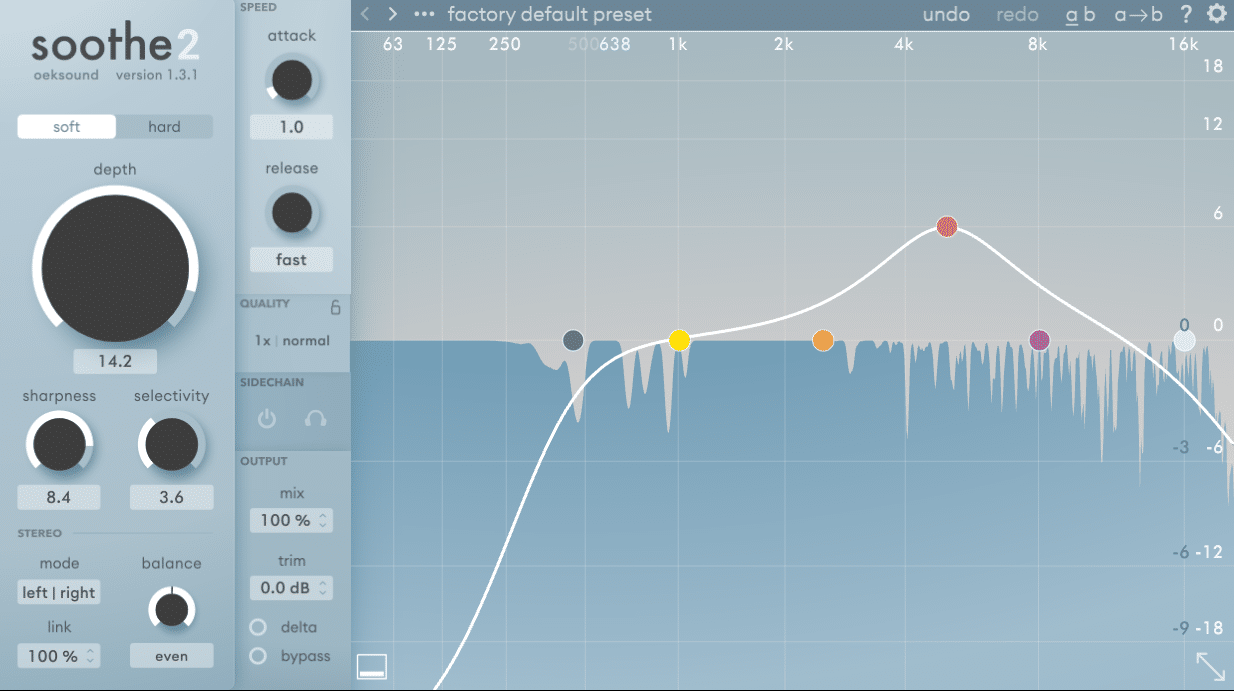
Depth controls how much processing happens.
Add more depth, and you will get more resonance suppression. Add less depth, and you’ll get less resonance suppression:
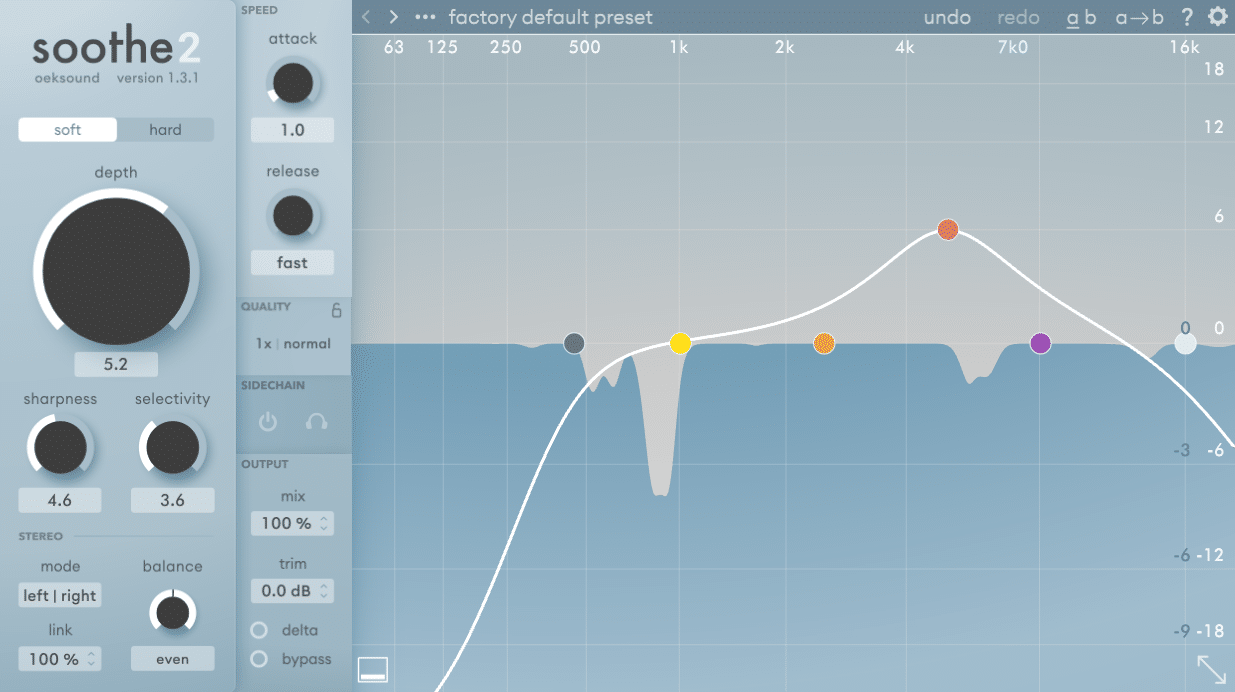
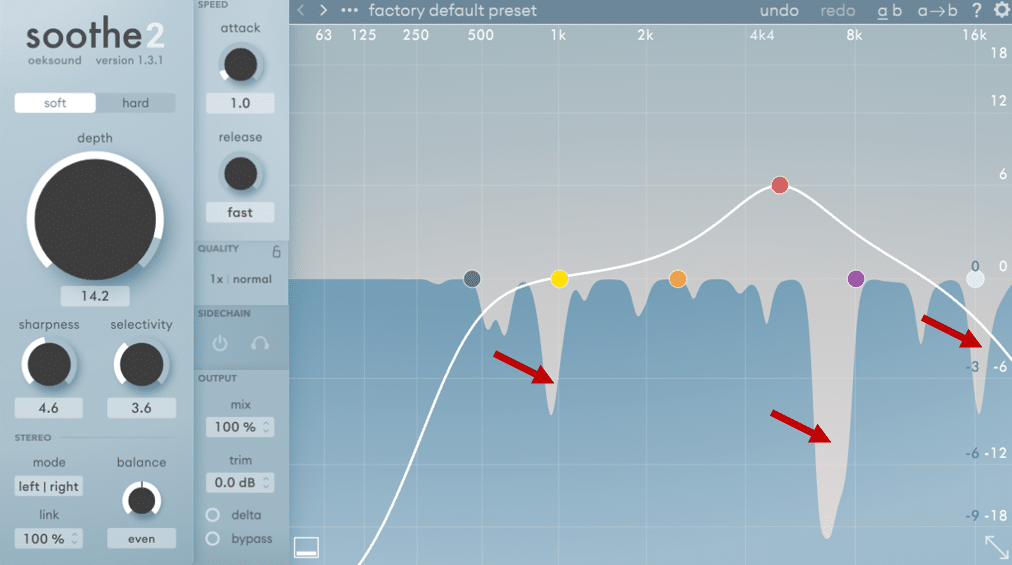
The frequencies that are being suppressed are shown in grey.
Sharpness acts a bit like a q-value of EQ band. Increase the sharpness, and you will get deeper and narrower cuts:
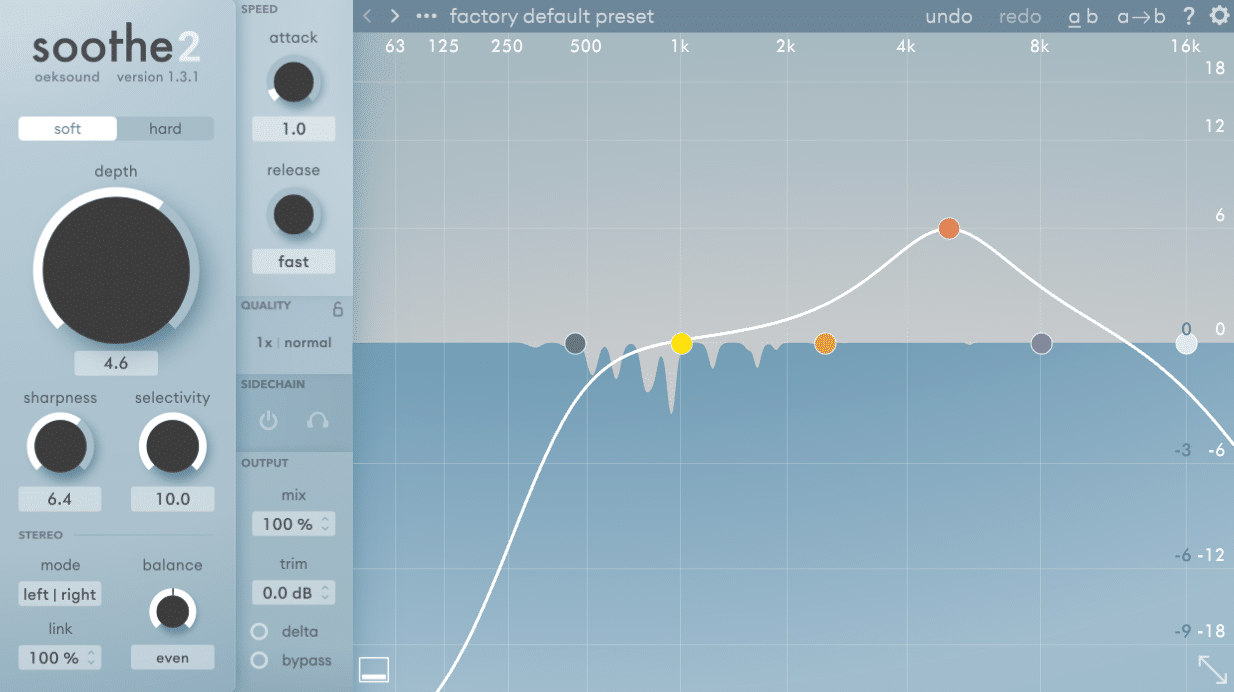
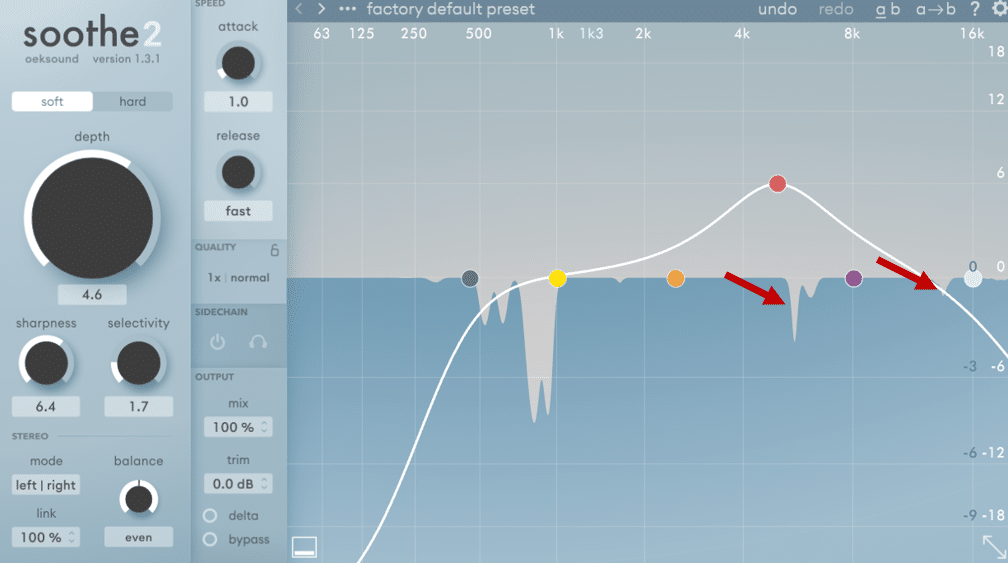
Finally, selectivity lets you control how many cuts Soothe 2 makes.
Increase the selectivity, and Soothe 2 becomes more… selective. And vice-versa:
Let’s listen to an example:
The change might sound subtle, but mixing is a subtle art.
When you have 20 different tracks playing at the same time, unpleasant frequencies stack up one by one. That’s why it’s so important to take care of resonances.
Wanna dive deeper in the world of EQ’ing? Check out this video from Aden:
2. Frequency Bands of Soothe 2
Next, let’s look at the main graphic window of Soothe 2:
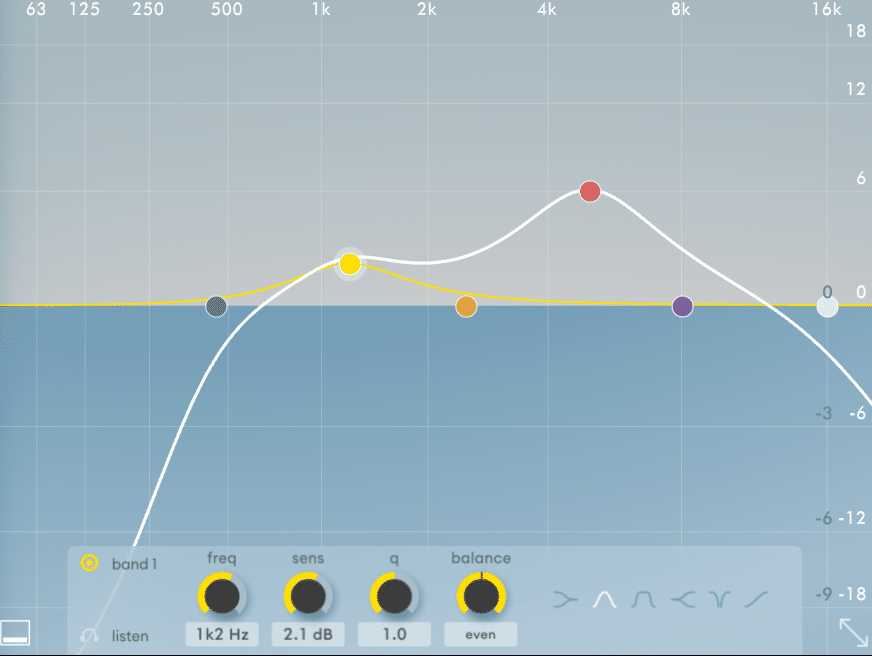
Although this looks like an EQ curve, it’s actually the opposite!
By boosting certain frequency regions, we are telling Soothe 2 to add more soothing, i.e. suppress resonances. Have a look:
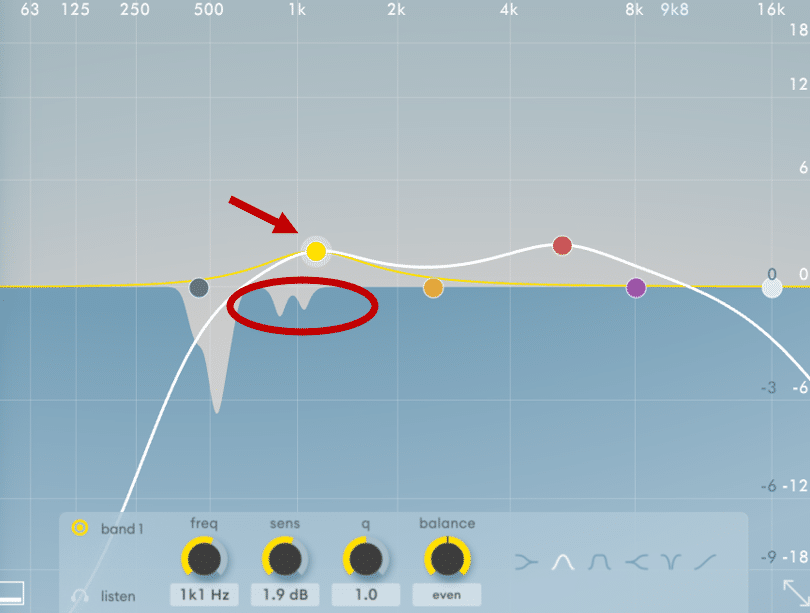
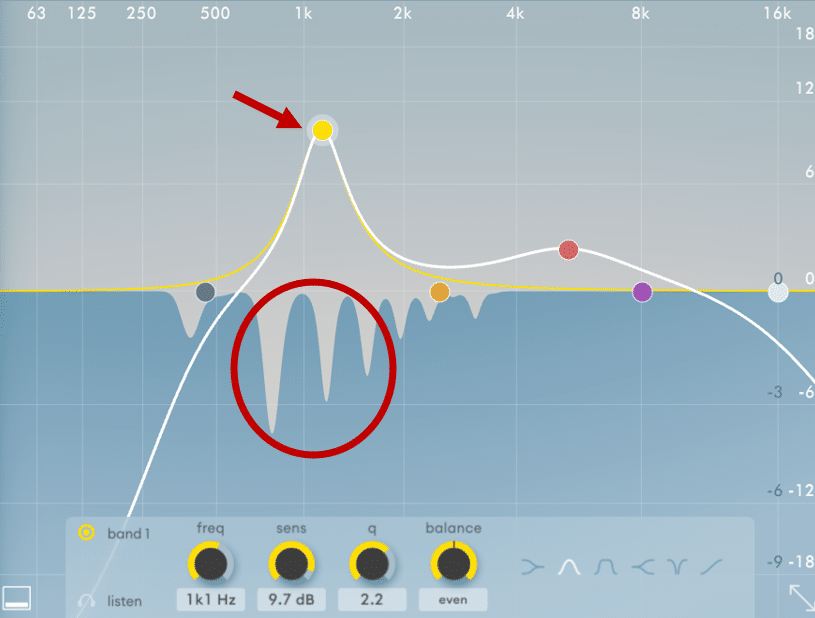
In my opinion, this is what makes Soothe2 truly special.
At first, the resonance detection works automatically. But you then have a great amount of manual control on specific frequency regions. Is too much suppression happening in the highs? No problem, just grab a high-shelf band:
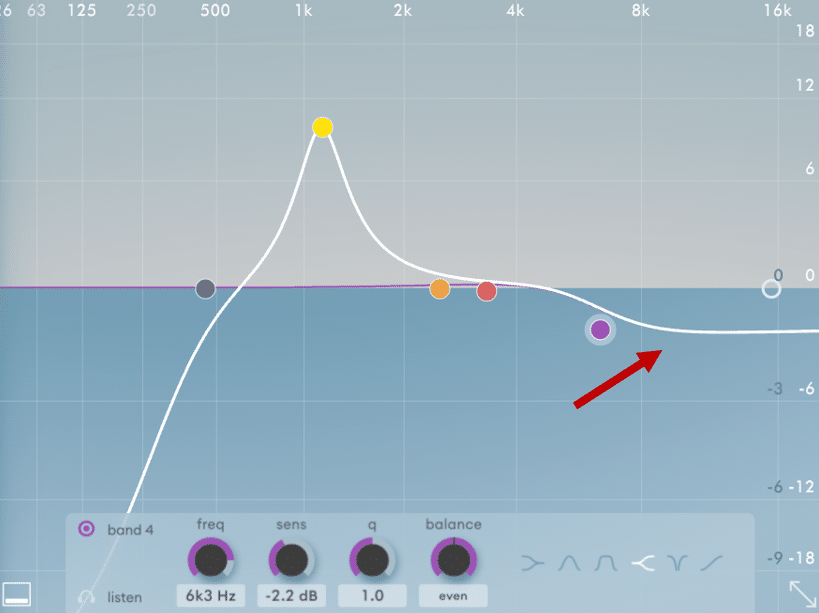
In my opinion, this gives Soothe 2 a great balance between “automatic processing” and “manual control”.
3. Attack and Release
If you’ve played with any dynamics plugins such as compressors and transient shapers, these settings will be familiar:
- Attack dictates how quickly Soothe 2 reacts to resonances. A low attack value means resonances will be suppressed almost instantly.
- Release determines how quickly the processor stops acting on resonating frequencies. Setting a low release time means Soothe2 will immediately stop cutting frequencies once a resonance has disappeared

Be mindful of the source sound you are processing.
Setting fast attack and release times can mess with the transients and introduce artifacts. This is especially true on vocals:
Notice how the vocal now sounds almost bitcrushed? This is the result of setting your attack and release times too low. This is even more prevalent when setting a high sharpness:
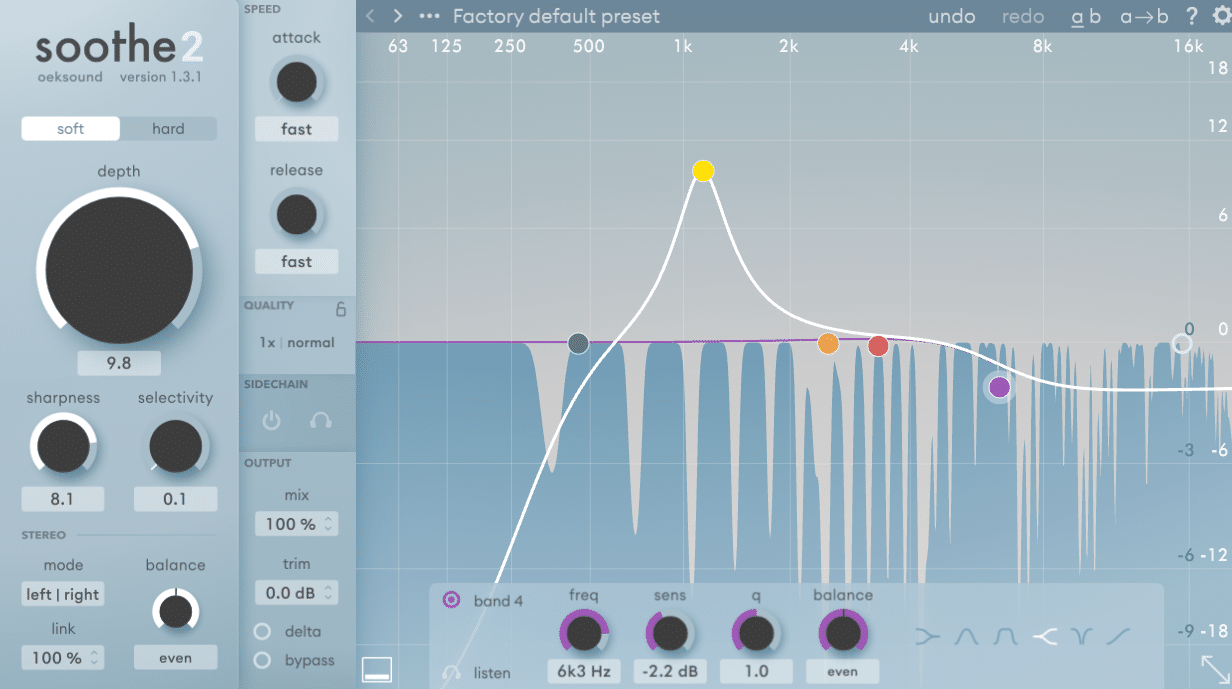
The more notches Soothe2 creates, the more artifacts have the potential to appear.
4. Stereo Controls
Moving on to the more advanced section of Soothe 2, we have the stereo controls:
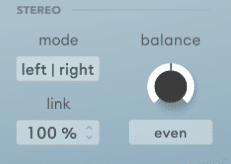
This lets you decide which parts of the stereo field are processed. You have two modes available:
- Left – Right: this lets you apply Soothe2 to the left or right channel, or anything in between
- Mid-Side: processing will be applied to the mid or side channels or anything in between
If this sounds a bit confusing, make sure to check out our article on stereo imaging 🔥
Here are a few examples:
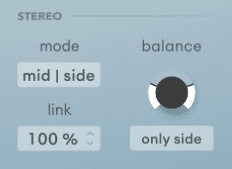
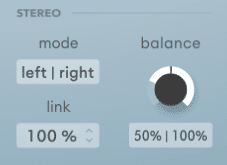
Setting the “link” control at 100% means Soothe2 will sum both channels and apply the same processing to both. Conversely, a 0% “link” means Soothe 2 treats both channels independently.
Let’s say you have a bus track with elements panned hard right and left.
With Soothe 2 on the bus track, decrease the link percentage. This will let the processing act on the L and R channels in isolation.
5. Quality and Sidechain
The quality section of Soothe2 lets you control oversampling and resolution settings.
Without getting too technical, higher oversampling and resolution will demand more CPU. But they will result in higher quality and precision.
One cool feature is the ability to set a different “offline” quality:
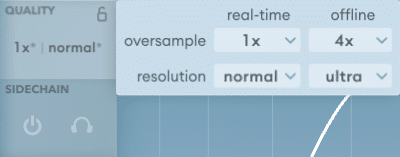
This means that any rendering you do will pick the “offline” settings, i.e. the higher quality.
The sidechain section lets you choose an external input for resonance detection. But more on that one later… 😉
6. Output
Finally, the output section determines what you actually hear through your speakers:
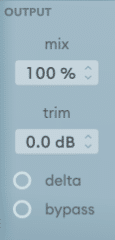
In order, we have:
- “mix” acts as your standard dry/wet knob
- “trim” lets you compensate for any loss in volume
- “delta” will let you hear what Soothe2 is actually removing
- “bypass” lets you… bypass the plugin entirely 😁
Here are 2 cool ways to use these features:
Enable “bypass” and boost any band with a narrow bell shape. Then scan for unpleasant frequencies:
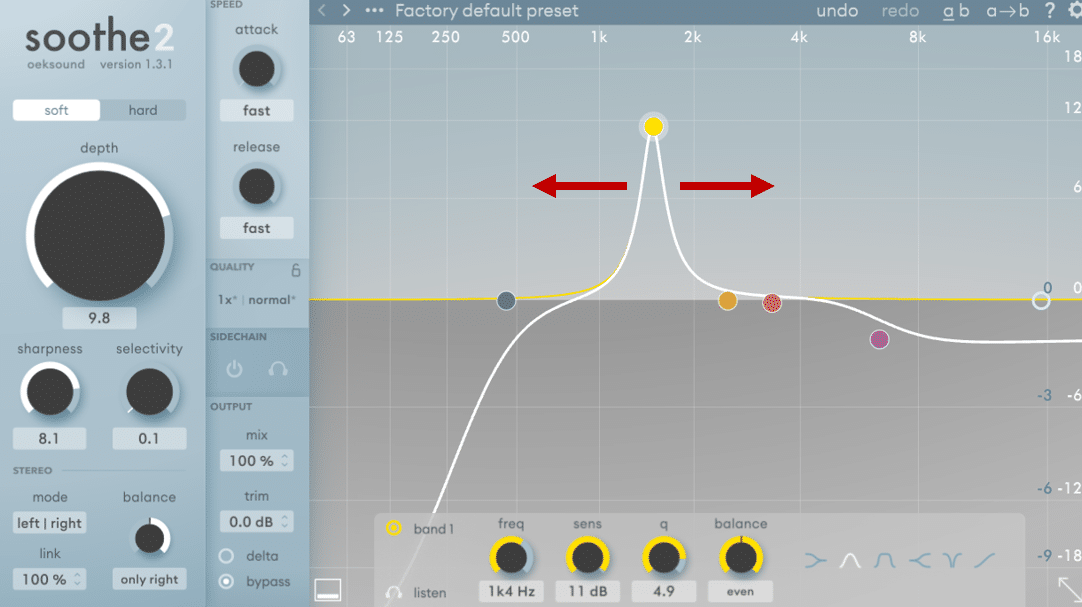
Once you find any harsh frequencies, reduce the bell sensitivity and disable “bypass”.
Another trick is to use the “trim” level for A/B testing.
Because Soothe 2 is removing frequencies, the end result will always be quieter. To properly check your processing, set the B side of Soothe 2 to the preset “Flat start”:
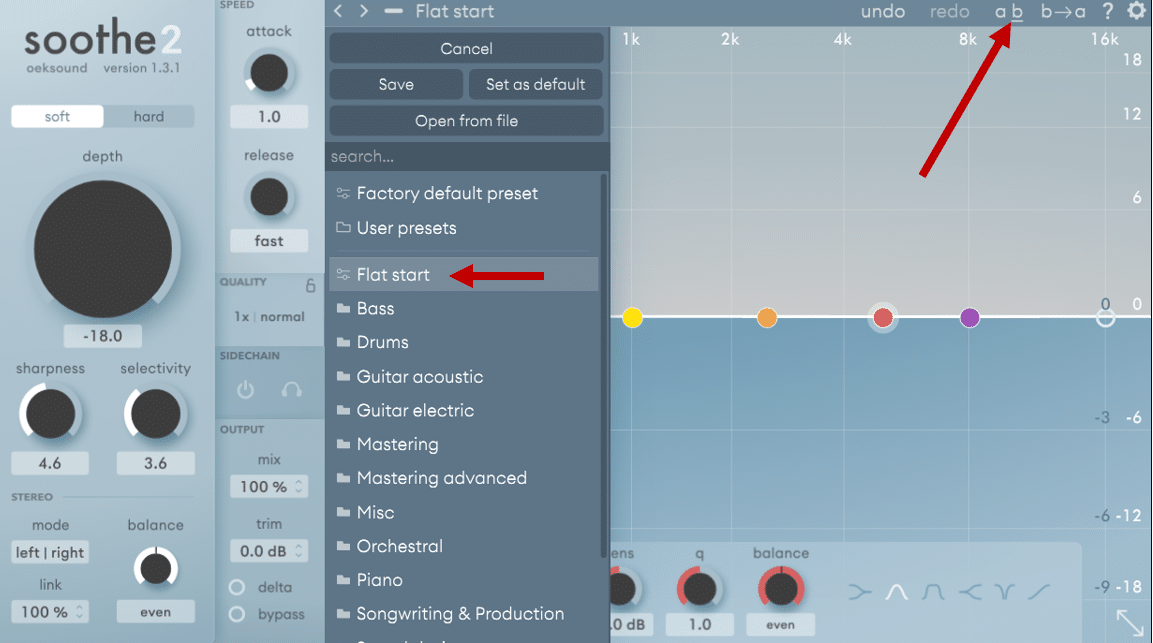
When you are done processing (on the A side), boost the “trim” value of the A-side. The goal is that both A and B have matching dB levels. Now you can properly check if you’ve done a good job 👍
My Favorite Way to Use Soothe 2 🤗
Of course, you could simply slap Soothe 2 on any instrument to make it sound better. But you already knew that 😅
So let’s explore my favorite application of Soothe2: sidechaining for vocal clarity.
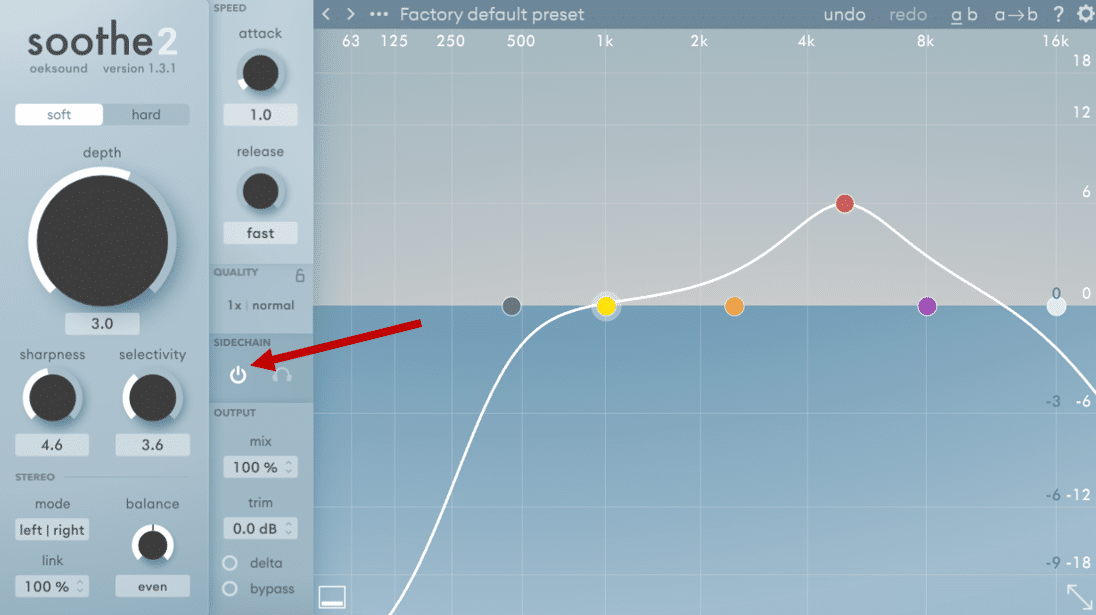
Using Soothe 2 as a sidechain device could be your new secret weapon. Especially when it comes to vocals…
With a busy instrumental, it can be hard to make the vocal stand out. Switching Soothe 2 to “sidechain” mode, we can use one input to affect the resonances of another input.
In our case, we want to control the resonances of our instrumental based on our vocals.
To do this in FL Studio, group your instruments into a bus and add Soothe 2:
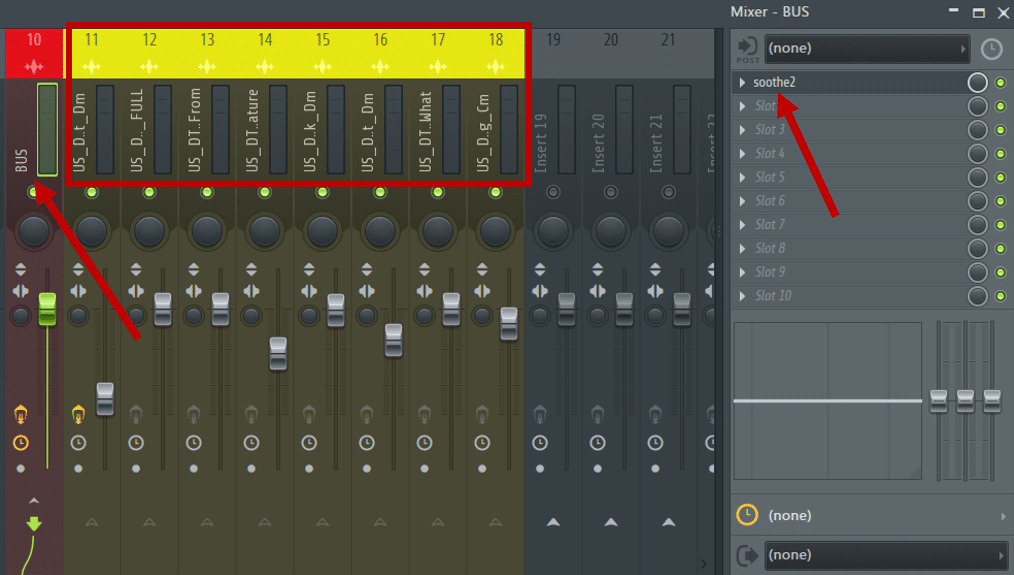
Next, select your vocal track and sidechain it to the bus track. Lastly, open up Soothe2, navigate to the VST Wrapper Settings and select the vocal as the sidechain input:
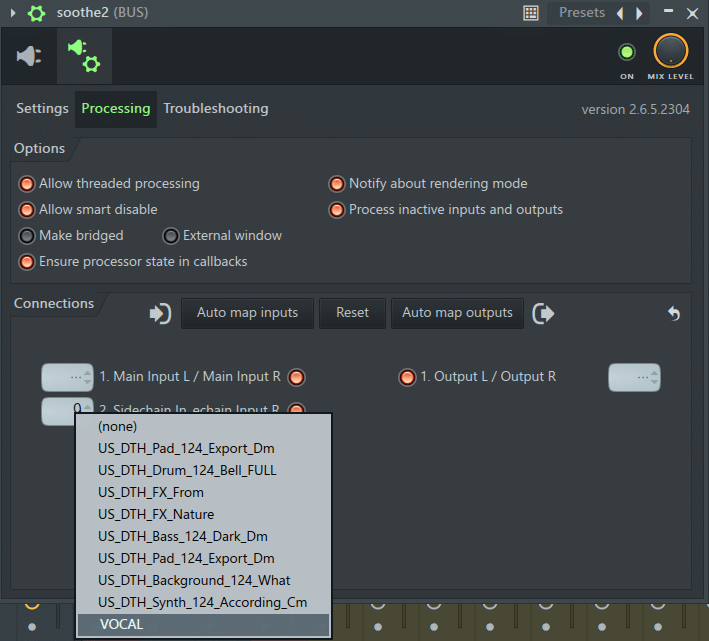
Nice! The vocal is actually now triggering the frequencies that are suppressed from the instruments.
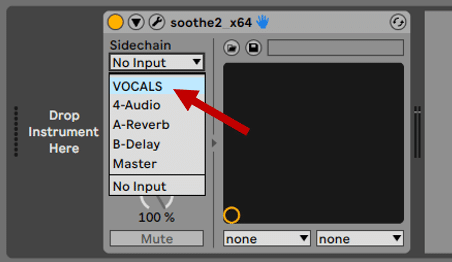
To do this in Ableton Live, drop Soothe 2 onto your instrument bus. Then, select your vocals under the Sidechain input:
To make sure everything is routed correctly, enable “sidechain” in Soothe2 and click on the headphones:
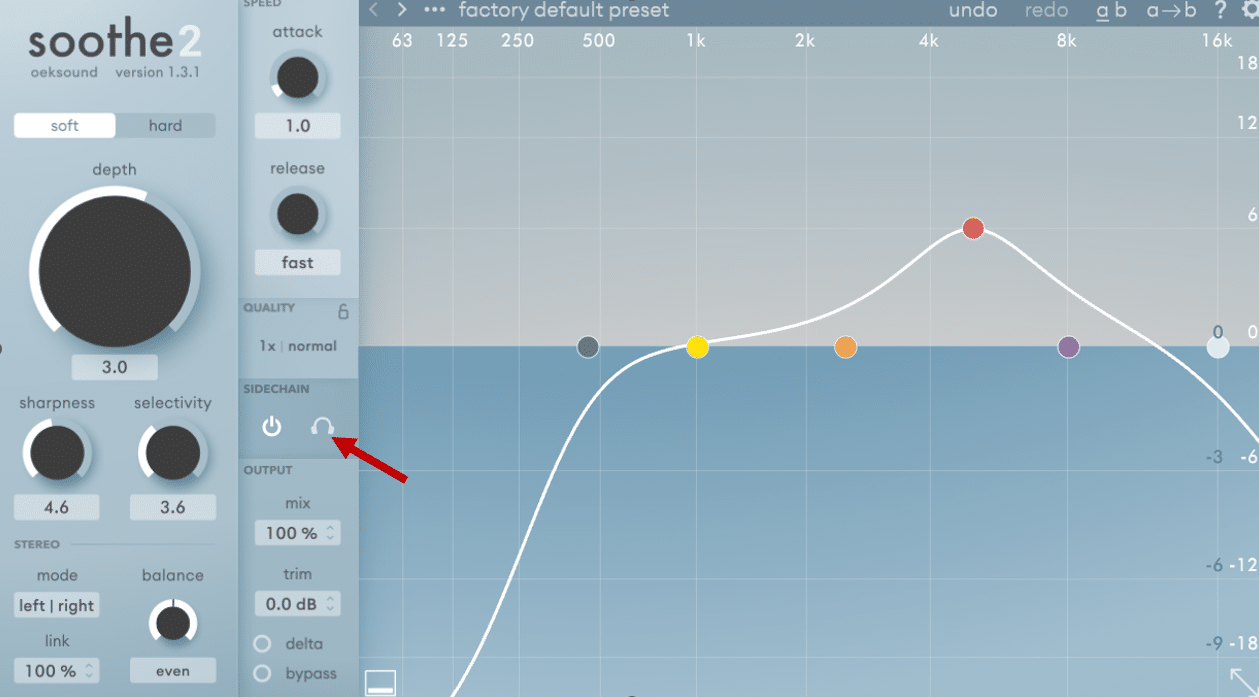
You should only hear the vocal playing, i.e. the sidechain input.
The result should be a clearer, more present vocal:
In this example, I’ve boosted the Depth to exaggerate the effect. You’ll notice that a lot of the highs in the drums are being suppressed. This is because they are clashing with the vocal.
This technique works great to make a vocal cut through the mix.
But you can use it to highlight any element of your mix you want!
3 More Reasons Why I Love Soothe2 ❤
If you haven’t been convinced yet, let me give you 3 more reasons.
Firstly, their amazing interactive tutorials. You can learn everything you need to know within the plugin itself:
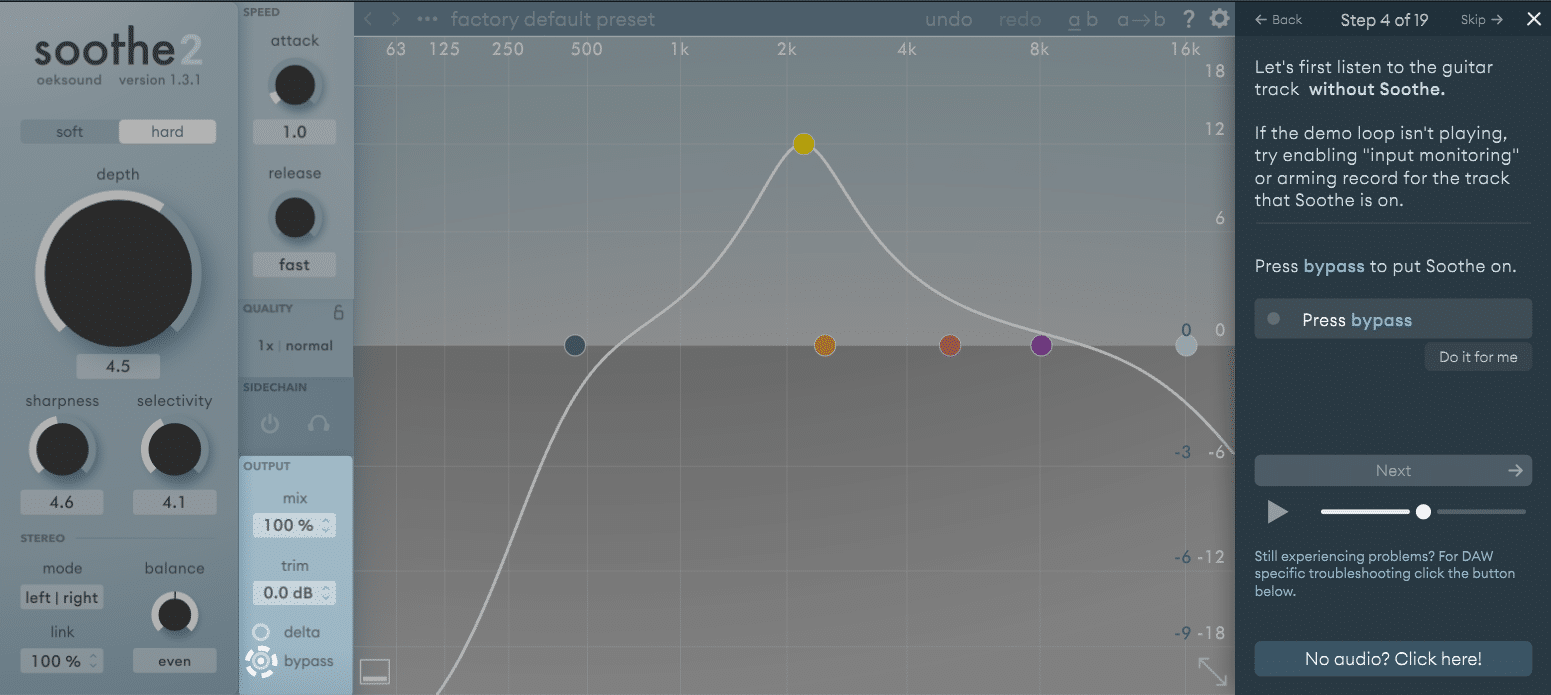
This makes it extremely fast and easy to learn how to use Soothe 2.
Secondly, let’s talk about the preset library.
Not only is it extensive (100+ available) and well categorized (drum, acoustic guitar, mastering, vocals…). But the names are amazing. “Annoying shaker – go away” or “So, you messed up the vocal recording…” are two of my favorites:
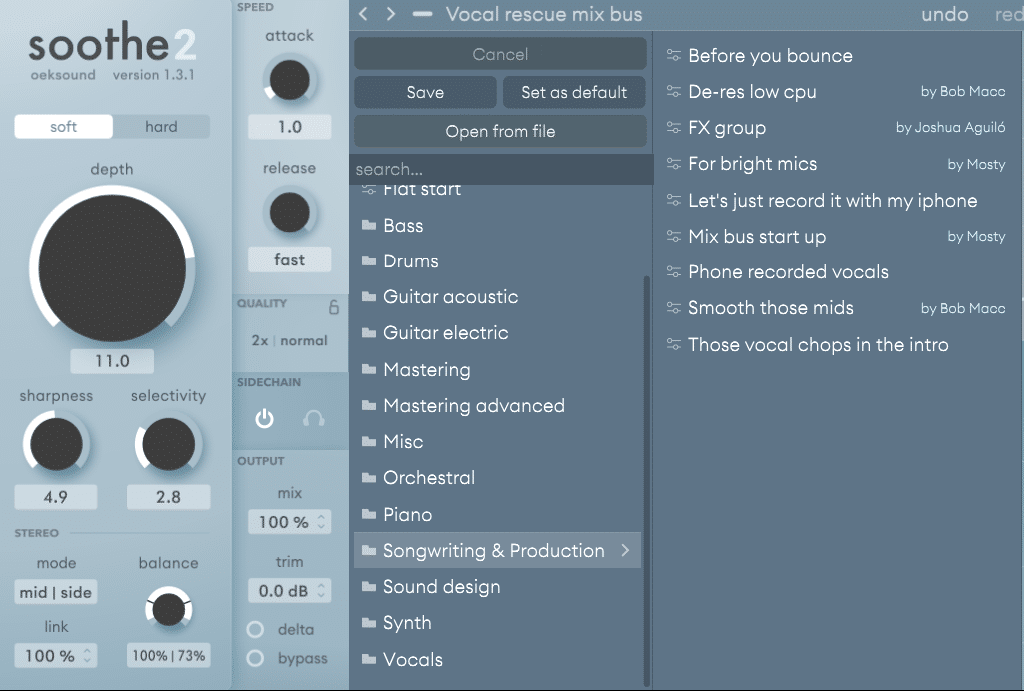
Finally, the interface is extremely intuitive. For such a complex plugin under the hood, the interface is surprisingly user-friendly. In a matter of minutes, you can get started, and you quickly know what knobs to reach for.
That’s it For This Guide! 🙏
That’s it for this guide! I hope you found it useful and learned something new. Make sure to check Oeksound’s website if you’re interested by Soothe2 or their other plugins.
Did I miss out on anything? Want a guide on a specific topic? Let me know over at [email protected]
