The Wider VST plugin is one of the most famous stereo effects out there.
And it’s totally free.
The Wider VST effect is a stereo expansion plugin. Basically, it takes any sound and makes it… well, wider 😁 And the recently release V2 brings a few more options to the table. Don’t worry, I’ll run you through everything you need to know.
What’s more, Wider is not the only plugin from Polyverse. In this guide, I’ll also go over my 3 favorite other Polyverse plugins.
So let’s get stuck in 👇
If you’re just here to download the Wider VST, you can grab it here. Although I would recommend hanging around to learn how to use it 😅
What Is The Wider VST? 🤔
As mentioned in the intro, the Wider plugin is a stereo expansion plugin.
If you’re new to the topic of stereo imaging, here’s what you need to know.
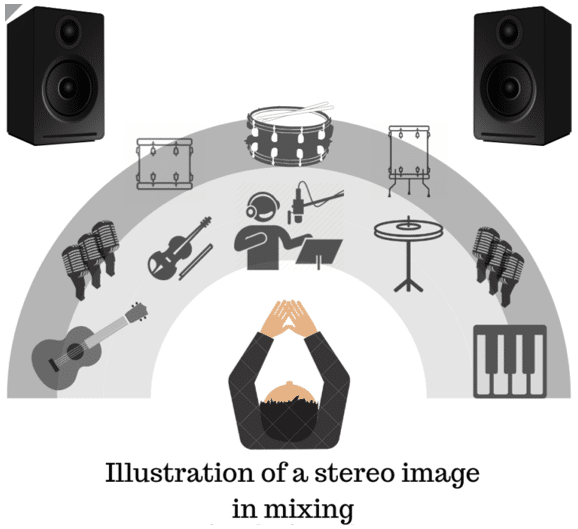
Stereo imaging is the art of placing elements of your track in a 180° field. By placing certain sounds to the left and others to the right, you create a sense of space.
If you’re interested in diving deeper, we’ve got a full article on the differences between mono vs. stereo 😉
However, what if you want to make a single element wider? That is, you don’t want to place to the left or right of your mix. You just want it to occupy “more space”, for lack of a better term.
This is where the Haas effect comes in.
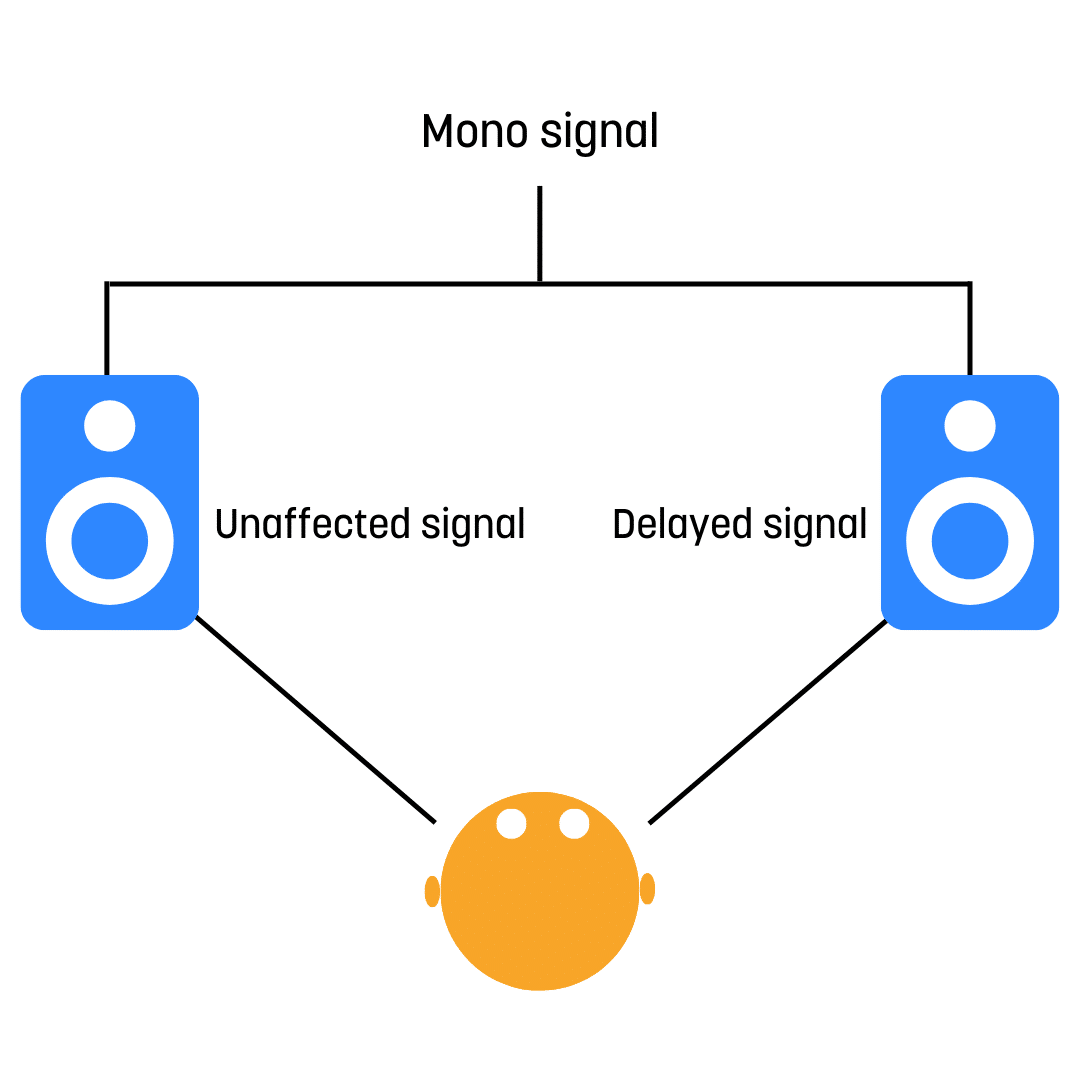
The Haas effect states that:
- 2 identical waveforms…
- … separated by a short enough time delay (lower than 40ms)…
- … will be perceived by our ears as a single sound.
But here’s the kicker.
Although we still perceive it as one sound, a feeling of space is introduced.
Check this example out:
This is the type of effect the Wider VST achieves:
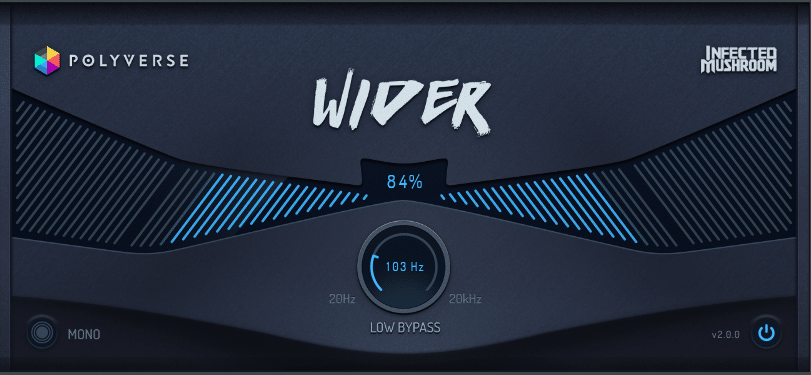
Wider takes any mono-signal and artificially widens it. Let’s take a listen:
But with the V2, Wider has introduced some new features. Let’s look at some of them 👇
A Deeper Look into How the Wider VST Works 🧐
The Wider VST is described as using a “diverse all-pass and comb filtering algorithm”. This enables the sound to always remain “in phase” with itself.
Phase cancellation is a topic I learned a bit late in my production journey.
If you’re new to production, you might also be wondering what “in phase” means. And why is it important?
To make a long story short, it has to do with when your track is played in mono. This could be in a club, on an iPhone, or on a small Bluetooth speaker. When this happens, the Left and Right channels are summed together.
If you happen to have sounds that are out of phase, they will cancel each other out.
This will result in a weak-sounding mix. Especially if the phase cancellation happens in the low end.
If you want to learn more, check out our full guide on phase cancellation and mono compatibility.
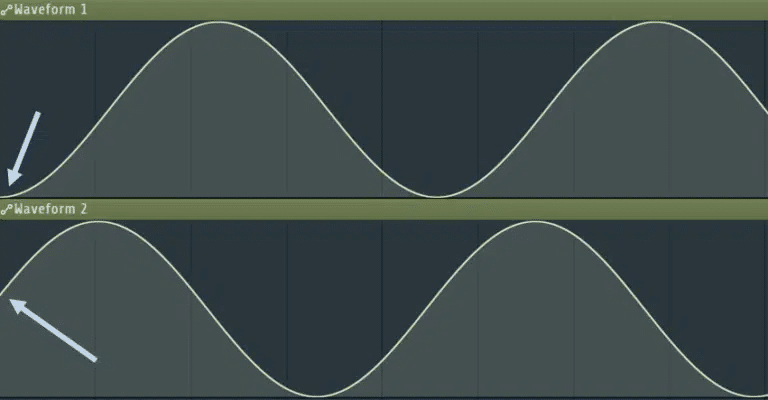
Lucky for us, the Wider VST will always keep a sound in phase.
This means you can widen a sound as much as you want, but it will still sound good in mono. You can even instantly check this with the “Mono” button:
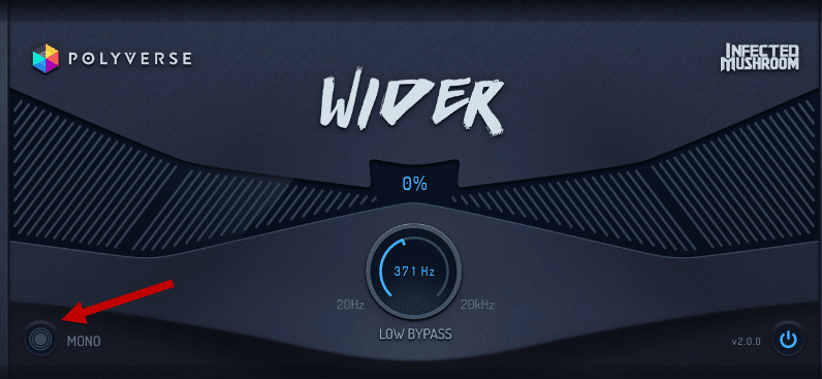
The other cool feature introduced by the V2 of the Wider VST is “Low Bypass”.
Basically, this lets you exclude low frequencies from the widening effect.
For example, you might have an instrumental loop you want to widen. But you want to leave the kick and bass in the center.
3 Use Cases for the Wider VST
So, when should you use Wider?
The short answer is, whenever you want some width 😅
Jokes aside, let’s look at a few practical examples.
#1: Wider VST on Drums 🥁
This is one of my favorite applications of the Wider VST.
The idea here is to artificially re-create the room mic in a drum room:
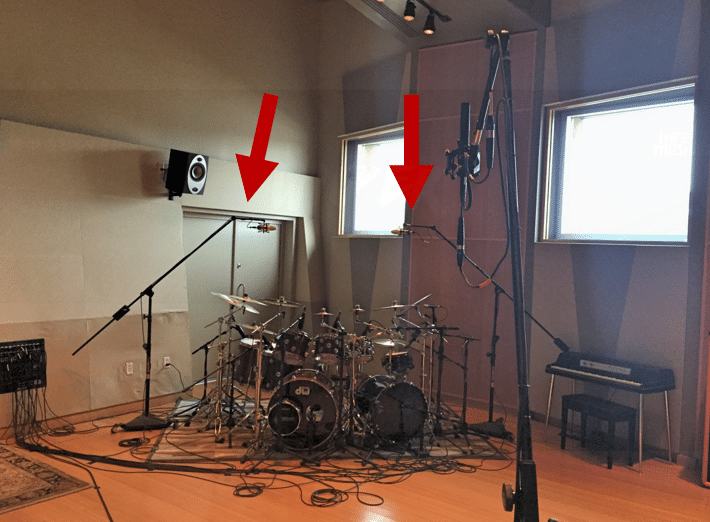
Room mics are what give a sense of space to our drums. Here are 5 easy steps to re-create them:
- Create a parallel channel for your drum track
- Set a reverb with a short decay to 100% Wet
- Remove the mid information with an EQ that has mid/side processing
- Load Wider and set it to 100%
- Low-cut below roughly 200 Hz
All you have to do now is blend the processed signal to taste! This should bring you from this:
To this:
Nice! 🤩
#2: Wider VST on an Effect Send ➡️
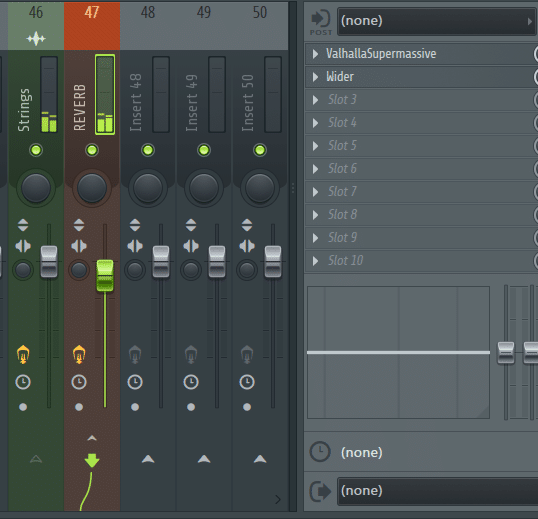
Another great way to use the Wider VST is to widen effects.
This means you are placing Wider on a parallel channel, not the main sound.
If this sounds confusing to you, make sure to check out our complete guide on parallel processing.
One example is to widen a reverb. But widening a delay can also work:
#3: Add Presence to a Bass 🎸
Do you often find yourself adjusting the volume of your bass?
It never seems to fit – either it’s too quiet, or too loud.
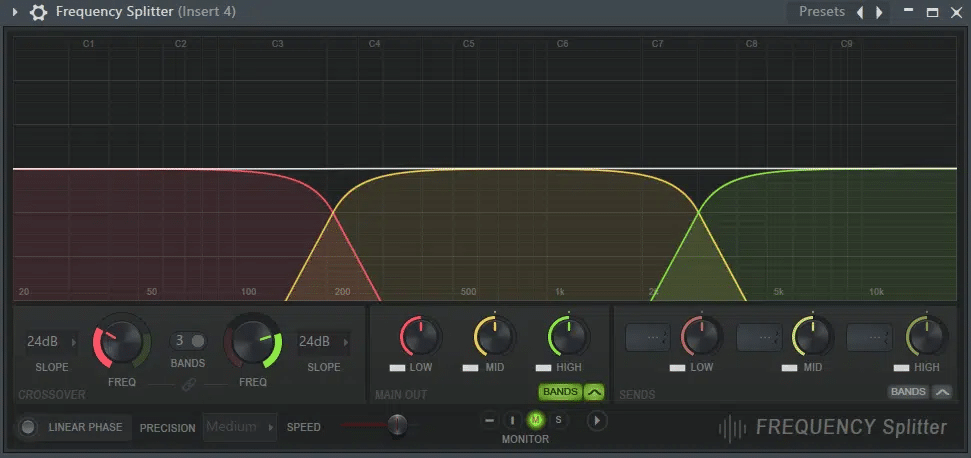
One trick to remedy this is to widen your mid-bass. Your sub-bass should always stay in mono, however.
If you’re in FL Studio, you can do this with the Frequency Splitter:
In Ableton Live, you can use the Audio Effect Rack:
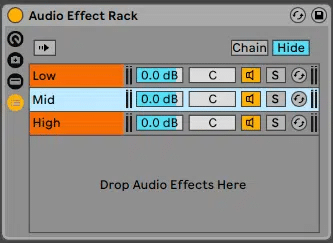
Once you’ve isolated the mid-bass, load up the Wider VST. This should give your bass more presence, without sacrificing the mono-compatibility.
What About the Other Polyverse Plugins? 👀
Although the Wider VST plugin might be the most famous, Polyverse offers a whole range of plugins.
Let’s have a quick look at my 3 favorites.
Comet: Achieve Maximum Lushness
Comet is a reverb plugin designed to craft beautiful, lush spaces:

Comet is not a reverb destined to re-create real spaces. For that, you might want to look at a convolution reverb.
Instead, Comet is best suited to create artificial textures and ambiance.
A key feature of Comet is the preset morphing ability. This means you can smoothly switch between presets with the Glide function:

In this example, I am going to switch between 2 different presets over 8 bars:
Other cool features include:
- High and Low Damping. This lets you control how fast the high and low frequencies disappear from the reverb
- Color. A sort of filter that makes your reverb darker or brighter.
Finally, one last functionality that I haven’t seen on other reverb plugins is the “Lock” function:

Basically, you can lock any parameter to a defined value. You can then switch between presets without affecting that parameter. This is really useful when Comet is on a Send channel and you want to keep the Wet at 100% for example.
Manipulator: Drastically Alter Any Sound
Manipulator is a wonderfully weird plugin:
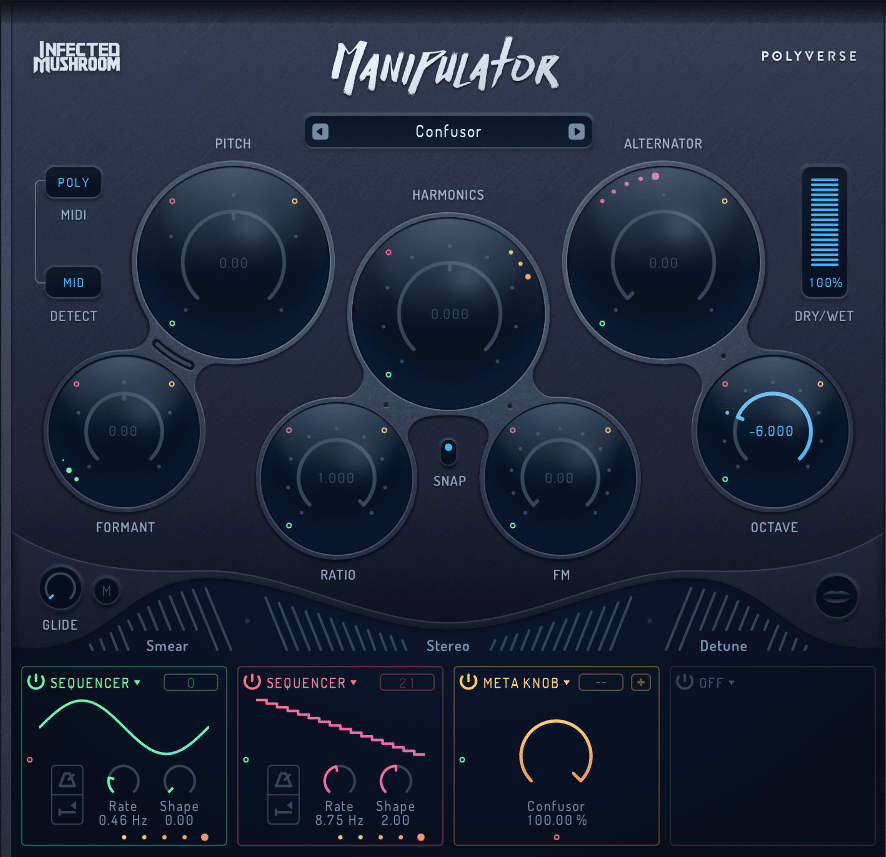
The easiest is to show you what it can do. Here is the original audio I’m working with:
And here are some of the results passing through Manipulator:
Manipulator works best on vocals, but you can throw it on any sound (just like the Wider VST). Here’s what I got when I loaded a Kick + Bass into it:
My preferred way of using Manipulator is to map a bunch of parameters to my MIDI keyboard.
I then play a loop and mess with the MIDI knobs until I find something I like!
Supermodal: Bringing Filters to the Next Level
Finally, Supermodal is a next-gen filter like no other:
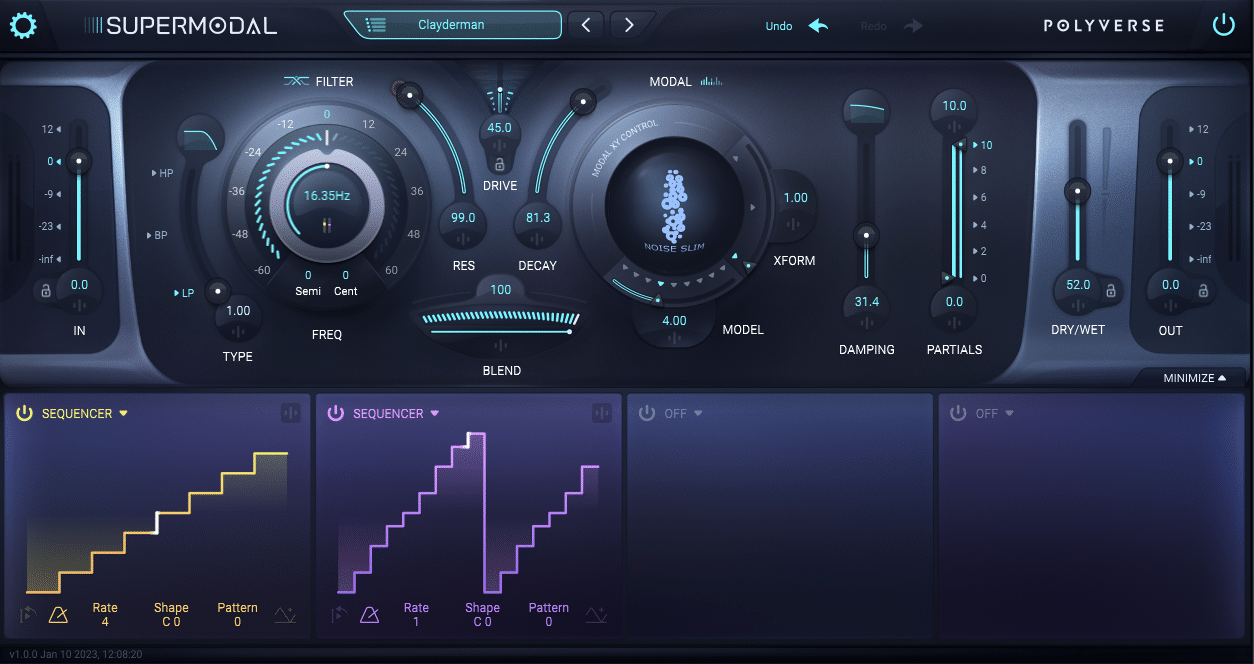
Supermodal features 27 different filter modes. These modes can be subtle, or completely transform your sound.
You also get integrated LFO sequencers. With these, you can automate any parameter you want to create rhythmic sequences:
Just like with the Wider VST plugin, you can lock parameters to certain values. This makes it smoother when switching between presets. Finally, you also get Macro knobs to control different parameters together.
Last Words
That’s it for this guide on the Wider VST and my favorite Polyverse plugins!
Did I miss out on anything? Any questions? Let me know over at [email protected]


